The Odoo app allows you to sell many products in a single bundle pack, which leads to more efficient and cost-effective sales. Users can set up combo goods in POS and Product, build POS orders with needed and optional products, modify carts to include optional products, and generate multiple combo products added to the combo. This module promotes efficient and cost-effective sales.
Product combos are created in Odoo POS by defining bundled products, which enables customers to buy multiple things at a discounted price or as part of a special offer. The basic procedures for configuring product combos in Odoo 17 POS are listed below:
Steps to Create Product Combos in Odoo 17 POS
Creating Product Combos
Enter your Odoo credentials to gain entry to the back-end. Module for Access POS. To create a combo, open the Odoo back-end ‘POS’ app and add individual products.
Make sure the system has been set up for each product that will be included in the combo. These may be products that consumers frequently purchase in tandem.
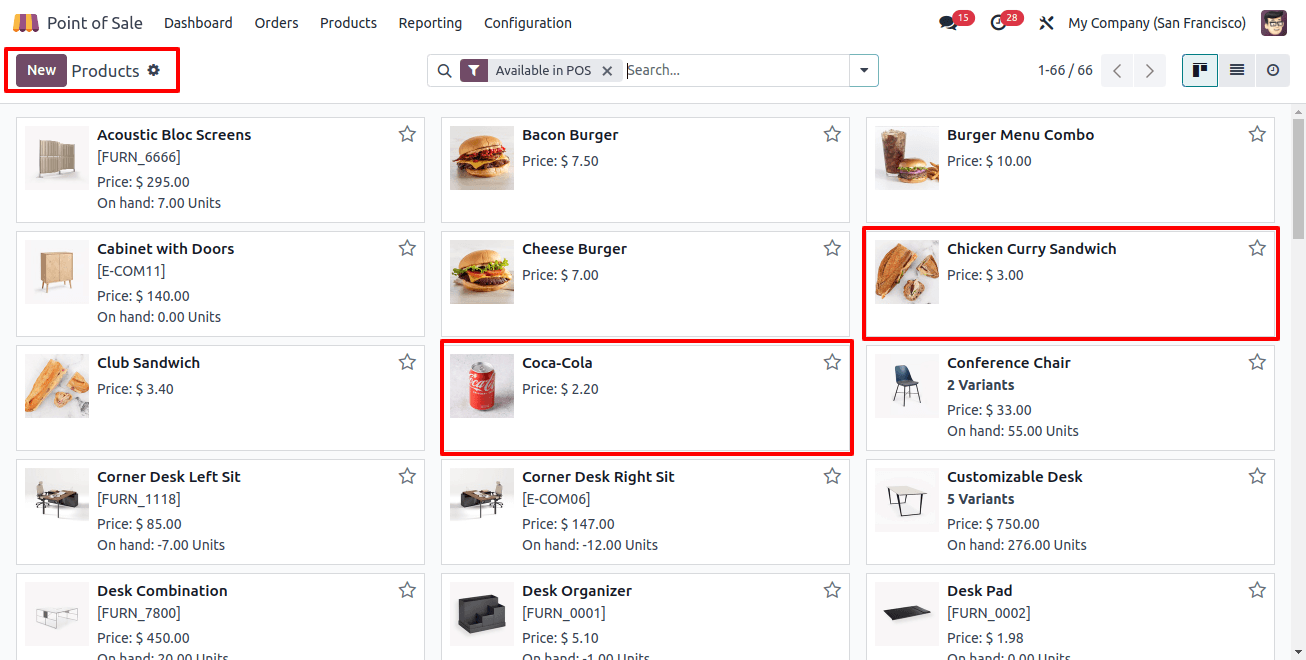
Make a New Product or Select One for the Combo
Go to the ‘Products’ field of the POS module and use the Product setup form to create a new product for the combo. The bundle of products will be housed in this product. For this instance, I’ve selected the well-known product ‘Bacon Burger.’
Product 1
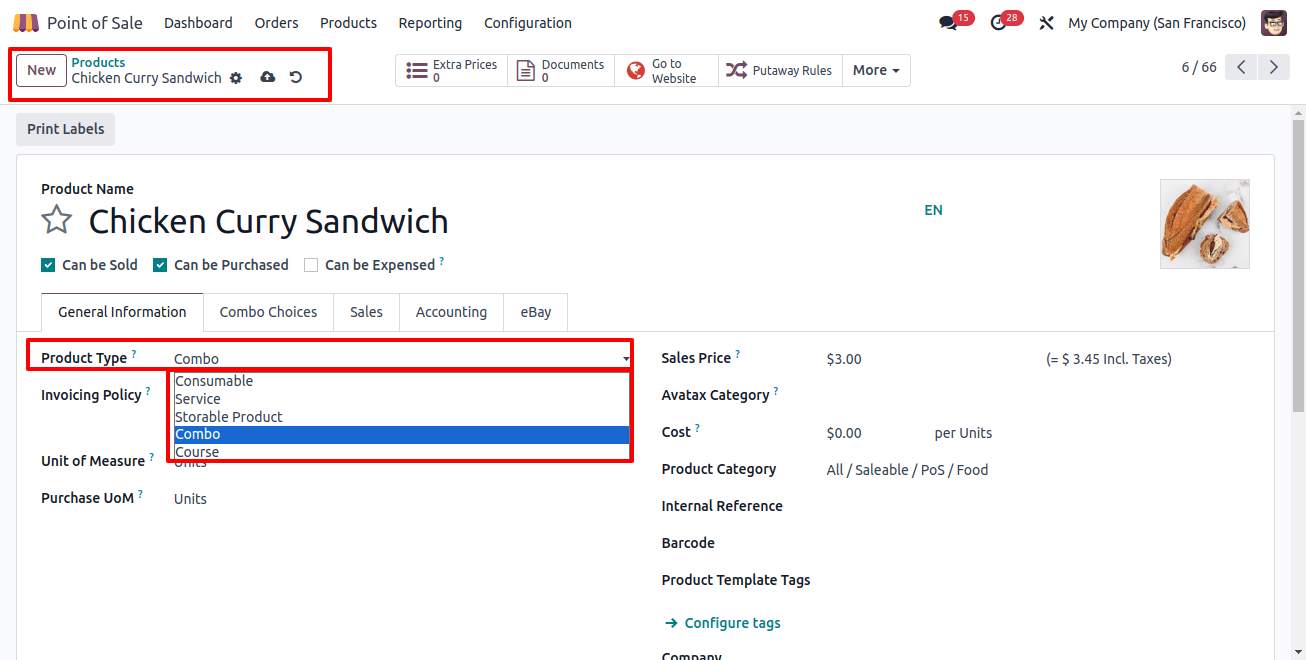
Provide the important product information in the product configuration form if a new product is being added. To identify it as a combination product, select ‘Combo’ as the ‘Product Type’ as seen in the image below.
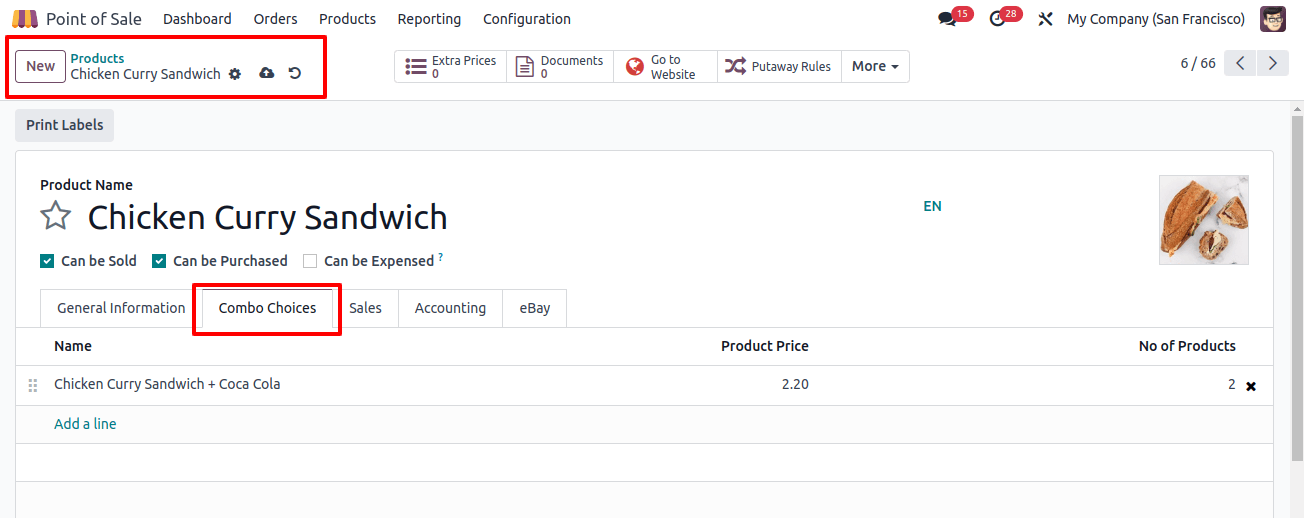
Combo Choices Tab
A sales-focused business may occasionally provide a variety of product combinations, and a single product may have several possible configurations. In the dedicated ‘Combo Choices’ tab, you can create or add several combos in which this particular product is available.
Select the ‘Add a Line’ button in the Combo choices tab’s Products section. As seen below, this will cause a pop-up window to open.
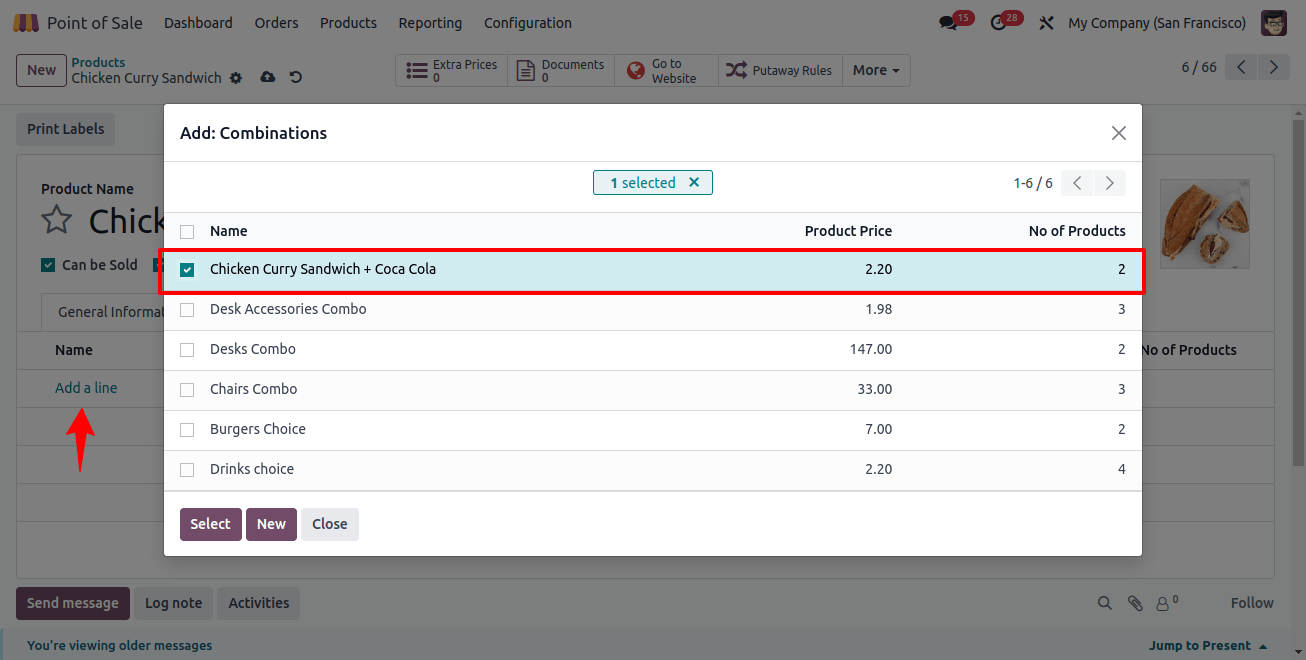
To add the selected product combos to the product configuration window, click the ‘Select’ button after making your selection in this window. Here, I’m going with the ‘Burger+Cola’ combo option. Next, enter the product’s price and any other required information in the product configuration form, then save the changes.
Let’s now configure a different product to meet the needs of product combos.
Product 2
We can now choose from the Combo options below and add the product "Coca-Cola" to this product combo.
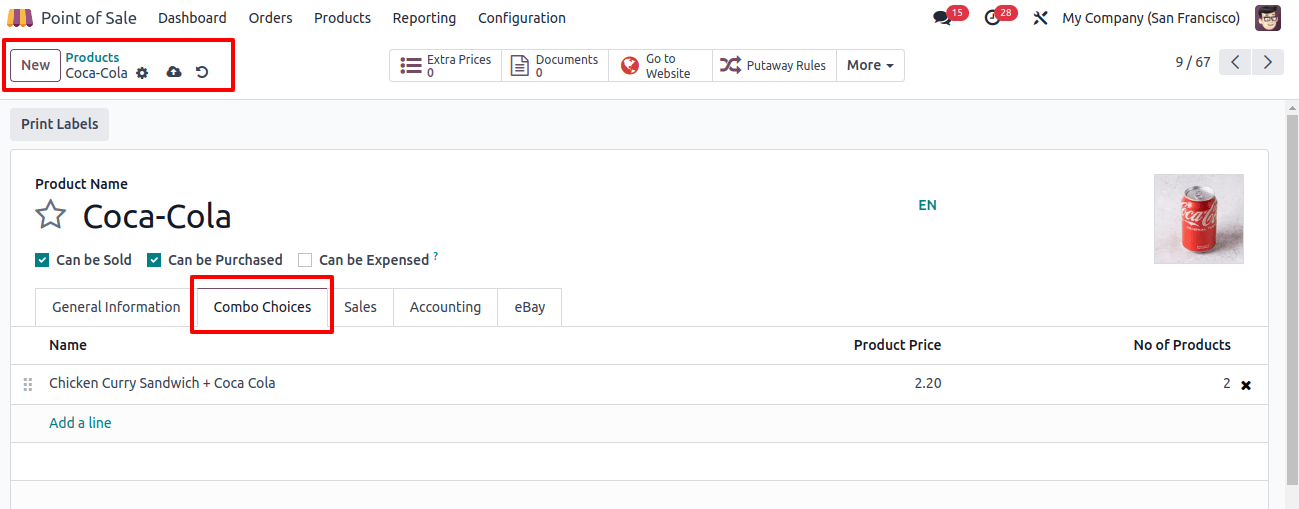
As shown in the screenshot above, the mentioned product will be available in both ‘Drink Choice’ and ‘Burger+Cola’ product combos.
Managing Product Combos
Odoo’s POS module interface includes an exclusive menu option for managing new product combos. You may find this feature in the ‘Product Combos’ section of the ‘Products’ menu.
This window displays a list of product combos, including their name, price, and number of products, as seen below.

To create a new product combo, click the ‘New’ button and fill out the form boxes.

Enter a combo name and then click the ‘Add a Line’ button to add the combo products. There should be the ability to add components or bundle stuff. Individual products can be added to the combo by connecting them with this product.
If you wish to charge more per product, put the amount in the price extra area. The initial price section displays each product’s initial price. Using this field, you can apply a discount to the total cost of the individual product or set a fixed price for the bundle. After saving the product combo, we can test its features by starting a new POS session.
Before checking product combo visibility, ensure that each combo product is set to ‘Accessible in POS’ so that it may be sold via the POS interface.
Testing Product Combo in a POS Session
Access the Odoo 17 POS interface and ensure the configured combo is displayed correctly. Test the purchase flow to confirm that the combination is processed correctly. So we can initiate a POS session from the ‘Dashboard’ option and begin ordering the combo product.
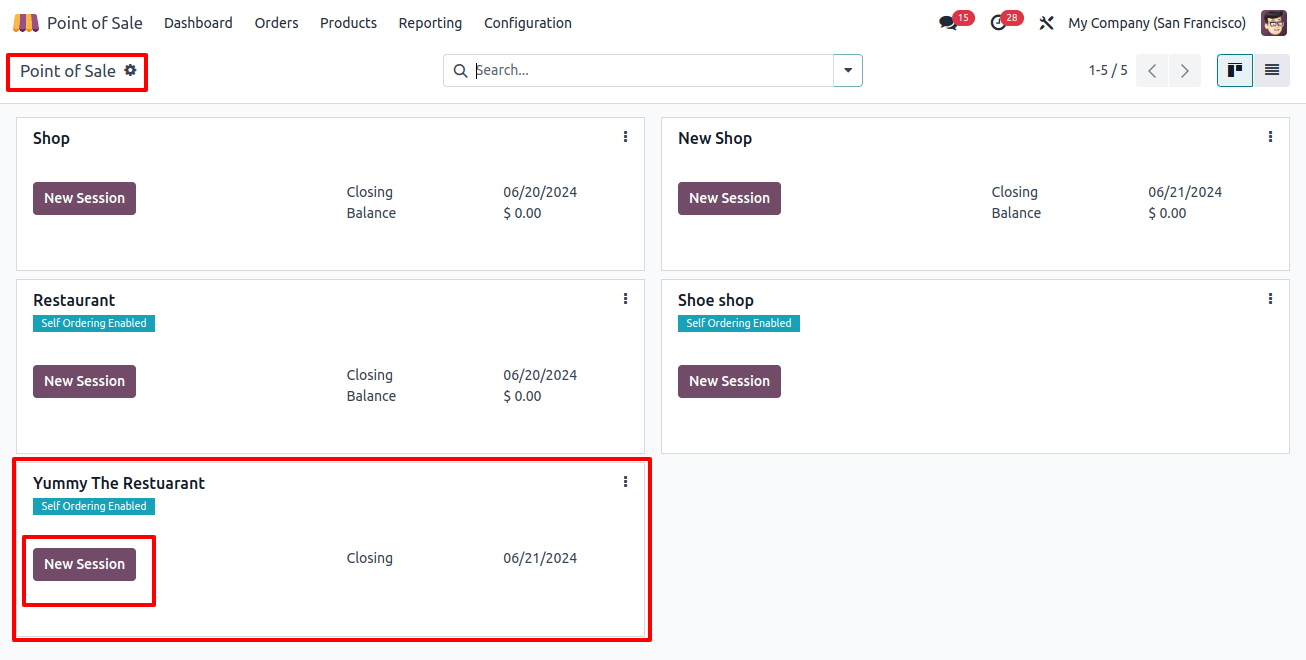
Open a session and select the required product, 'Coca-Cola.' As a result, a pop-up window will appear with the two combo options 'Burger+Cola' and 'Drinks Choice', as seen below.
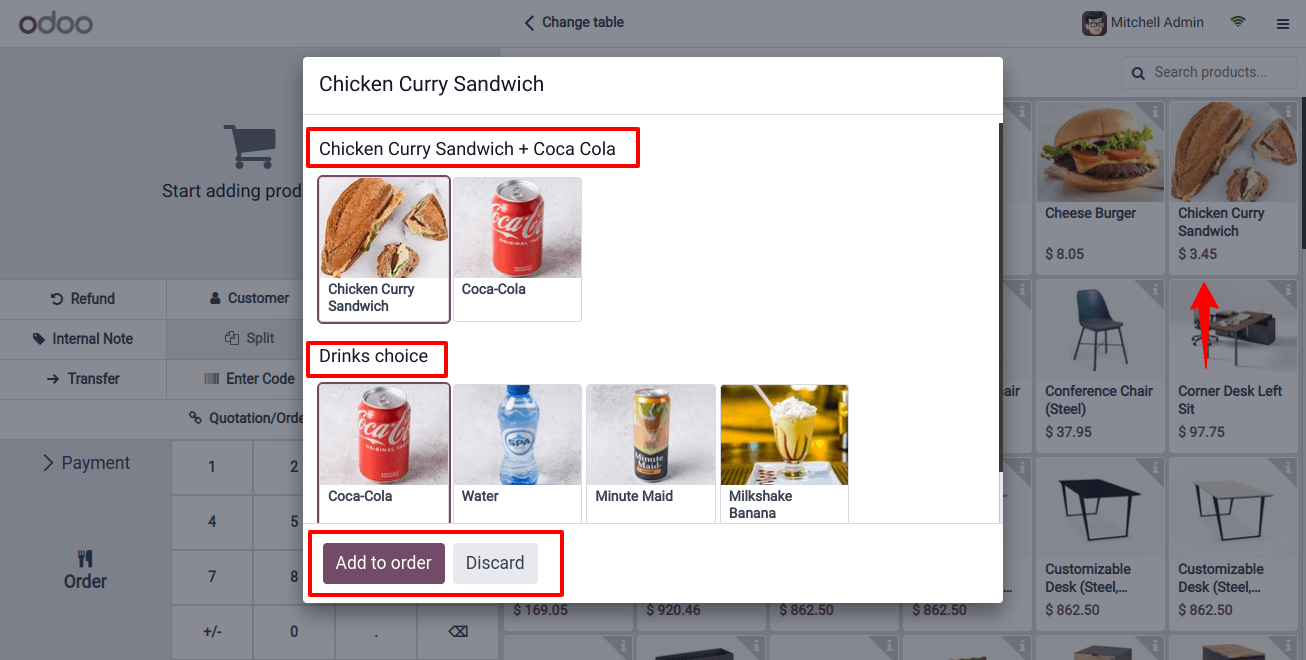
To place a POS order, select the desired products from the combo and click the 'Add to order' button. The ordered products and amounts are then displayed in the Orders window.
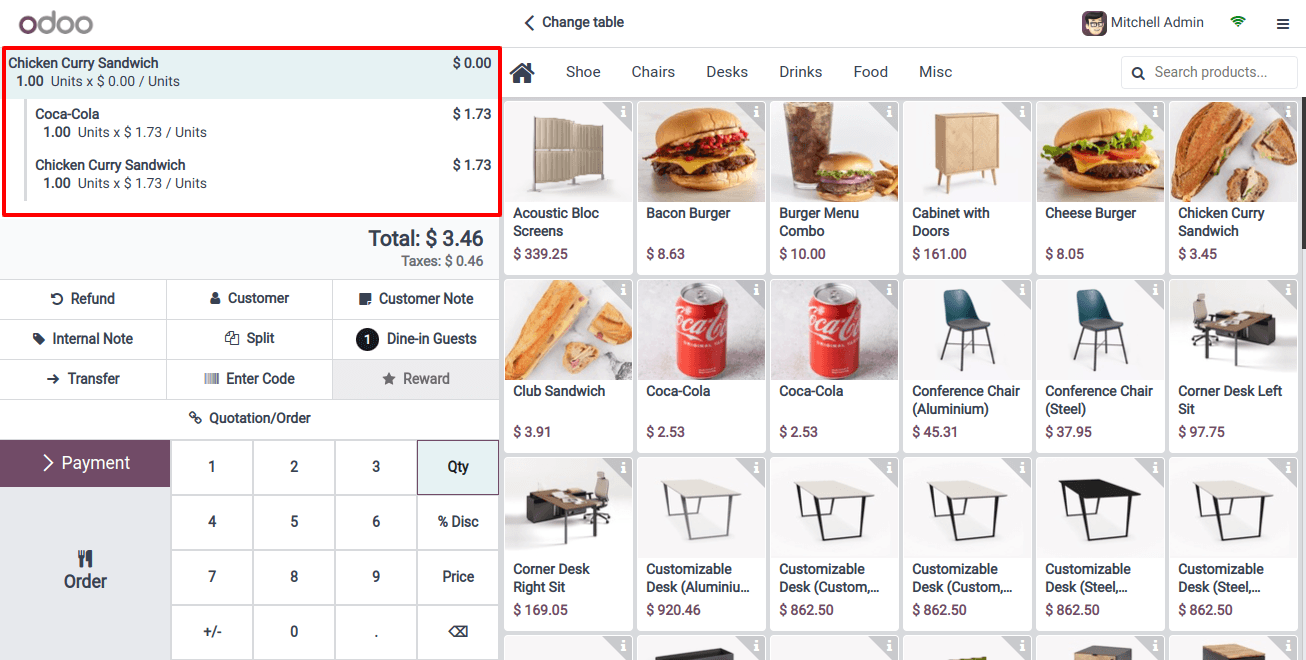
To start the ordering process, click the ‘Order’ button. Then, use the ‘Payment’ option to complete the transaction. Next, select a payment method from the window that displays payments, as shown in the image below.

The 'Tip' option lets you add the amount of the client tip to the bill. The $1 tip from the prior screenshot is shown here, after the payment options. Use the 'Validate' button to verify the payment and complete the operation.
As shown below, you will finally receive the payment success window and a printable invoice document.
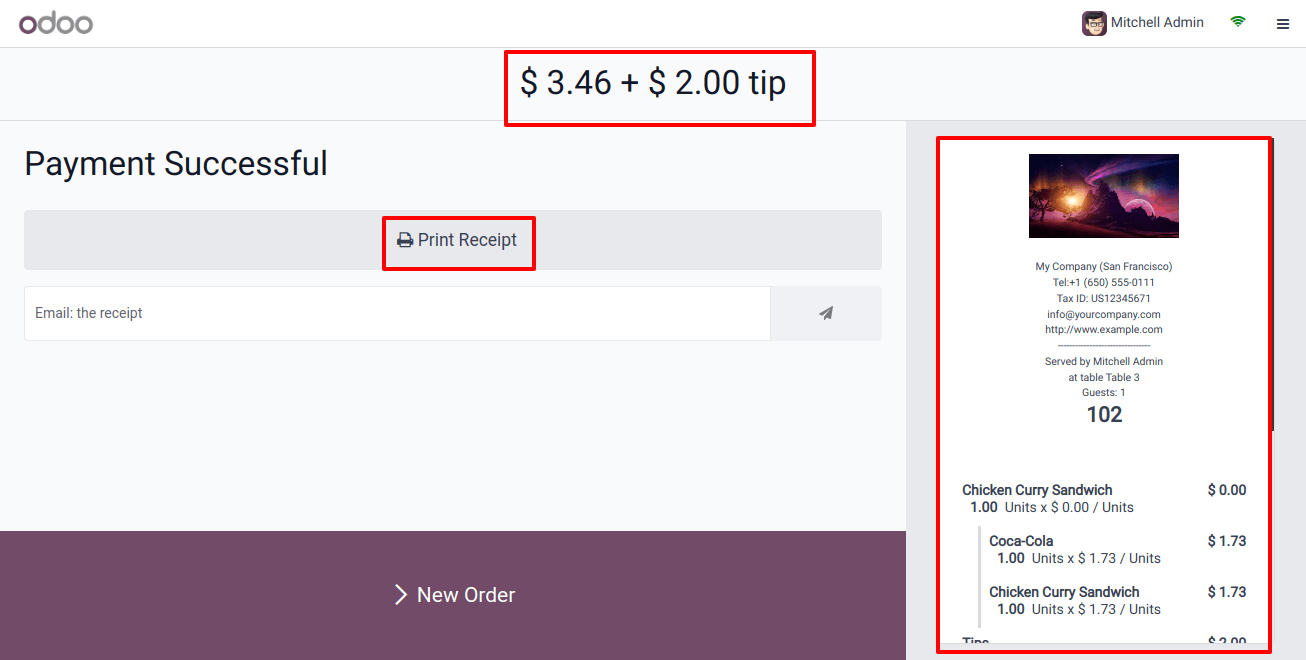
The screenshot above shows how Odoo POS generates detailed invoice bills for each successful order fulfillment and payment transaction. Use the ‘Print Receipt’ option to print the bill on an external device.
By following these steps, you may create and manage product combos in Odoo POS, giving clients the option of purchasing related items at a discounted price.
Keep in mind that processes and options may differ slightly depending on the version of Odoo you’re using, so for the most up-to-date information, see the Odoo documentation for your version.


