Businesses can list tasks that need to be completed or things they wish to do; Odoo, a dedicated business management solution, allows you to list those tasks and schedule them using the To-Do List App, simplifying business operations.
Business organizations worldwide operate predominantly in a pre-planned setting, with operations heavily reliant on plans and activities.
We may use the To-Do List app to schedule general activities and list actions from sales, purchases, inventory, and all other Odoo modules.
The features of the To-Do List app are as follows: arranging routine To-Do lists and carrying out each duty again. Give each task a priority based on the user, and activities can be filtered accordingly.
When the user enters the module, they are presented with a Kanban view based on the state of the scheduled activities. The states are classified as Today, Planned, and Expired based on the due date or deadline.
When an activity is completed, it is in the Done state; when it is canceled, it is in the Canceled status. In the Kanban view, you can also see who created the activity. Each action, activity type, priority level, and summary are displayed in the Kanban view.

The page displays various stages, including inbox, today, this week, this month, later, and personal stages.

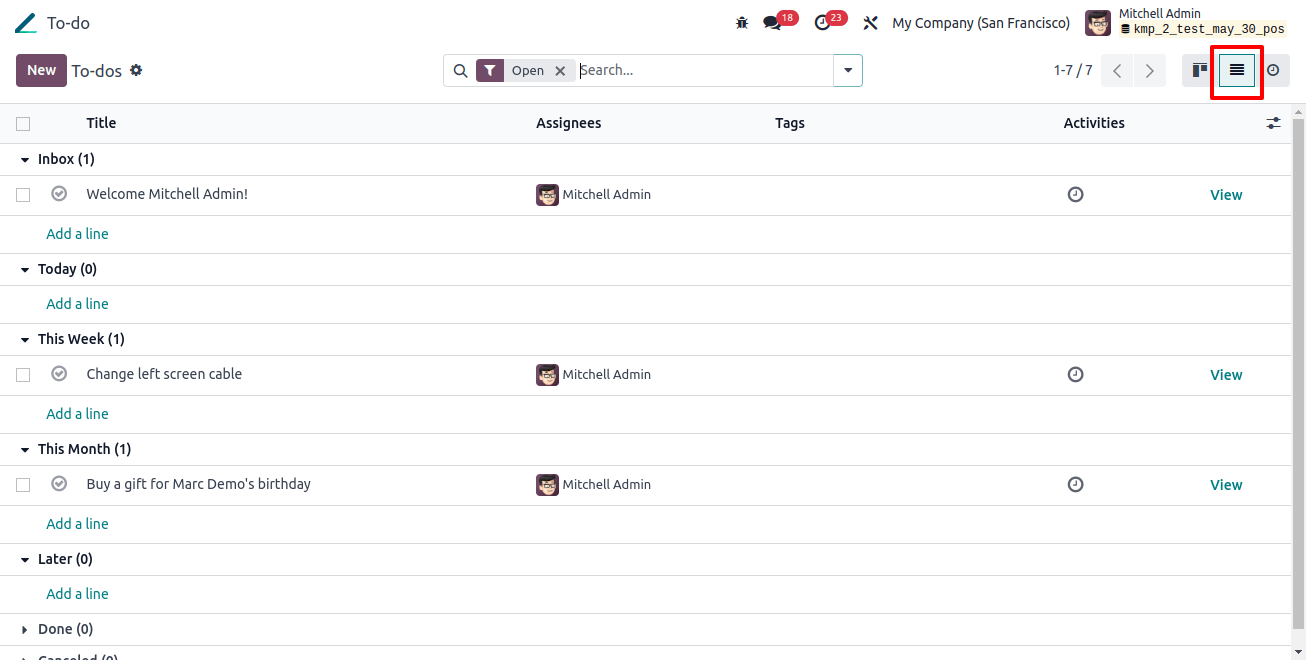
As previously mentioned, the stage is in the Kanban view, visible in both the list and activity views. The list view will appear as seen in the image below.
The page’s Activity view will be as shown in the image below.

Now, when you search in the space in the center of the page, you will see an icon for a drop-down menu with filters and favorites options, as seen in the image below.

The Filters option includes sub-options such as open, closed, archived, and custom filters. Under the favorites menu, you will also find the option to save the current search.
The tags, assignees, stage, and custom group choices are available under the group by menu. And this is one remarkable advanced feature added in Odoo 17.
To create a new ToDo, click the New icon, which will take you to the creation page in the image below.
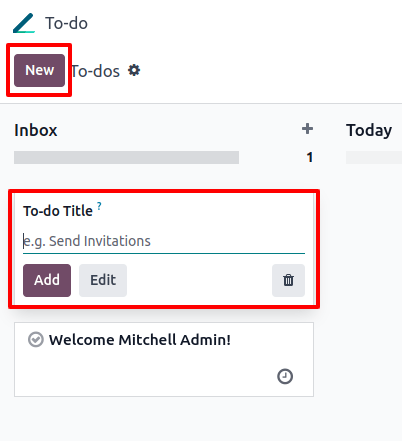
Here, you can easily enter the Title into the supplied field and then click the Add icon. You can now schedule an activity by clicking the button on the Activity View page. After picking the choice, you will be sent to the page shown in the image.

Go to the New Option provided on the page. And the page of creation will look like the image below.
Here, you can specify the task’s titles, project, assignees, associated tags, task deadline, and intended date. Below that, you have the choice of Description, where you can enter information about the job created.
The assignment might be for today, this week, this month, or later as needed. Finally, go to the save and close button.
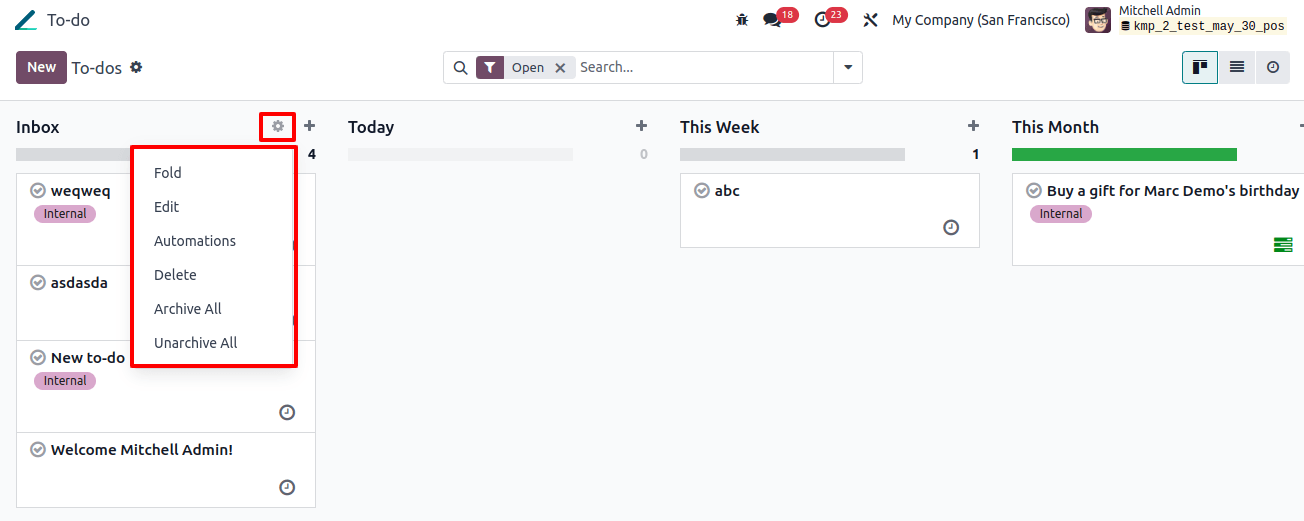
When you click the settings icon, you will be given the option to fold, edit, automate, or delete. To make a new ToDO, pick the plus icon, which will bring up the page. In addition, the image below shows a clock-like icon.
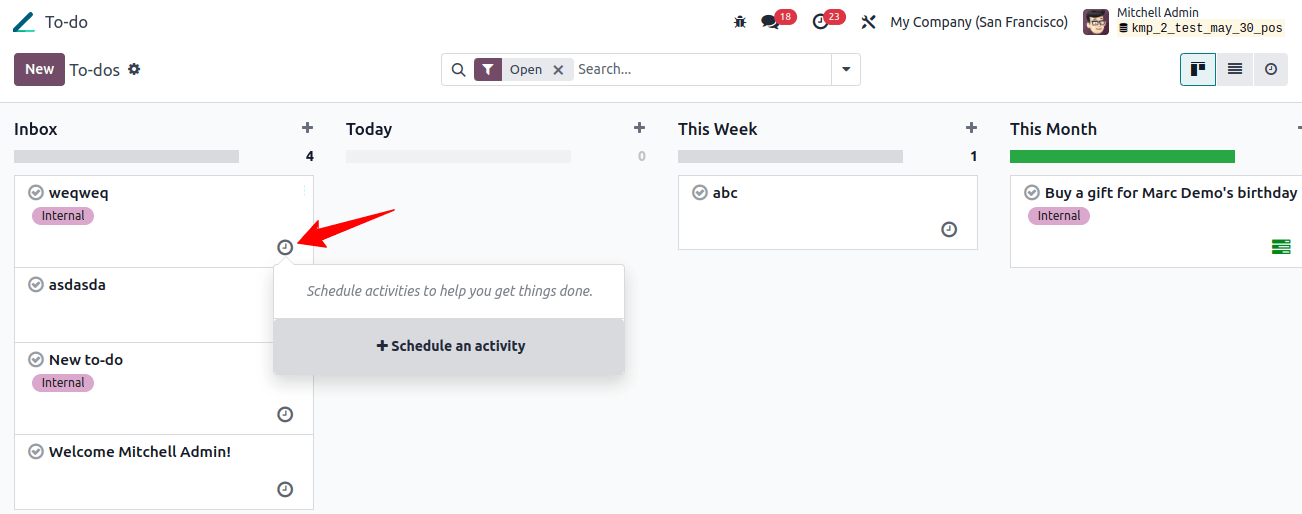
Here, you can schedule an activity, which will result in the page shown below.
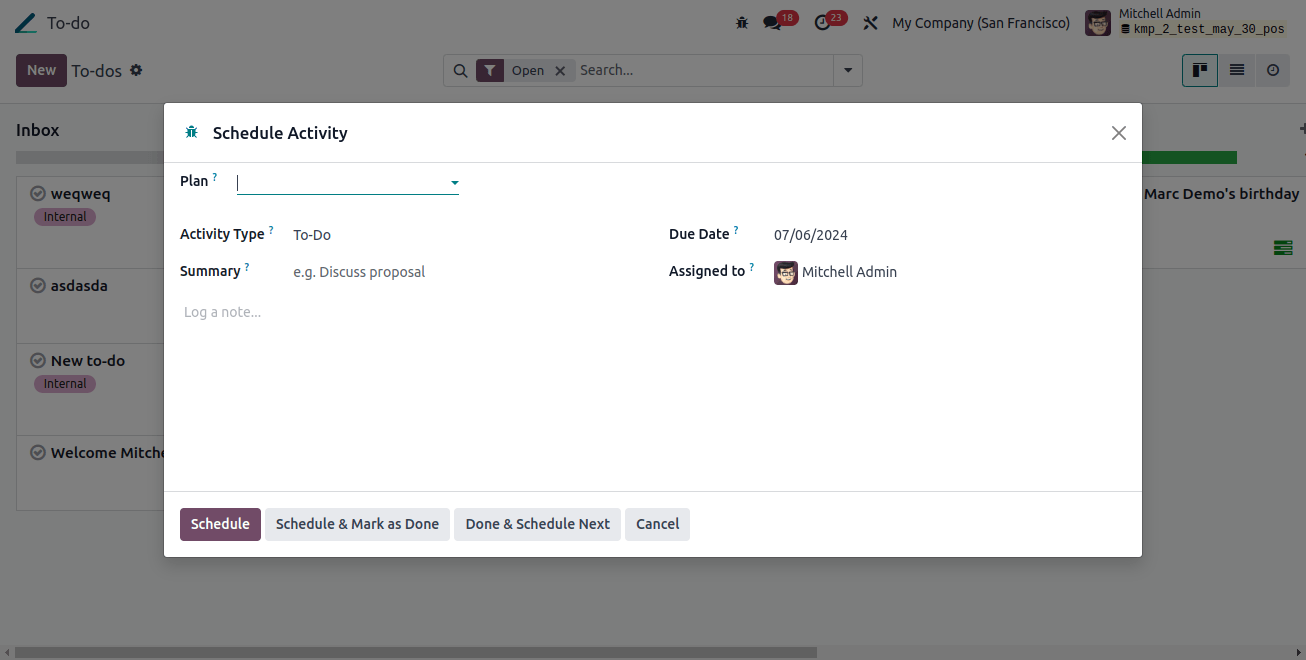
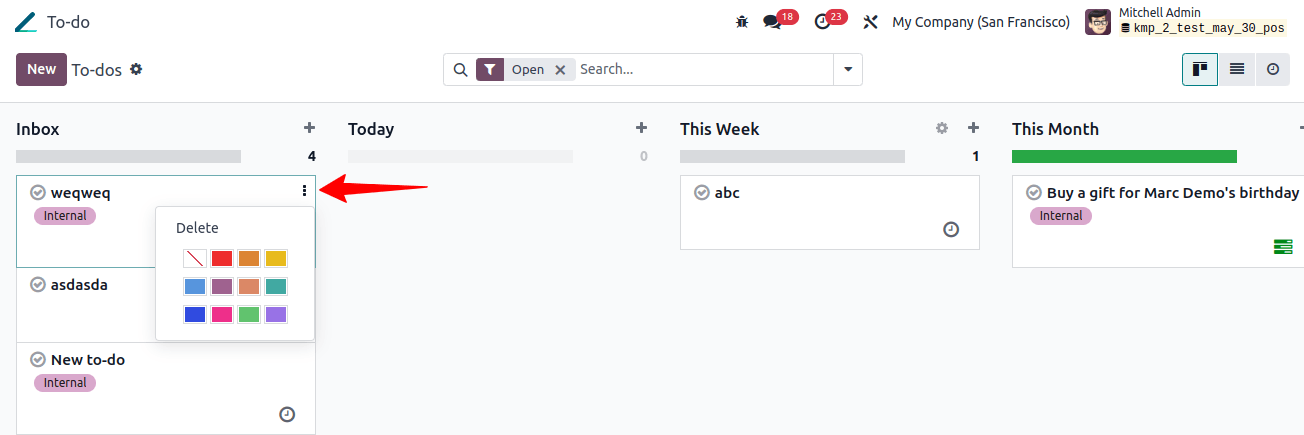
Now, provide the specifics, such as activity type, summary, and due date. As shown in the image below, you can now use colors to indicate which tasks are most important to complete.
Now, when you select a task from the dashboard, you will see the page shown in the image below.
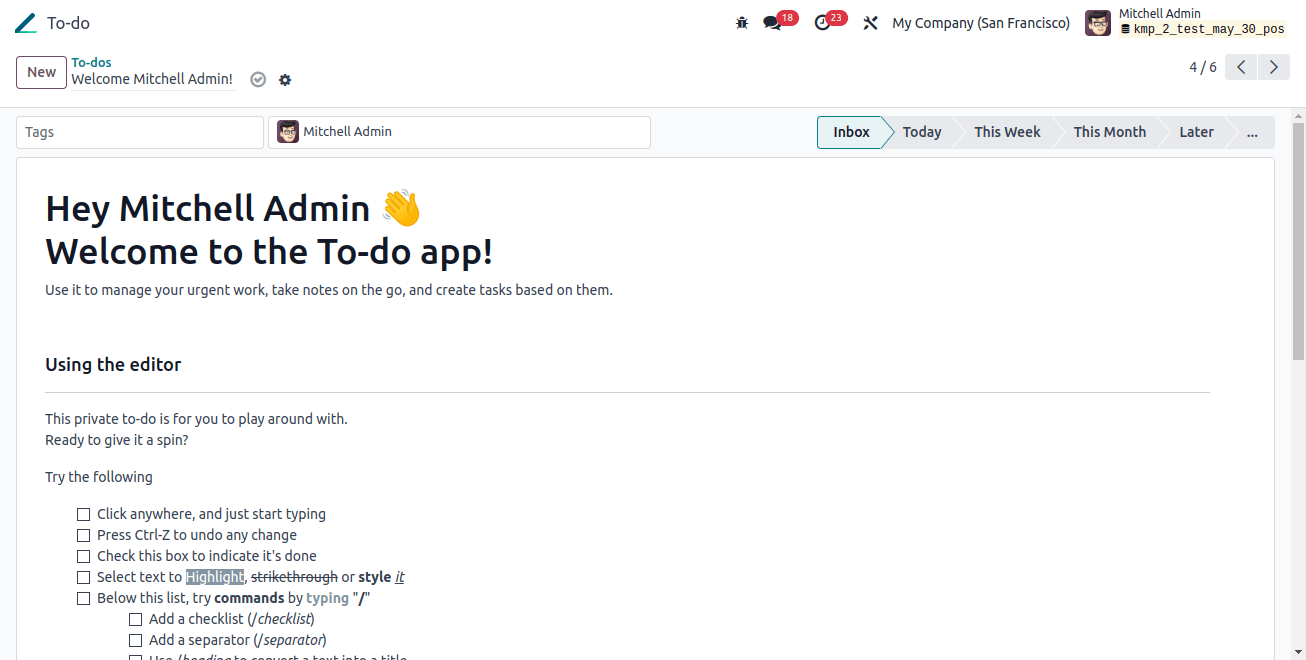
You can add related tags in the supplied space. Similarly, multiple assignees can be added close to that. On the leftmost side, you can also see the steps of ToDo. If it is complete, select the Mark As Done option, which appears as a tick icon.
Let us now look at how to create a ToDo task in ToDo. You can do this by clicking the settings icon on the page, which will take you to the sub-options listed on the next page.
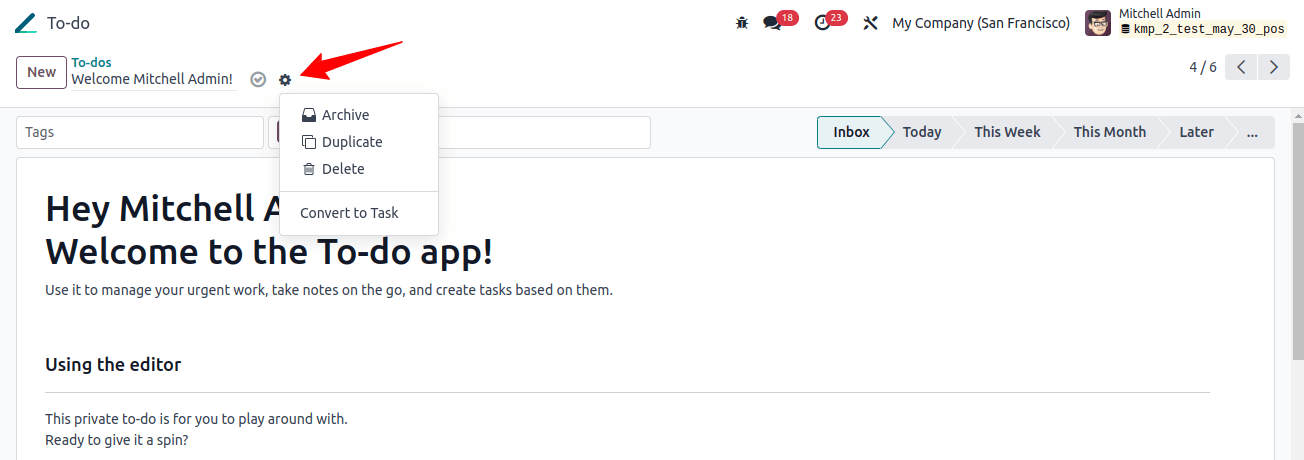
As with the alternatives, you can have action, archive, duplicate, remove, and convert to task options. Among these, select the convert to task option, and the page will appear as shown below.
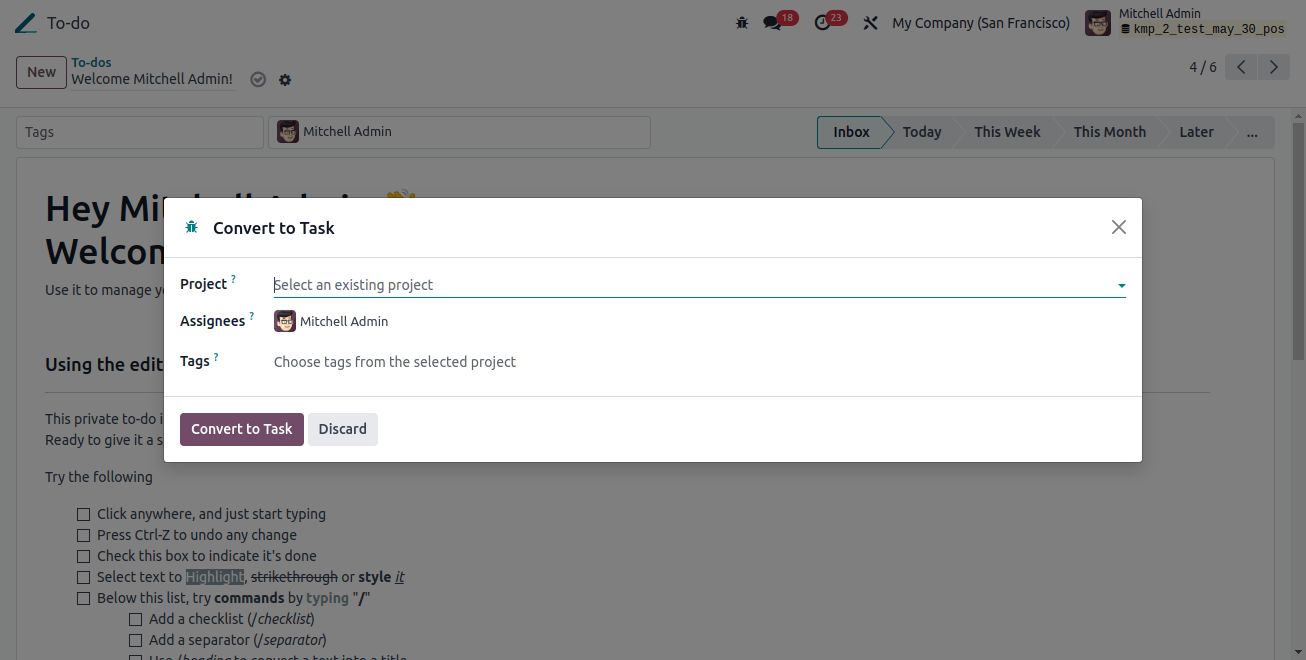
You must first provide the project name, assignees, and related tags before selecting the convert to task icon. Clicking will display the job as generated, as shown in the image.
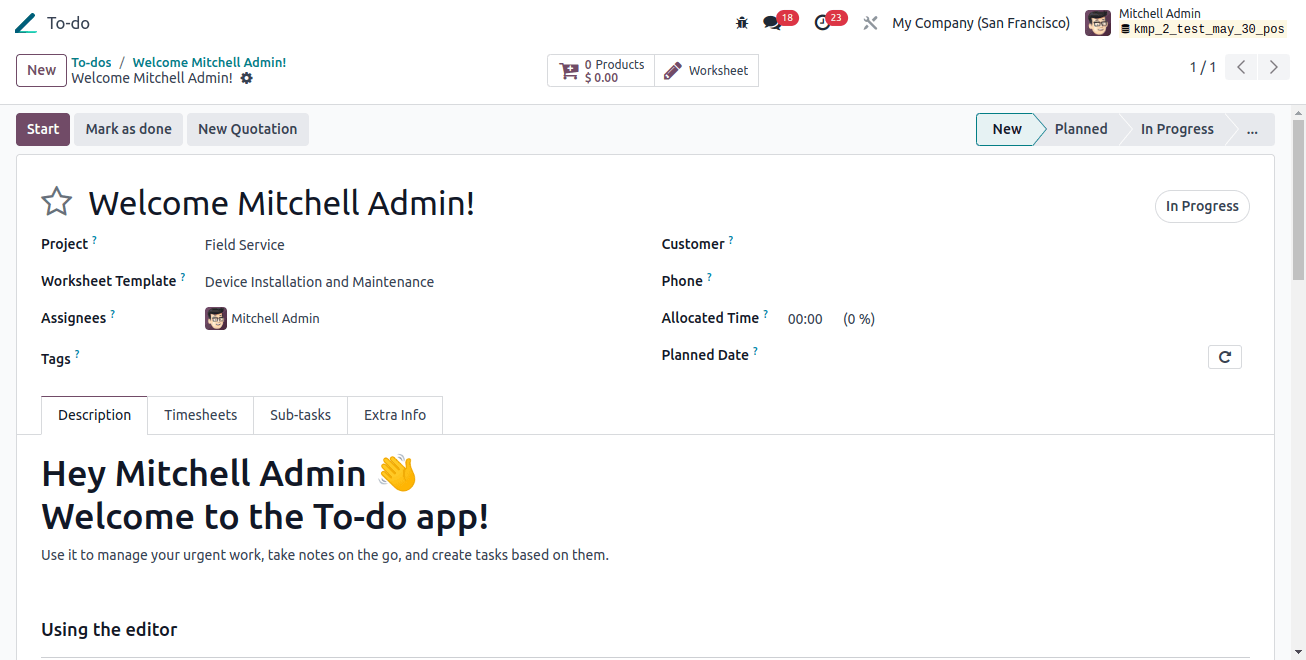
Here, you can enter the project name, worksheet template, tags, sales order item, job allocation time, and date. In the description tab, include a brief task description. Under the timesheet tab, you can list the employees who worked on this project. Then you can determine who worked at a specific amount.
Now, using the sub-task option, you can quickly add the sub-task by selecting the Add a Line option, as shown in the image below.
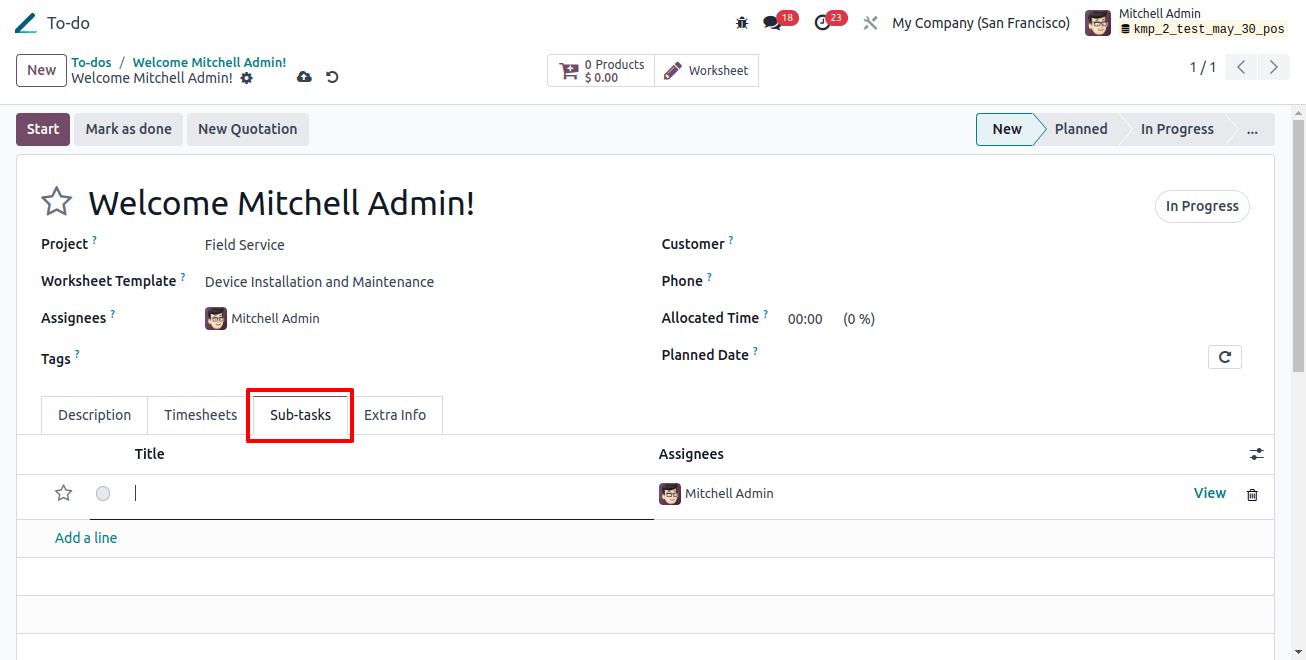
Here, you can enter the title and projects. Then save the created subtask so that you can see it using the view task option.
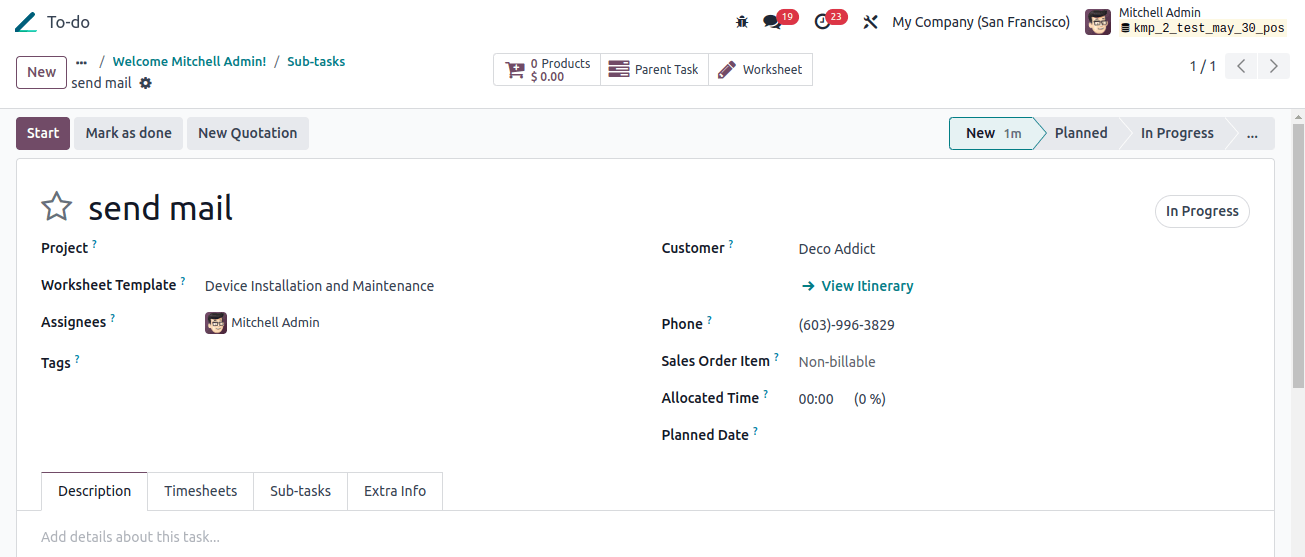
You can use the Parent Task option to return to the main page. You can now have the extra information as well.
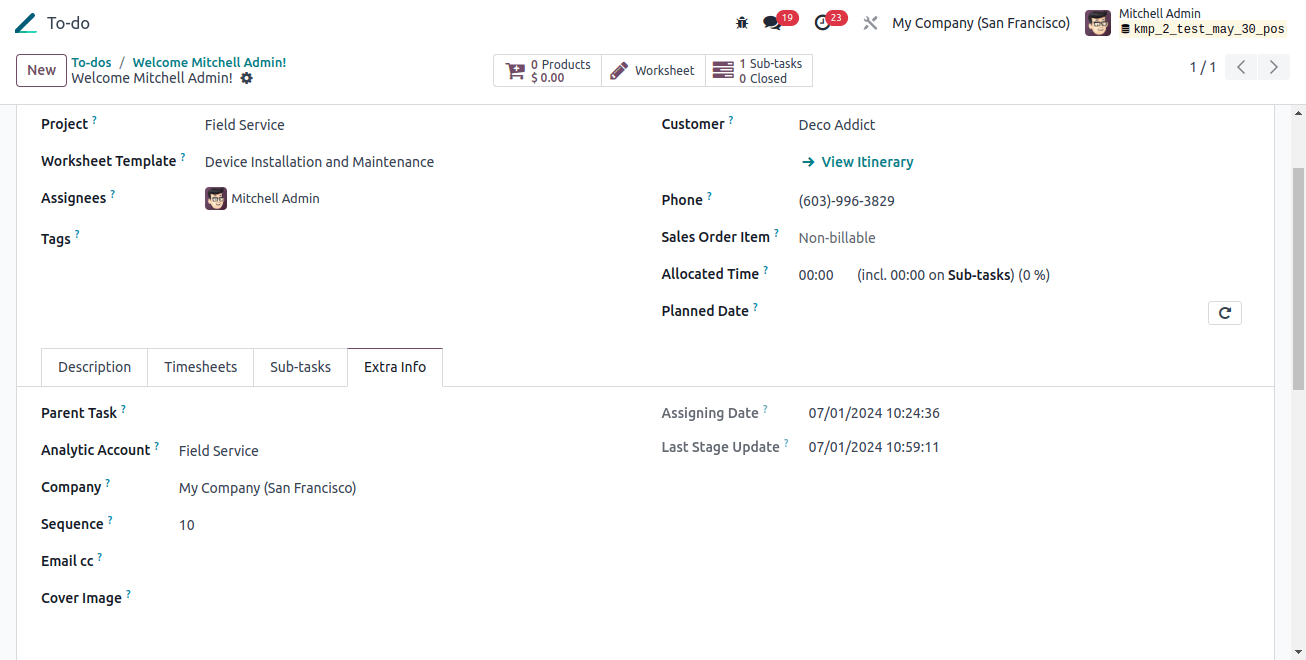
If the option is not present, you can go to developer mode and, as shown in the image, select extra information.
There, you can include the parent task, business name, sequence, email cc, cover image, project date, and final stage update. The additional subtasks and papers can be found at the top of the page.
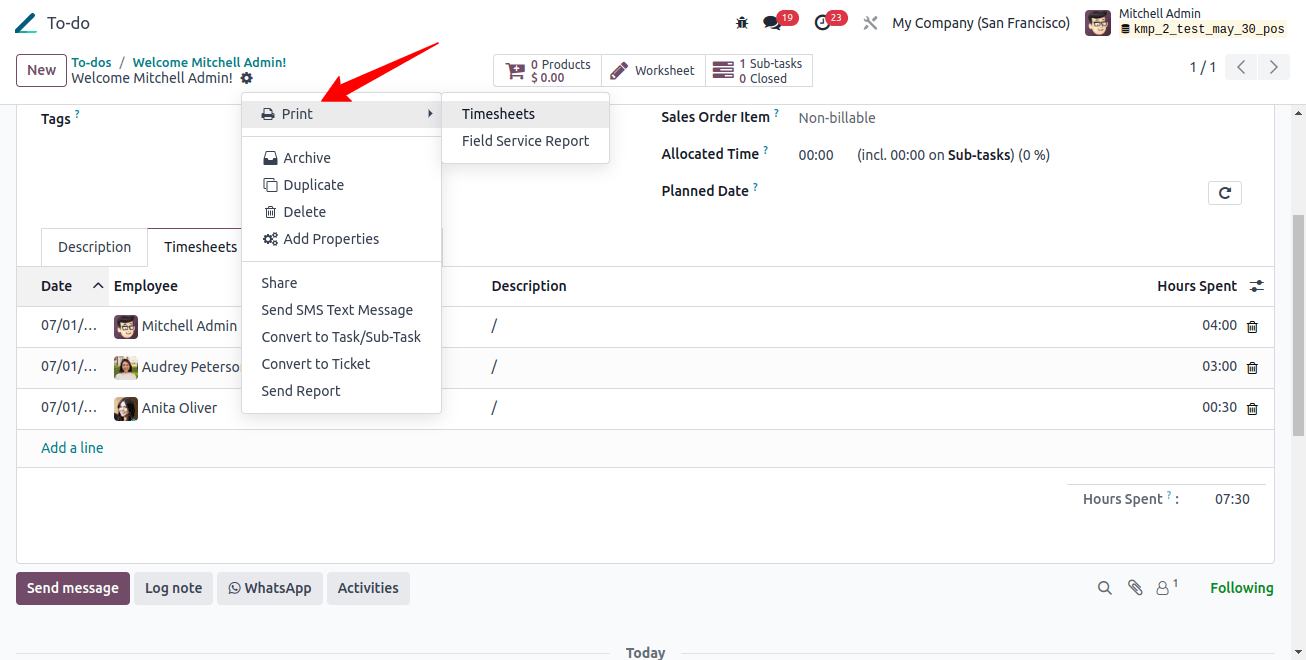
If you want to retrieve the document’s principal, click the icon above to see the possibilities, which include print, timesheet, field service report, archive, duplicate, delete, add properties, share, send SMS to the message, convert to a ticket, and send the report.
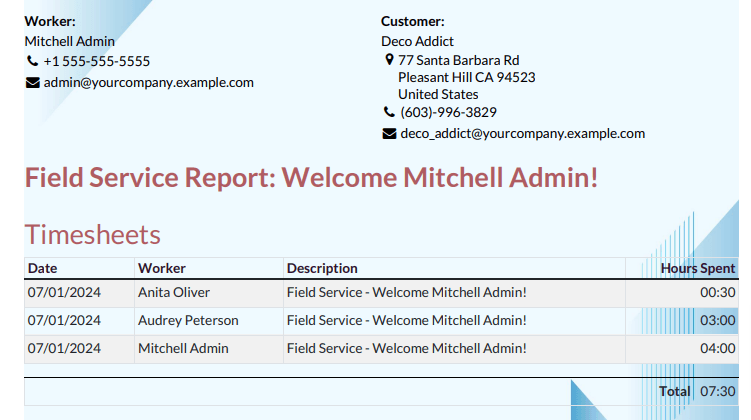
When you select the print choice, you will receive the print in the image below.

Similarly, you can obtain the field service report, which will also be available in PDF format.
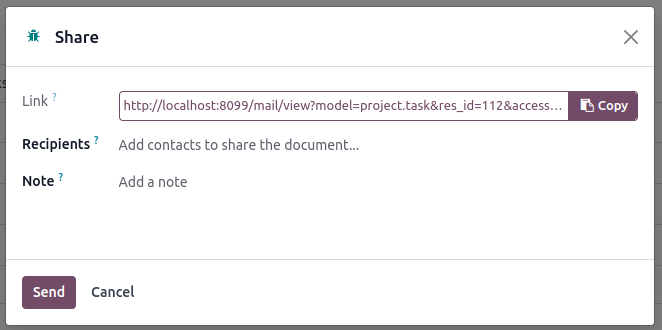
The specifics may be found here, including the description, quantity, unit price, taxes, tax included, and tax excl. Now, by selecting the duplicate option, you can obtain a copy of the document. And, with the share option, you may send the URL to other recipients, as shown in the image.
You can now send SMS text messages and convert them into tickets. Finally, the send report option allows you to transmit it to the right individual. Now it’s time to talk about creating a ToDo list and using the ToDo module.
