Odoo Accounting, a fully smart accounting software, focuses on accountant productivity with features such as intelligent matching suggestions, bank synchronization, and AI-powered invoice detection.
It teaches fundamental accounting concepts such as taxes, customer invoices, vendor bills, payments, reconciliation, and cash registers.
Additionally, it provides reporting, declarations, and analytic accounting. The stand-alone invoicing software Odoo Invoicing allows you to create invoices, deliver them to clients, and track payments.
Odoo provides a variety of ways to automate the creation of customer bills, based on the activity taken and the module chosen. After confirming a sales order, you will receive a draft client invoice, which you must approve and deliver to the right clients.
The customer menu in the Accounting module takes you to the invoices platform, where you may save and manage automated invoices or create invoices manually.
Odoo's client Addresses feature simplifies the process of delivering client bills and deliveries to multiple addresses in firms with multiple addresses by assigning the correct address to each situation. This ensures that all cases are addressed efficiently.
This blog will walk you through specifying invoice and delivery addresses in client invoices using the Odoo 17 Accounting module.
Steps to Manage Separate Billing & Shipping in Odoo 17 Accounting
Configuring Customer Invoices
To properly customize your accounting settings, start by going to Accounting > Configuration > Settings.
Once there, go to the ‘customer invoices’ field and enable the ‘customer address’ option, as shown below.
This important step ensures that the system effortlessly integrates customer addresses into the sales order process.
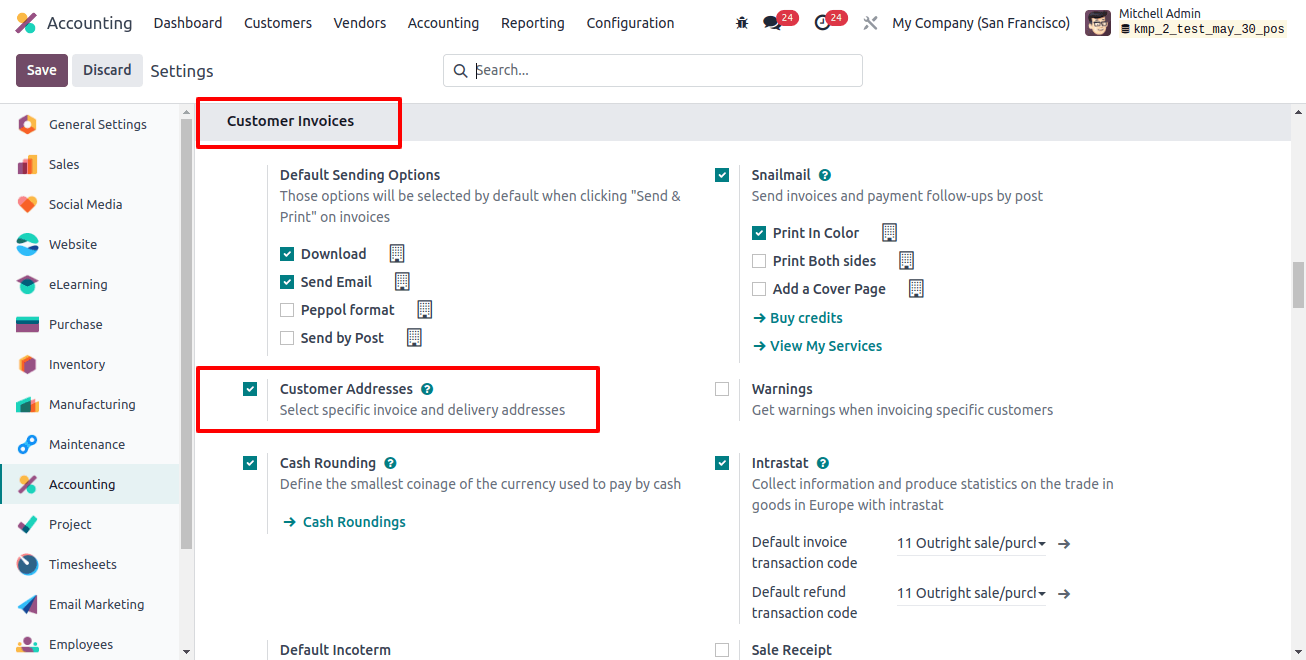
After activating and storing this feature, shipping, and billing addresses are shown on sales orders and quotations.
If a contact record includes the customer’s address as the invoice or delivery address, it is used by default; otherwise, any contact’s address is used.
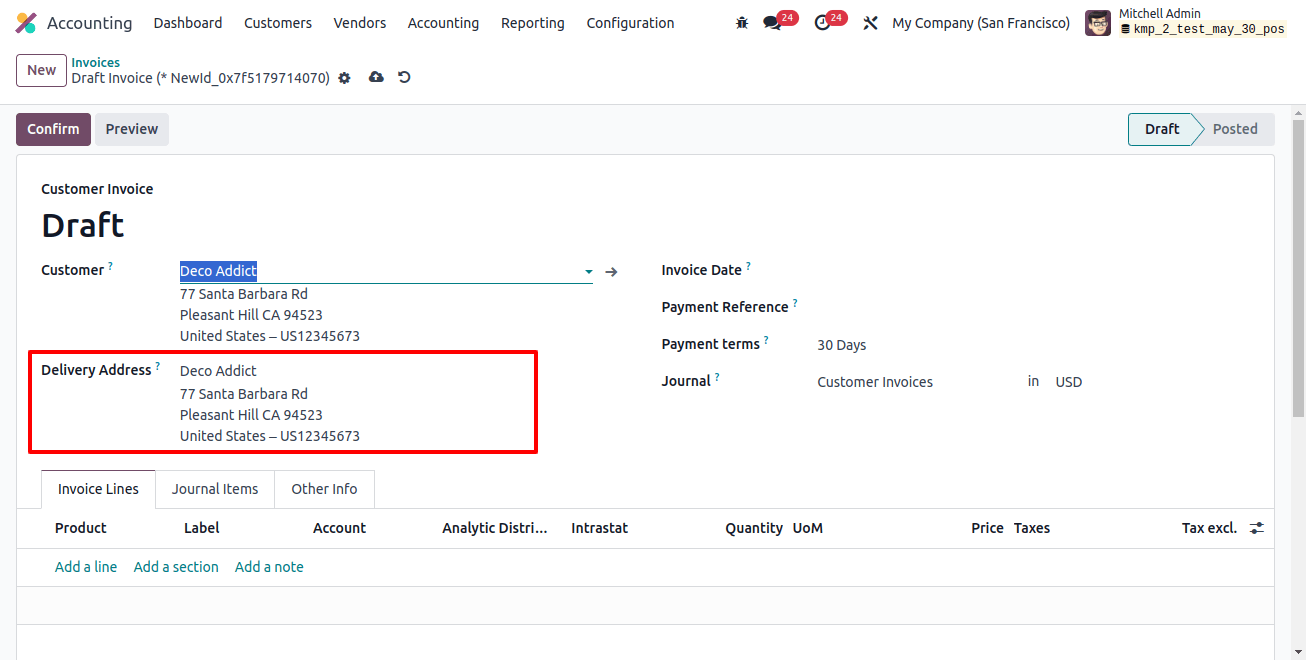
Keeping Track of Multiple Client Addresses
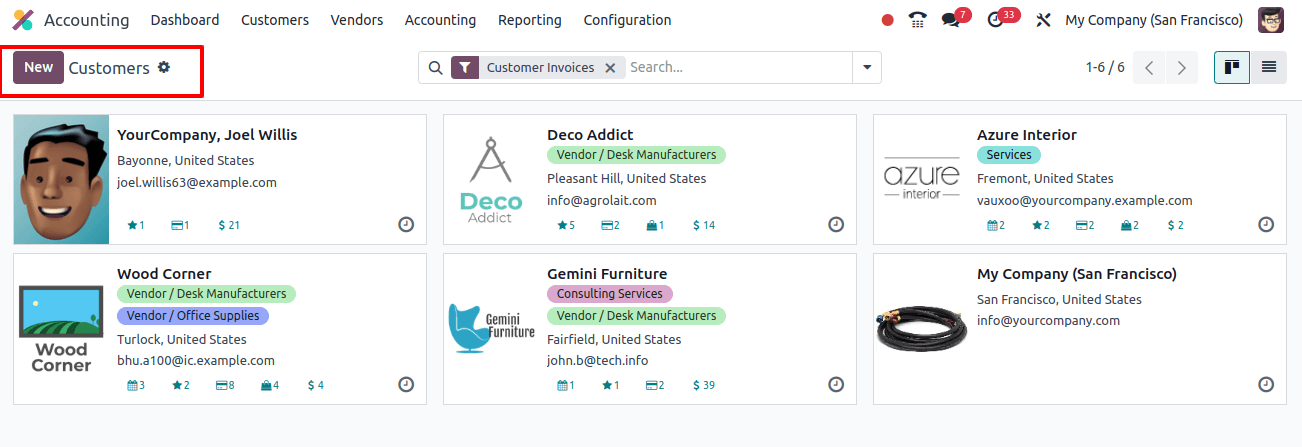
We can build and manage customer data in the Odoo 17 Accounting Module using the ‘customers’ dashboard under the ‘customers’ list. We can see the existing client dashboard from this window.
When entering new customer data, you can enter multiple addresses in the ‘Contacts & Addresses’ field of the form.
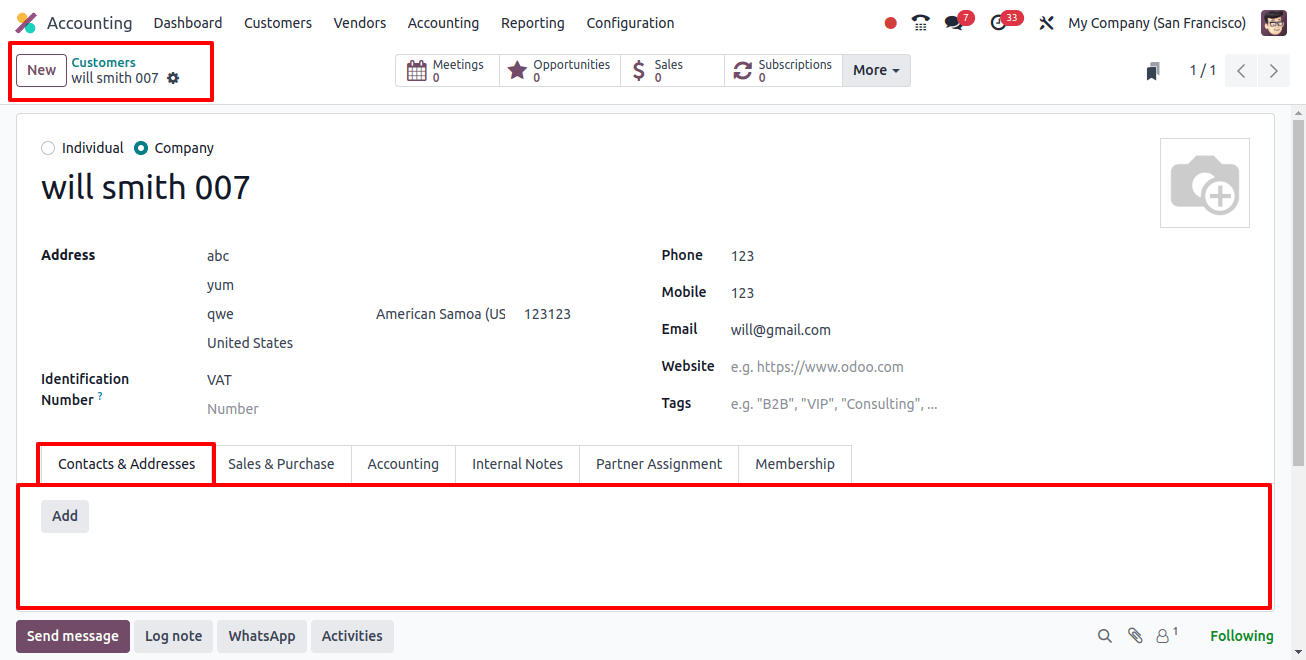
The 'Add' button allows you to set different addresses for the customer. The 'Add' button will open another pop-up window in which you can enter numerous addresses, including Contact, Invoice Address, Delivery Address, Follow-up Address, and Other Address, as shown below.
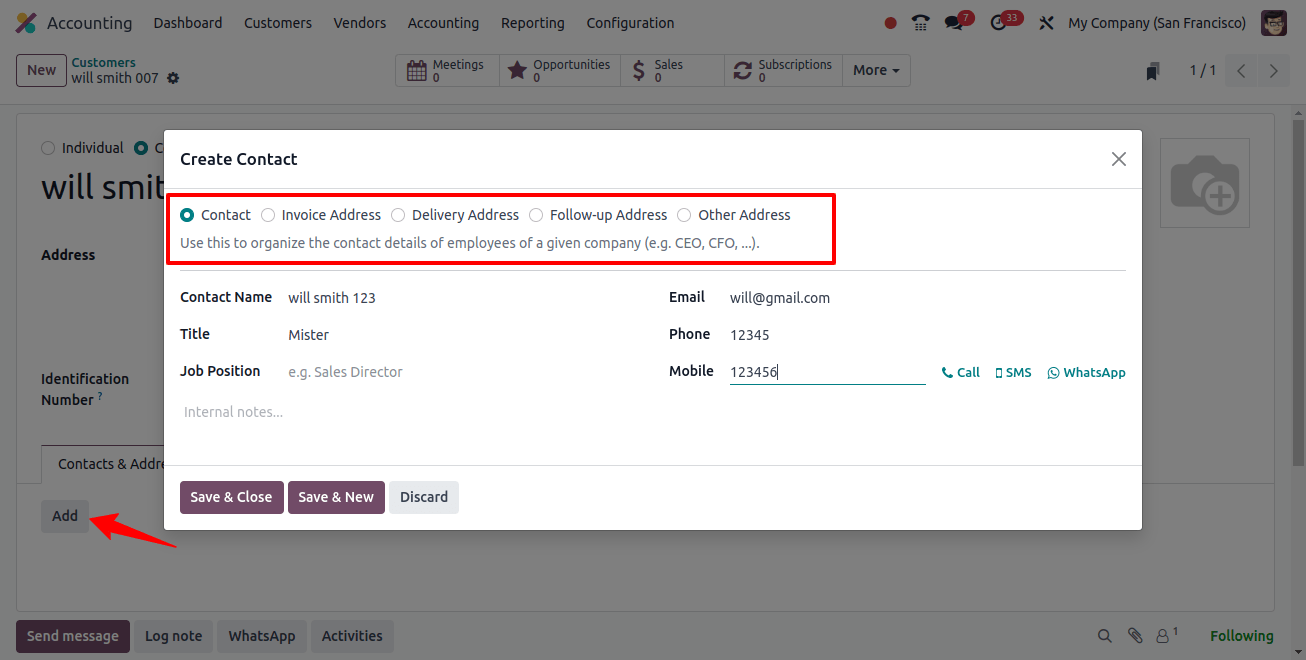
We may modify some basic contact addresses by selecting the ‘contact’ option and saving them with the ‘save & new’ button.
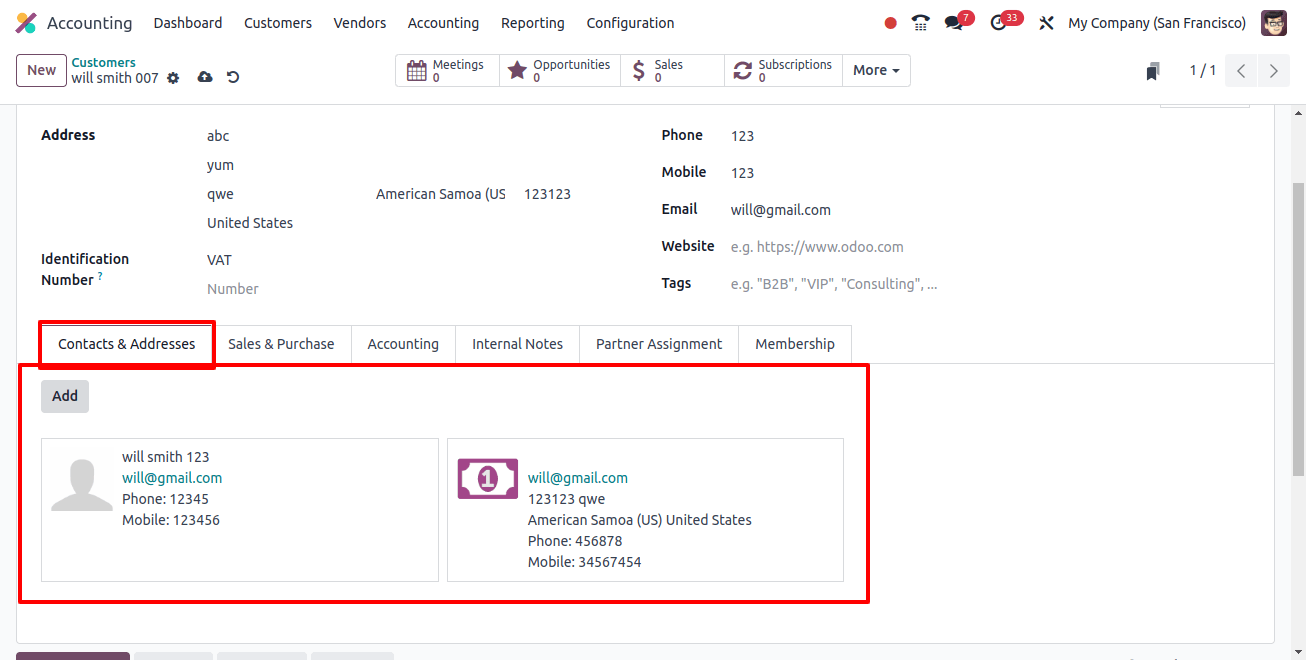
Then, instantly select the Invoice Address option and enter the next address. The ‘contact & address’ field displays the two separate addresses, as shown below.
Invoice and deliver to multiple addresses
For delivery orders and associated delivery slip reports, the address given as the delivery address on the sales order is used.
To reassure customers that their products are being delivered to the right location, invoice reports by default display both the invoice and shipping addresses.
Also, emails are sent to many addresses. The invoice is sent to the email address specified as the invoice address on the sales order, while the quotation and sales are sent to the principal contact’s email as usual.
To test the capability, choose or create a client with several addresses. Then, use the Odoo 17 sales module’s ‘orders’ menu to create a sales order or quotation.
Edit the required fields in the form view, including customer name, pricelist, referrer, payment terms, and customer PO.
You can also change the Invoice Address and Delivery Address in the right boxes. As you can see in the image below, I’ve provided distinct addresses for delivery and invoice.
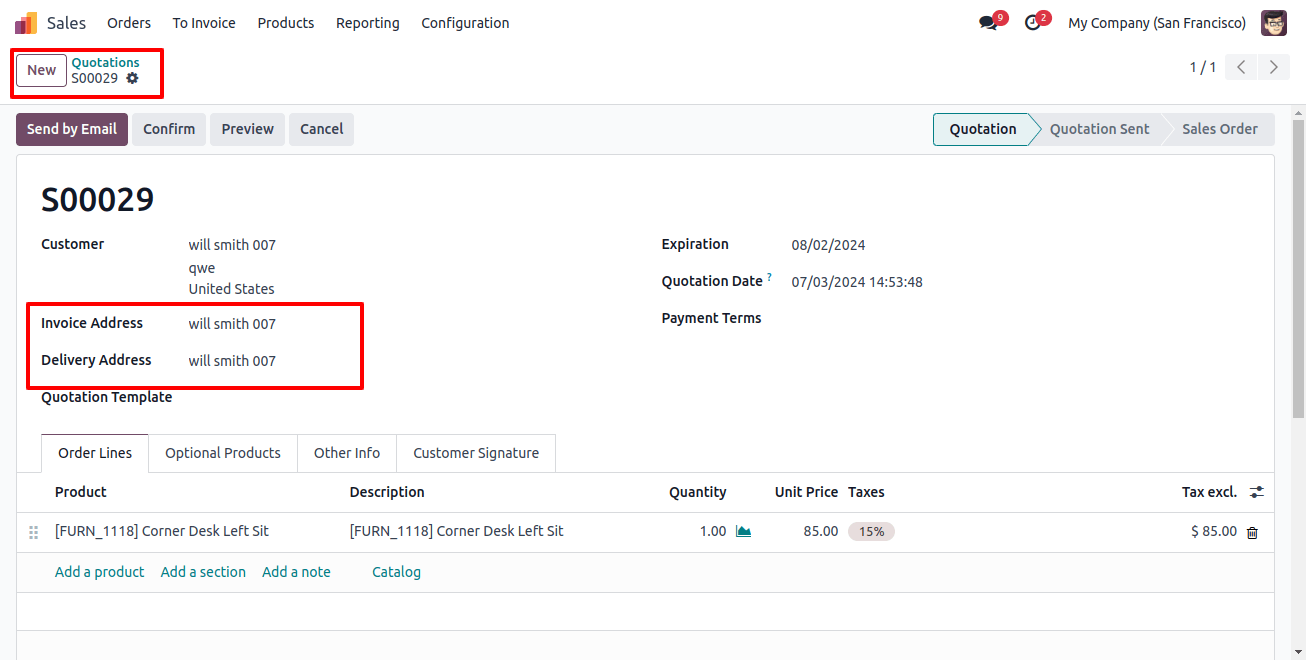
Next, add your sales order products to the 'Order Lines' page. To add extra products, utilize the 'extra Products' tab, and additional sales order details and comments can be modified under the 'additional Info' and 'comments' sections. Finally, click the "Confirm" button to authenticate the order and preserve the information from your form.
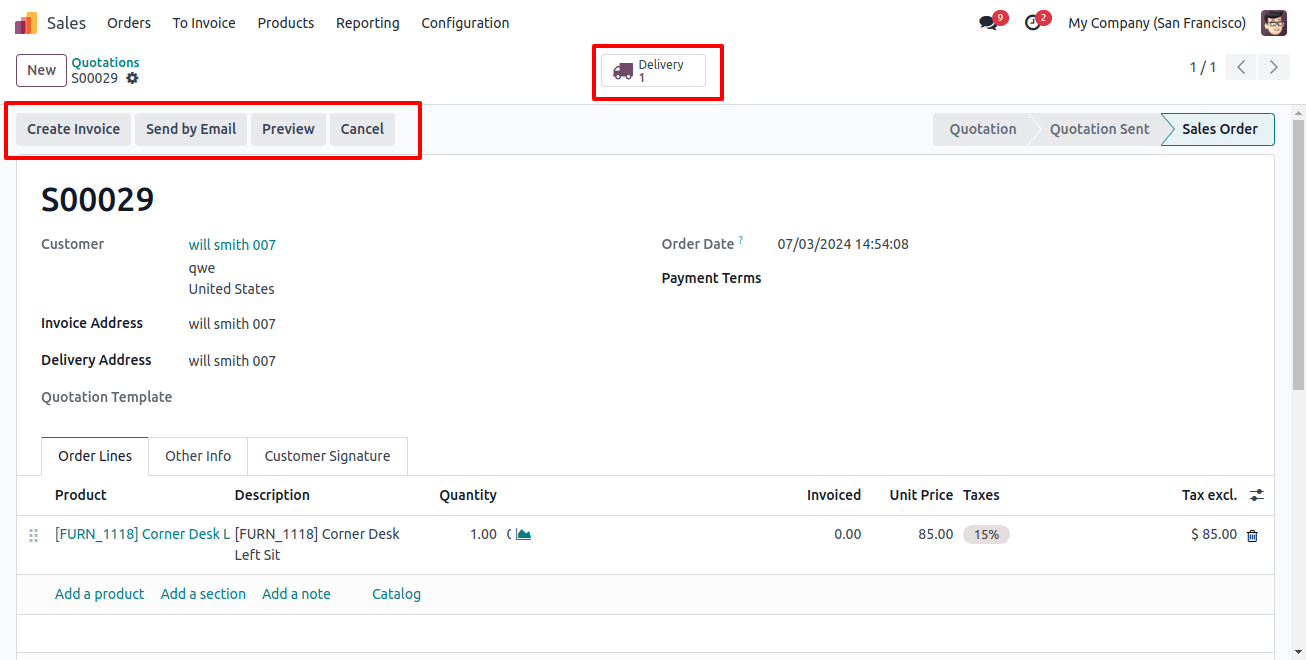
You can generate a sales order invoice by selecting the ‘create invoice’ option. Also, the delivery smart button will display the delivery data, which you may validate from there.
Following validation of the sales order, an invoice will be generated automatically, considering the selected billing addresses.
Select Regular Invoice, Down Payment (Percentage), or Down Payment (Fixed Amount) as the invoice type in the pop-up box that appears after clicking the "Create Invoice" button, as shown below.
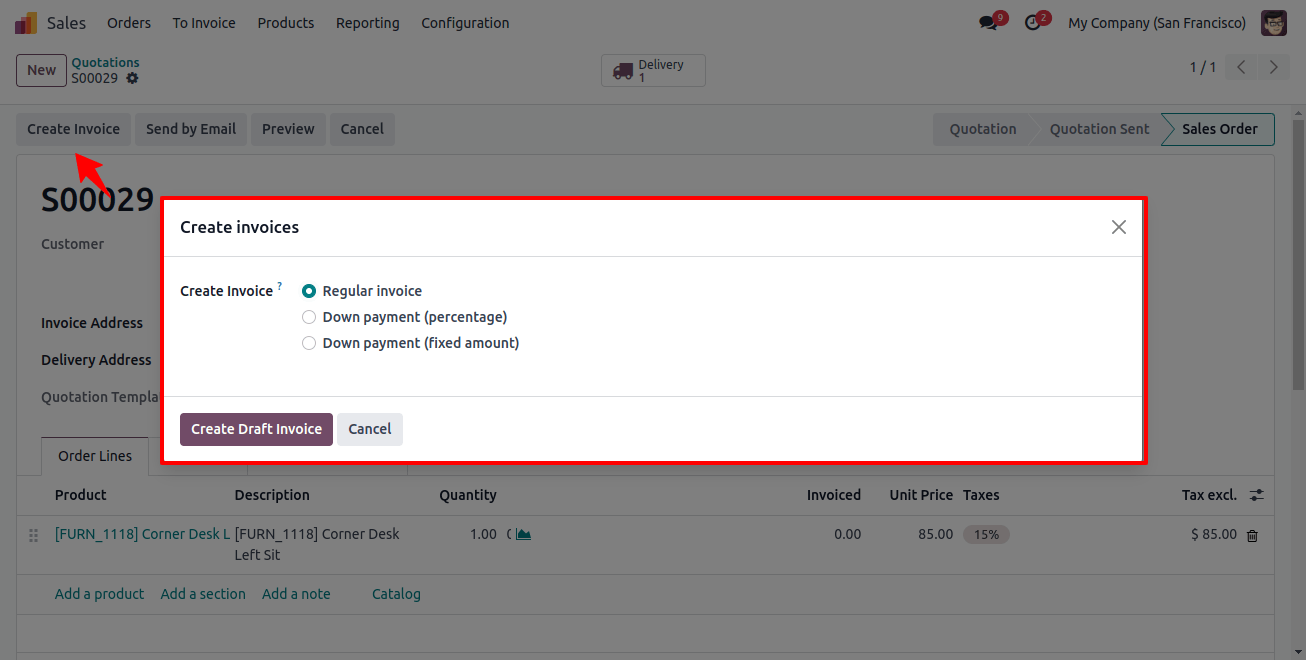
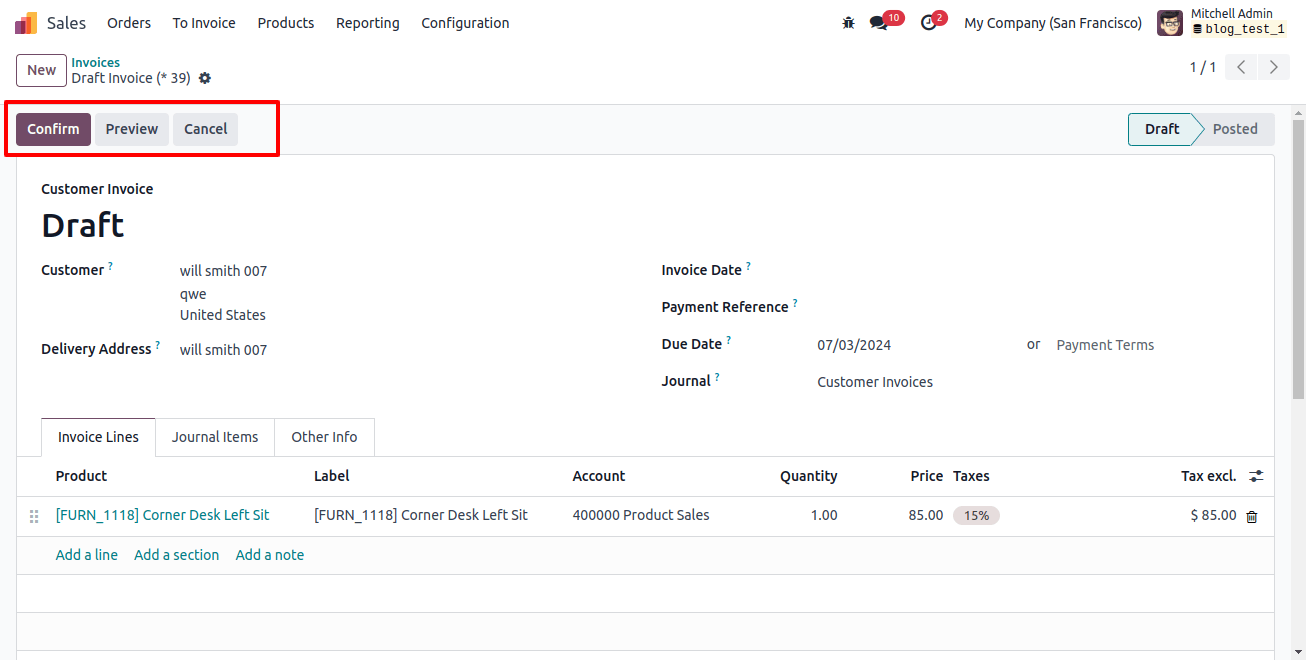
We can select a regular invoice and confirm it by clicking the ‘create draft invoice’ button. The draft invoice is displayed, and by clicking the ‘confirm’ option, you can confirm it.
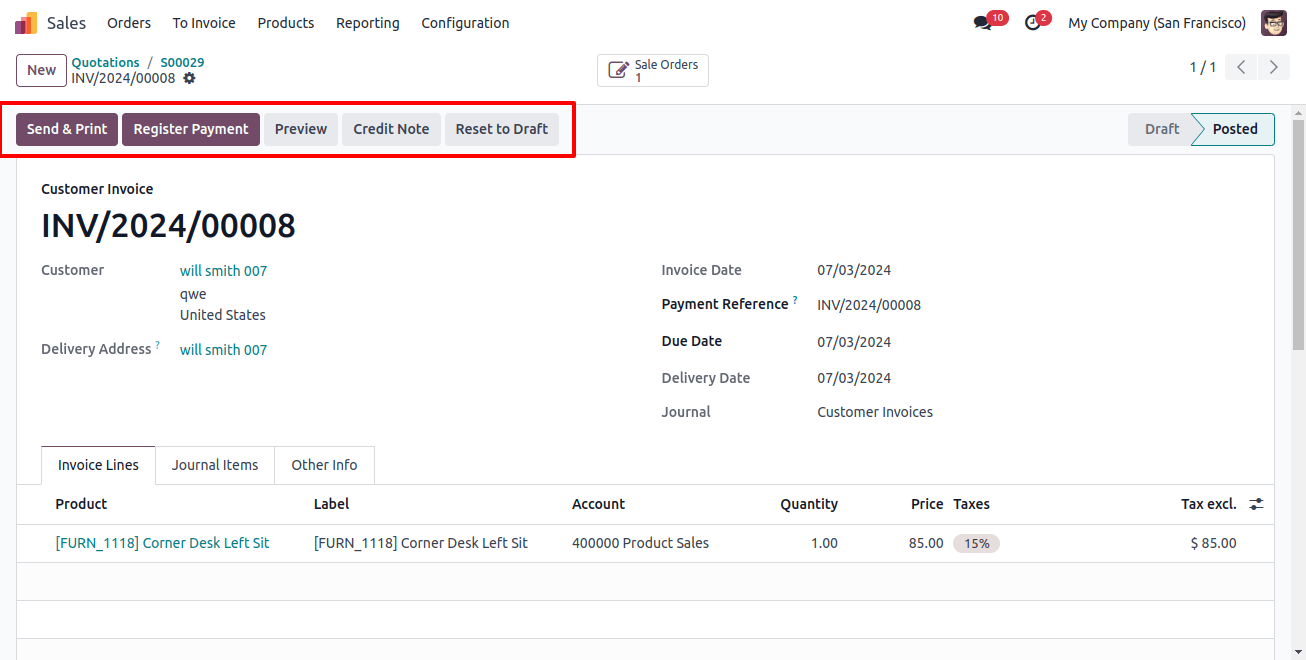
Then, click the ‘Send & Print’ button to send or print the invoice. To send the invoice to the recipient, change the letter body, attachments, and multiple recipients on the send wizard page, as shown below.
You can proceed to the next stages of the sales order after sending the emails. In enterprises with several addresses, Odoo’s client Addresses feature simplifies storing and sending invoices to diverse locations, ensuring smooth case processing and client bill distribution.
