Controlling opening and closing is an important aspect of Odoo 17 POS cash management. When commencing a shift, cashiers enter their login information and the first amount of cash.
This process ensures that financial transactions begin clearly. Every purchase, return, and other cash transaction activity during the shift is documented, resulting in an audit trail for each transaction.
When the shift ends, the cashier closes it in the Odoo 17 POS application. This approach allows the cash balance to be easily compared to the actual cash in the drawer because the system calculates the cash balance using documented transactions. To assist in discovering any errors, compare the computed and actual cash balances.
Odoo 17 POS’s complete opening and closing control feature improves accuracy, accountability, and transparency in money transactions. It allows businesses to better manage their cash flow and provides a reliable system for tracking transactions throughout the sales cycle.
So, let’s talk about the Odoo 17 POS’s opening and shutting controls, as well as other payment-related features.
Steps to Use Odoo 17 POS Cash Control Flawlessly
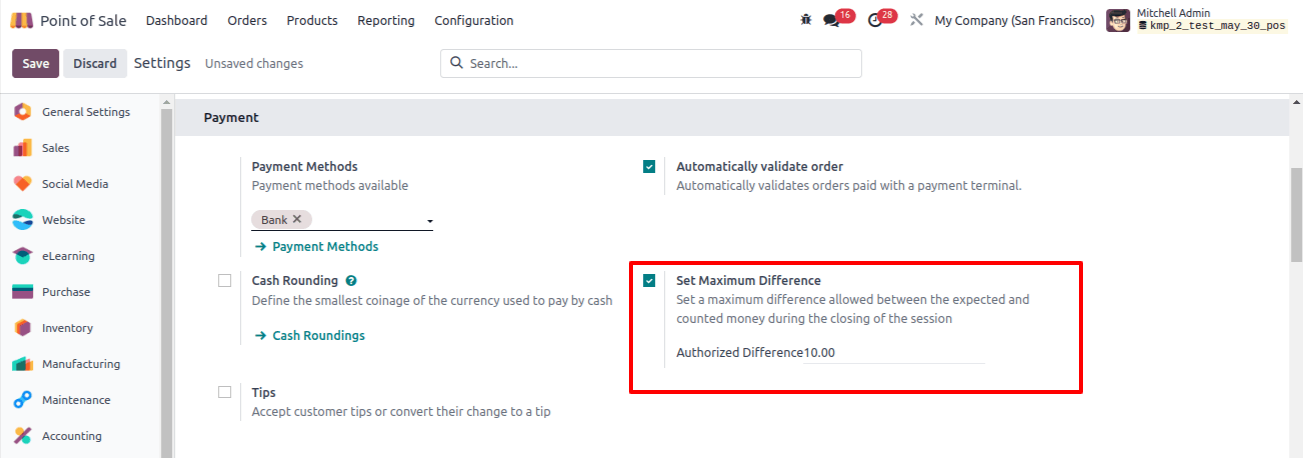
The ‘Set maximum difference’ option in Odoo 17 POS can help you control cash managing accuracy. Businesses can use this technology to define a tolerance level for differences between the cash in the drawer at shift closing and the calculated cash balance.
By setting this maximum difference, businesses can reduce the possibility of cash management errors while also ensuring tighter control over their financial operations by quickly identifying and investigating any differences that surpass the threshold.
The allowed difference in this situation is fixed at 10 dollars.
The Coins/Bill function in Odoo 17 POS allows users to easily manage coins and bank transactions while accelerating cash processing during transactions.
This feature guarantees that cashiers have a precise count of the coins and bills available for change, increasing the overall efficiency and precision of the POS process.
From there, you can start a new section. To do so, go to the dashboard and click the NEW SESSION option.

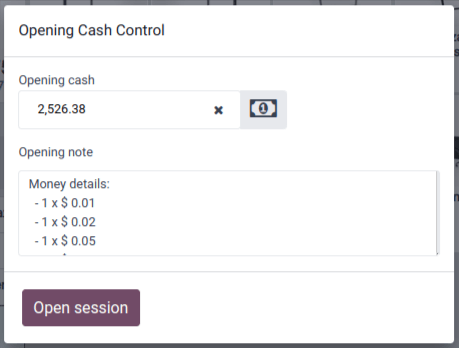
Each new session begins with a popup requiring the addition of an Opening Balance. In the Odoo 17 POS module, the Opening Balance refers to the first cash or fund amount available in the register at the beginning of a working day or shift. It served as the starting point for all transactions conducted via the POS system at the time of opening.
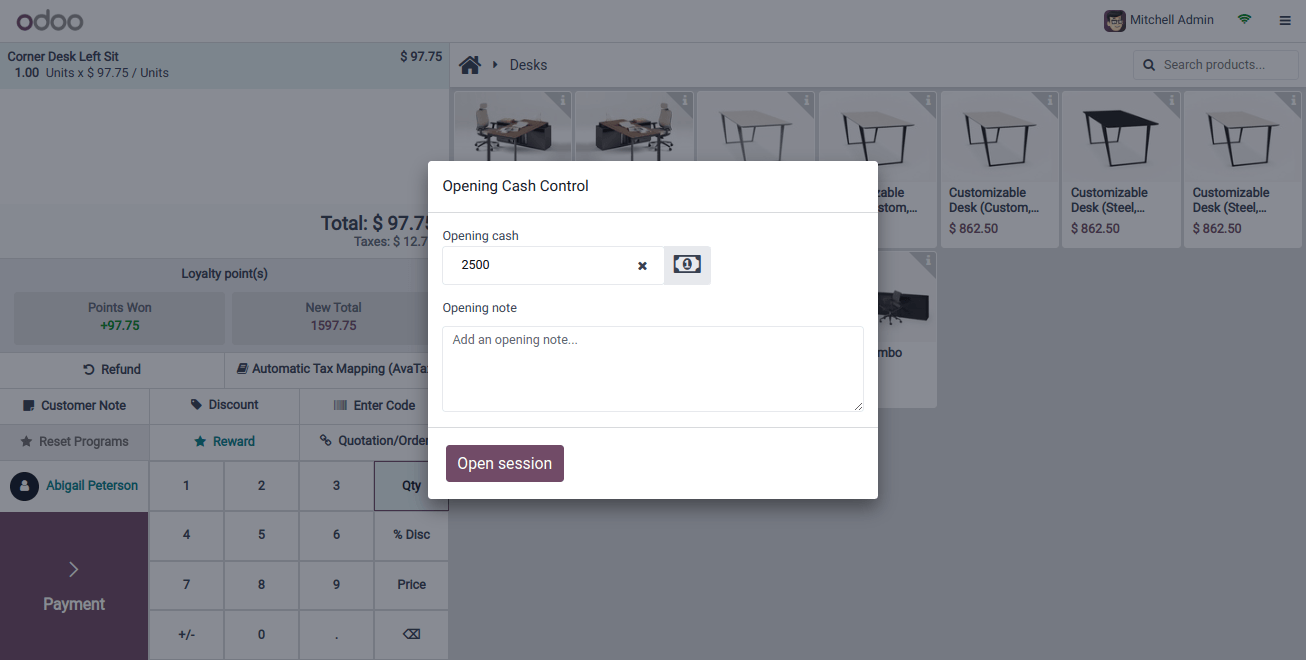
As a result, you can use the coins to increase the amount when setting a starting balance. We updated some of the shop’s setup options to add some coins. To add the appropriate coins, click on the little calculator icon.
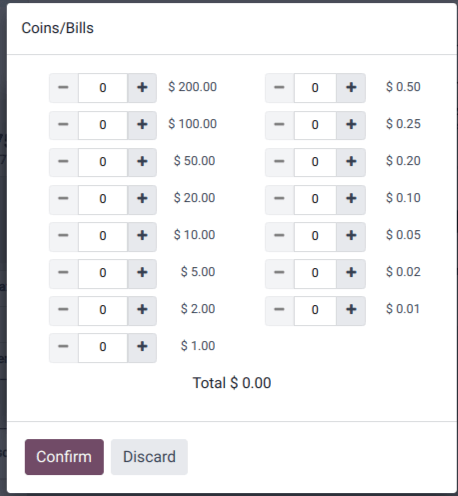
As a result, you can use the coins to increase the amount while creating an opening balance. We updated some of the shop’s configuration settings to add some coins. To add the appropriate coins, simply click the little calculator icon.
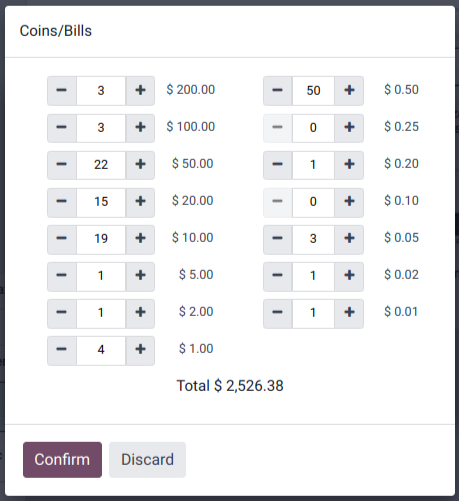
Following that, the money details will be shown in the Opening Note section. By pressing the Open Session option, an initial balance of $2526.38 can be added to the session.
The Odoo 17 POS’s cash in/out feature makes it simple to keep track of any additional cash that is added to or removed from the cash drawer throughout a shift. This feature allows flexibility in dealing with diverse cash-related events, such as documenting cash deposits or refilling change, while maintaining the integrity of financial records.
The cash in/out feature allows employees to quickly replace cash after they have used it for their intended purpose. Let us research.
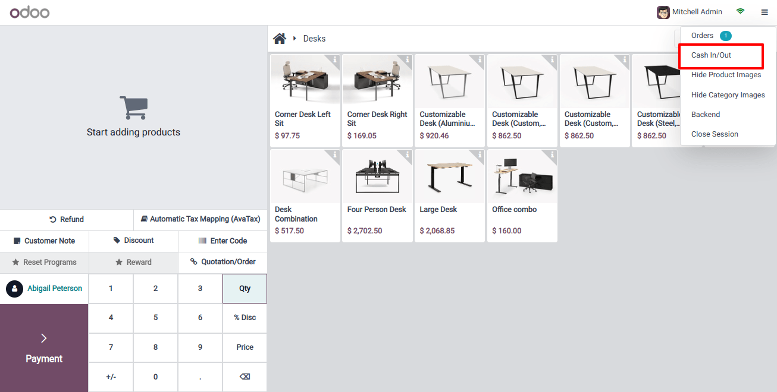
After clicking the Cash in/Out option, another window will appear. The log-in user can choose Cash In or Cash Out from the pop-up window. You can provide any specific reason in the ‘Reason’ field. Next, press the confirm button.
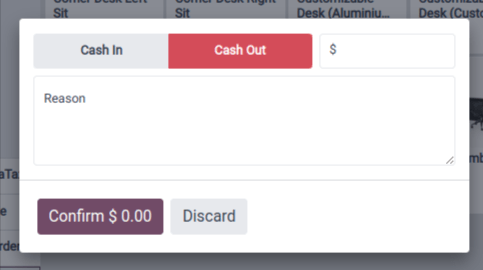
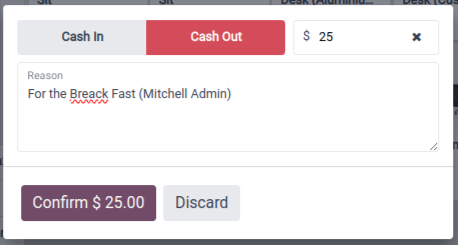
Cash-out is the process of withdrawing money from a store’s cash drawer. Click the Cash Out button (it is now highlighted in red). You can enter the amount taken into the designated field. It immediately shows the amount as negative.
Mitchell Admin, the employee, receives $25. Next, press the Confirm button.
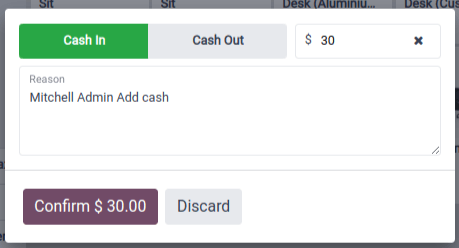
If an employee needs to contribute cash to the drawer, simply click the Cash in button. It appears in green and displays the amount as a positive number.
Mitchell Admin, an employee, added $30. Next, press the confirm button.
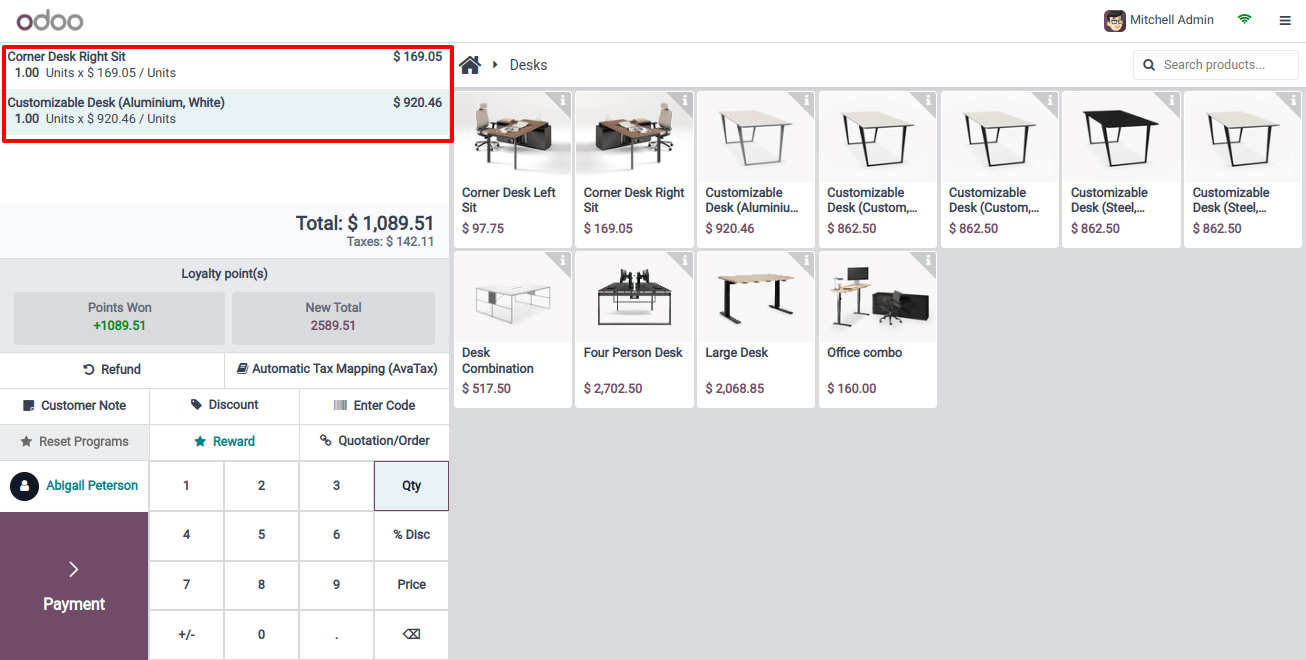
Customers can select things from the shop. If the consumer selects a product, clicking the Payment button, which takes the user to the payment page, simplifies the payment process.
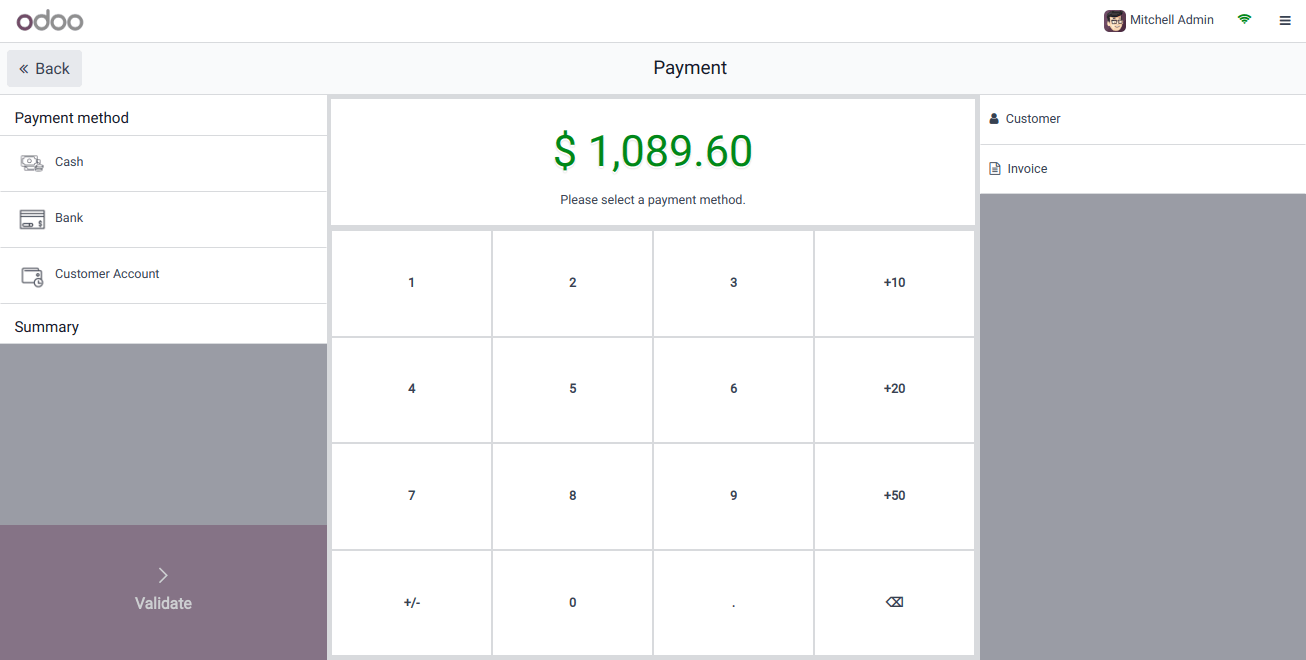
Odoo supports four separate payment methods: bank, cash, customer account, and payment through payment terminals.
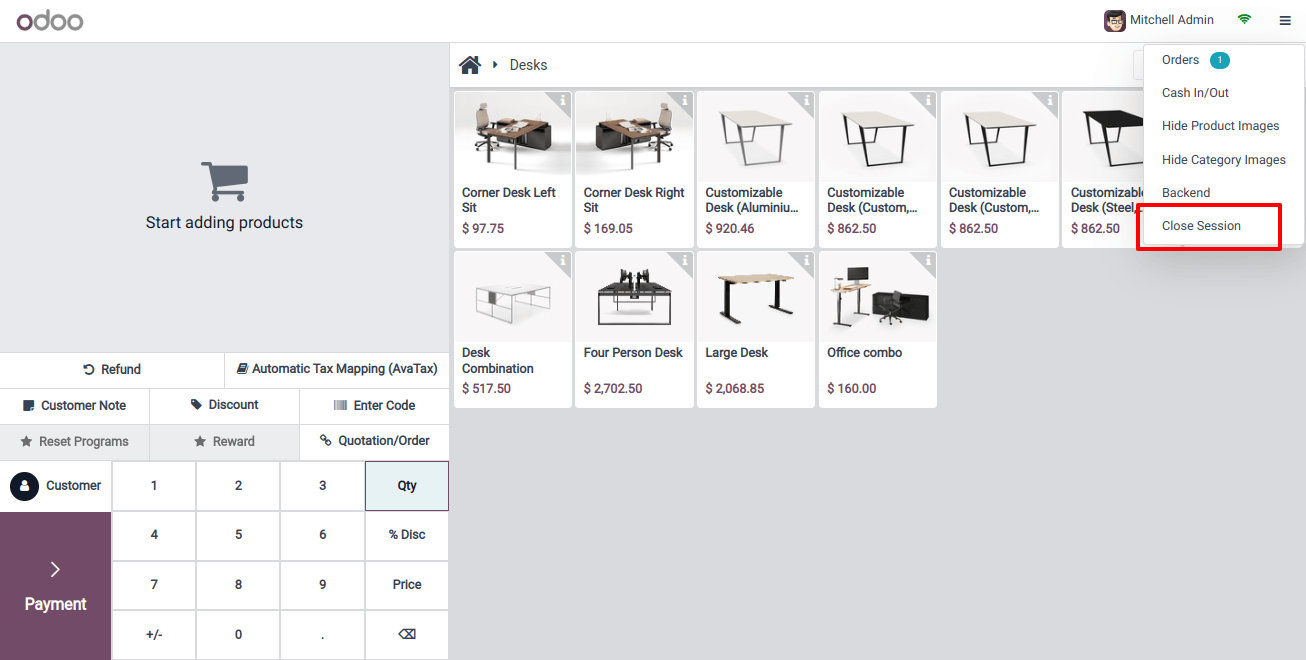
After making the deal, the user can simply click the close button in the upper right corner to finish the session. This gets us to the final section.
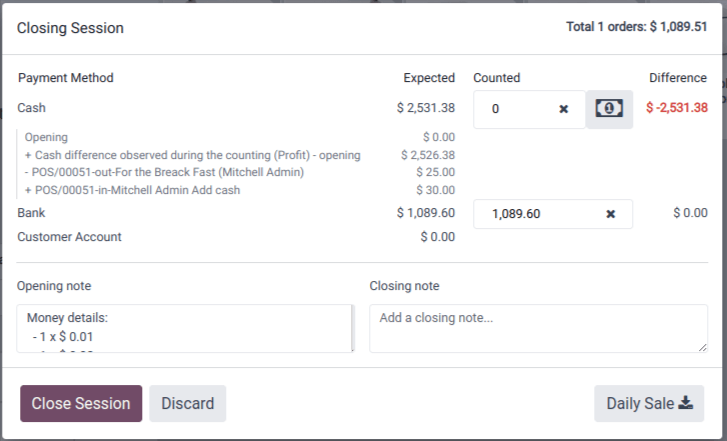
The closing control for a closing session will appear before closing. The closing balance in the Odoo 17 POS module refers to the total amount of cash or funds remaining in the cash register at the end of a business day or shift after all sales, refunds, and other transactions have been recorded. It connects the items in the register to the predicted total and gives a glimpse into the cash situation.
The closing balance includes all of the information, including the total amount of orders. We have three orders totaling given dollars from this session. The image below shows the opening balance, the opening note that was added, and the cash in and out amounts.
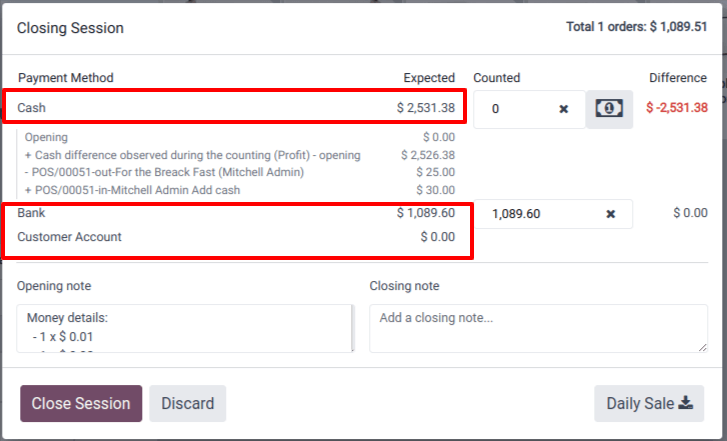
As shown in the image below, the amount received using each payment method will be presented separately during the closure session.
In the last session, a small calculator sign is also presented. From there, the player can use Coins to increase the Difference. Give it a click.
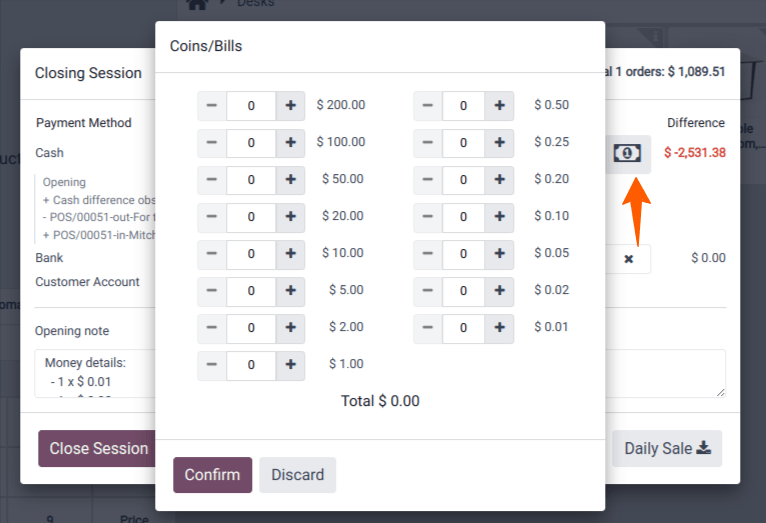
Following this, the disparity will be updated. The money information will be added in the closing notes section.
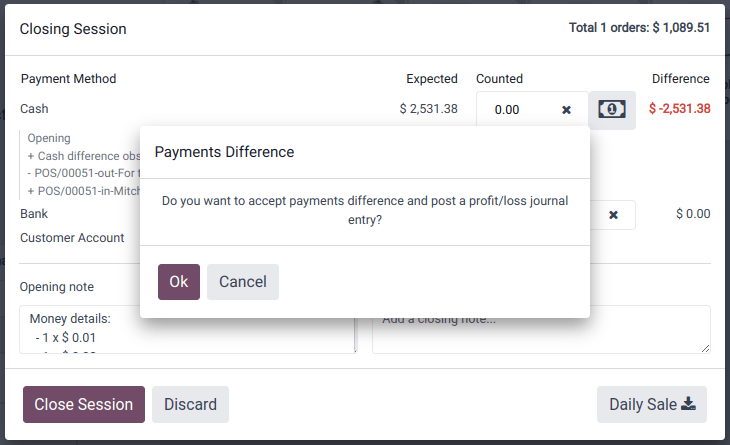
The projected sum is provided in this scenario. However, the updated total amount of money is also provided. The difference is therefore clearly visible. Click the close session button to end the meeting.
A popup notification informs the user of any payment differences. As a result, the journal entry wishes to mention the profit and loss. To proceed, simply click the OK button. The meeting will thereafter end.
When the session ends, the dashboard will automatically update with the latest closing cash balance and date of closure.
Let us look at the profit and loss statement to understand what happened with the journal entry. To do this, go to the accounting module and then the reports tab. Select the profit and loss report from the dropdown menu.
If more money was collected than predicted at the end of the session, a ‘cash difference gain’ is recorded in the gain account. As a result, it was recorded as revenue and reported in the gain account.
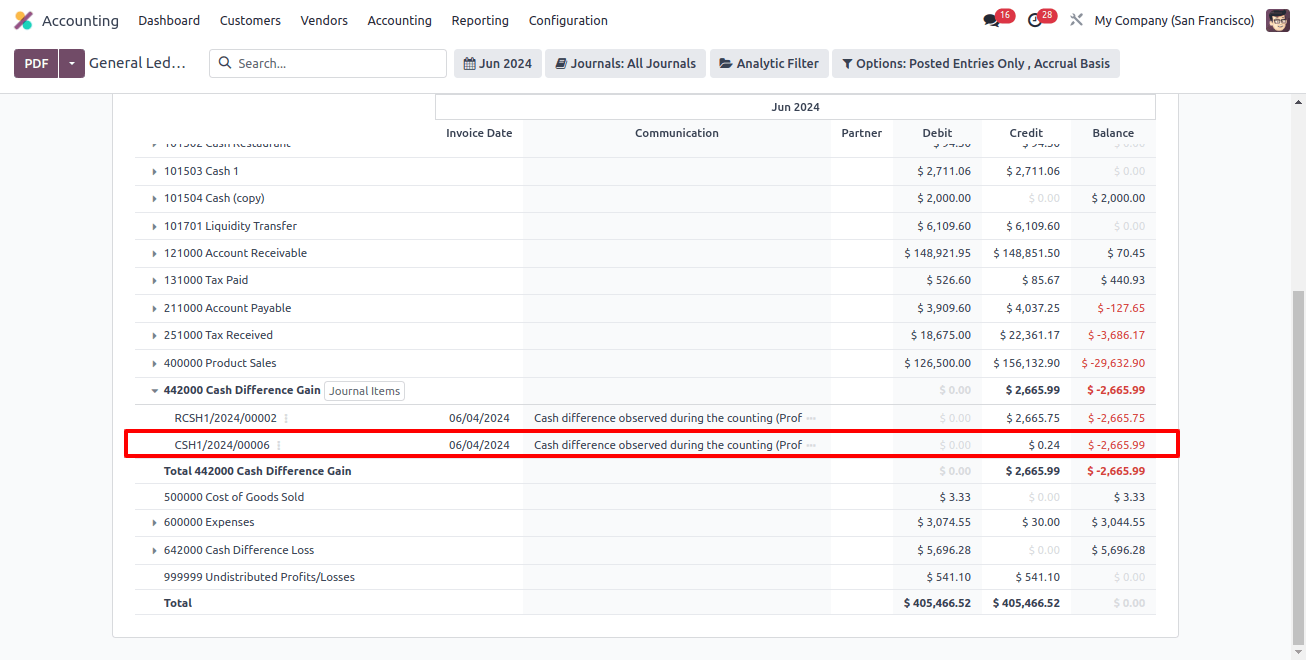
If the session concluded with the least amount, the report will reflect a loss.
Conclusion
As a result, this blog post went on to great lengths about opening and closing cash controls during a POS session. This action addresses several difficulties, including cash in/out, cash differences, closing session, posting difference, opening balance, adding denominations, coins in POS, and setting maximum difference.

