Most people think about the policies and caliber of a company’s products. They like to purchase products based on their quality. The business puts the material through a series of tests to guarantee that quality before delivering it to customers.
Quality standards, customer expectations, and good quality, which make them happy, assure a successful transaction. Odoo 17 offers a quality module that improves the quality of the products. It consists of Alerts, Checks, and Control Points.
The primary subjects covered by the Odoo 17 Quality module include quality cheeks, alerts, teams, product variations, and control points. Using the Odoo 17 Quality module, you can manage every activity within a single system.
Install the Quality module from the Odoo Apps to get access. The module then shows up in the Odoo database.
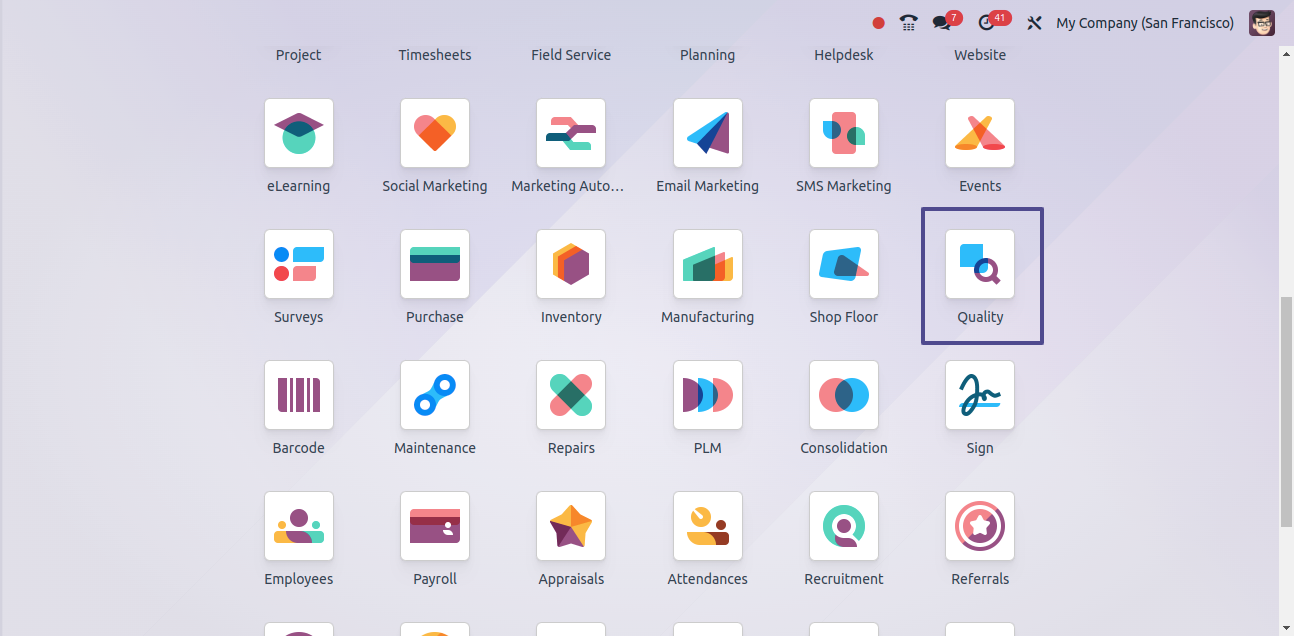
The Odoo Quality module’s dashboard tabs give a summary of the teams, products, configuration, reporting, and quality control.
We may set up Quality Control points, products, Variations of Products, Alerts, and checks with this module. The list and Kanban versions of the dashboard are visible to the user.

From here the product quality can be evaluated via the many methods used by Quality control points to measure product quality.
In the list view of the Quality control points window, information about the reference number, title, product name, operations, company, type, and team is shown.
To add a new field, click the three-dot button at the right end of the window.

The Kanban view displays all materials activities and product records in a single window. To view more precise information, simply click on the reference number.
There are additional choices for Custom Filters and Group by using filters.

The Create icon in the Quality Control Points app makes it easier to create new QCPs. A new window opens when you click the Create button, as shown in the screenshot below.
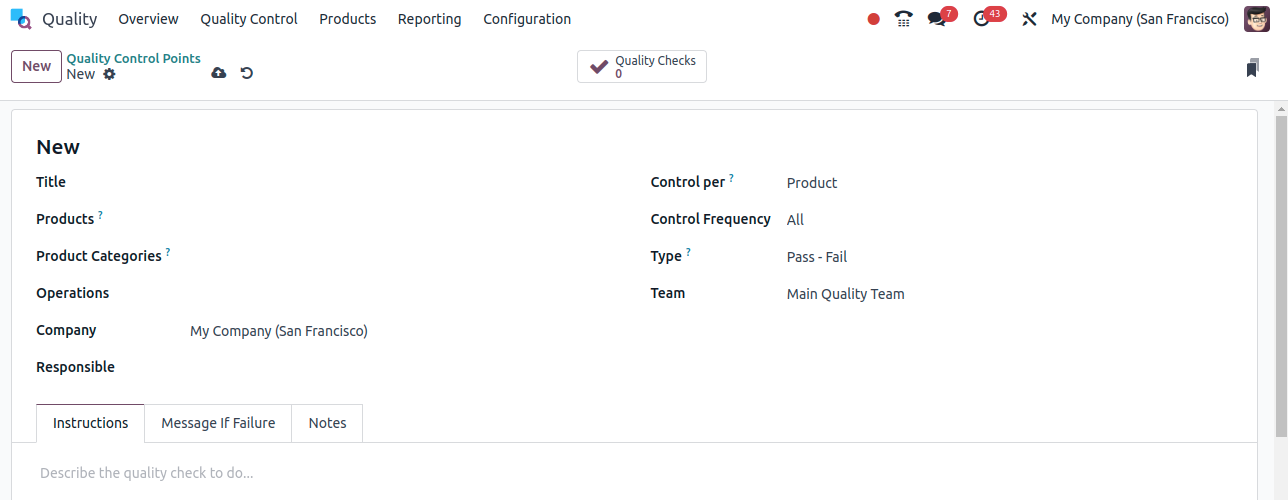
Enter the name of your quality control point in the Title field. You can select the needed product from the Products. Put Tag Operations and the firm name in place.
You can also add control for each process or product and set the Control Frequency to All, Periodically, or Randomly. Select the team, type, and name of the Responsible Person next.
At the bottom of the page, you can put instructions, a notice in case of a failure, and remarks about the quality check. Save your modifications after adding all of this data to the Quality Control Points.
Order management for manufacturing, delivery, and services is handled by Odoo 17 Quality Alerts. It reminds employees to check the quality of the products.
You can review Alerts at different levels by choosing the Quality Alerts menu located on the Odoo dashboard’s Quality Control tab. In the Kanban view, the product name and reference number are displayed at several stages, including New, Action Proposed, and Confirmed.
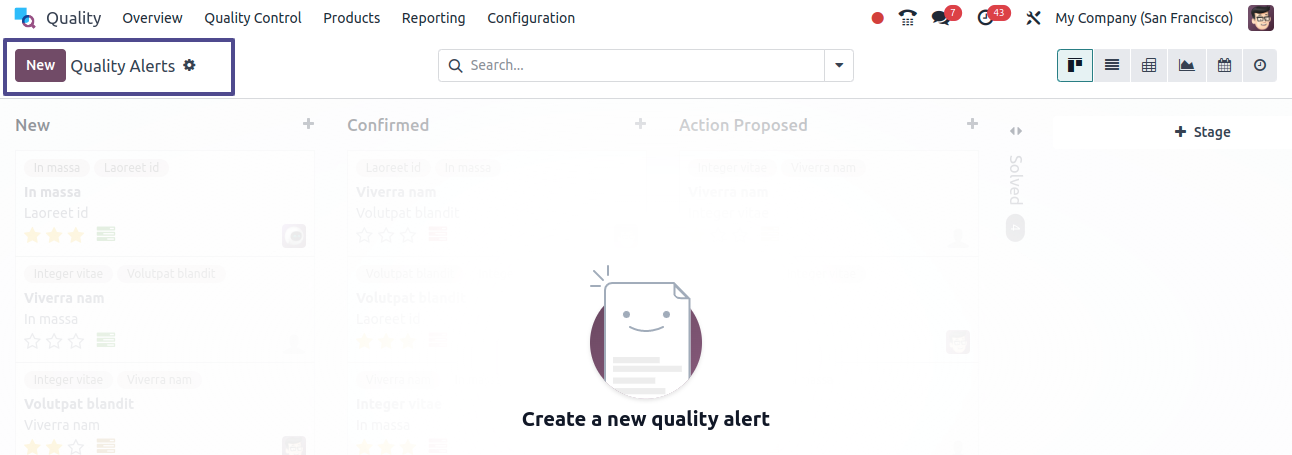
In the List view, the following are displayed: Product, Name, Team, Work center, Date Assigned, Responsible person, Company, and Check. You can see a detailed picture of the Quality Alert for a particular product by clicking on the title of each name.
Use the three-dot button at the end to add new custom fields to the ones that are already there.

Percentage of the Quality team's New, Confirmed, and Action Proposed issues that are visible in the pivot view of the Quality Alerts window.
With the help of the Main Quality Team's plus icon, you can activate Stage, Responsible person, Creation date, Root cause, and Add Custom Group.
You can choose to import a new spreadsheet into Pivot by choosing the Insert in Spreadsheet option. We will trigger the total number of notifications, as the Measures symbol assures us.
The Root Cause and Count rate are represented by the X- and Y-axes in the graphic depiction, respectively. The count is displayed at several periods and can be shown in Bar, Pie, or Line form.
To view a Quality Alert analysis of the available product, click on the specific count. By choosing the Quality Alerts menu from the Reports tab, we can also see the graphical representation.

Using the Calendar option, you can display the quality alert for a product in a day, week, month, or year format. We have access to all upcoming and current material notifications.
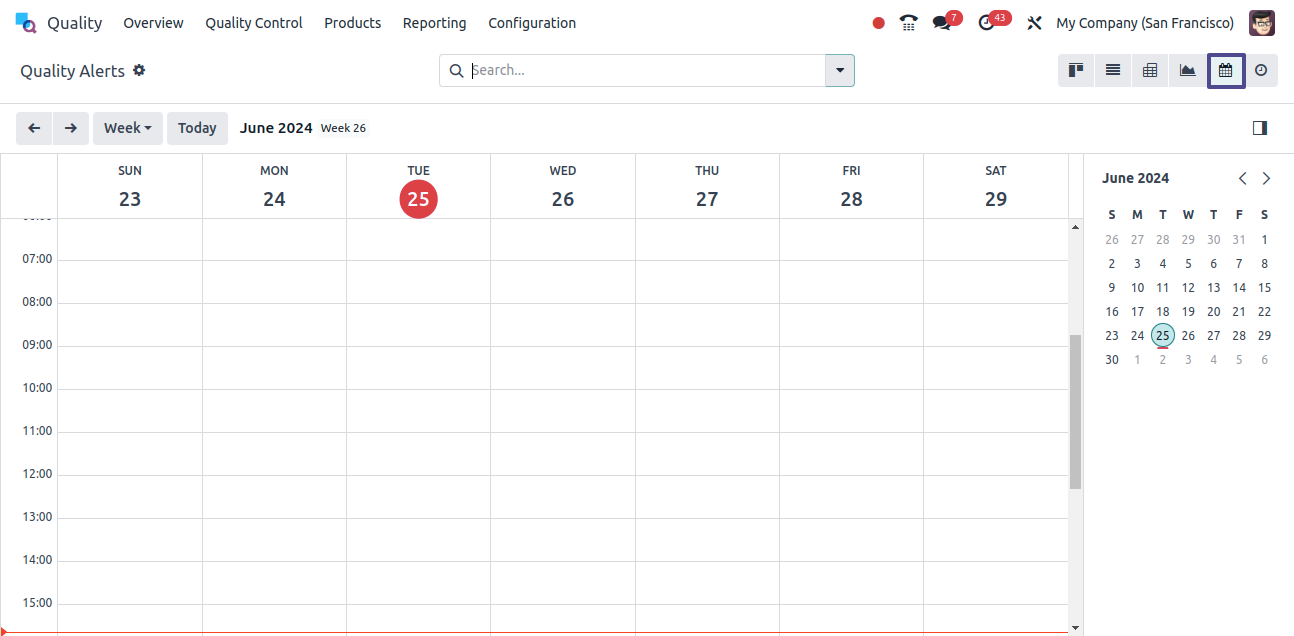
The New button in the Quality Alerts pane creates a new product alert. As seen in the screenshot below, selecting the New icon opens a new Quality Alerts panel.
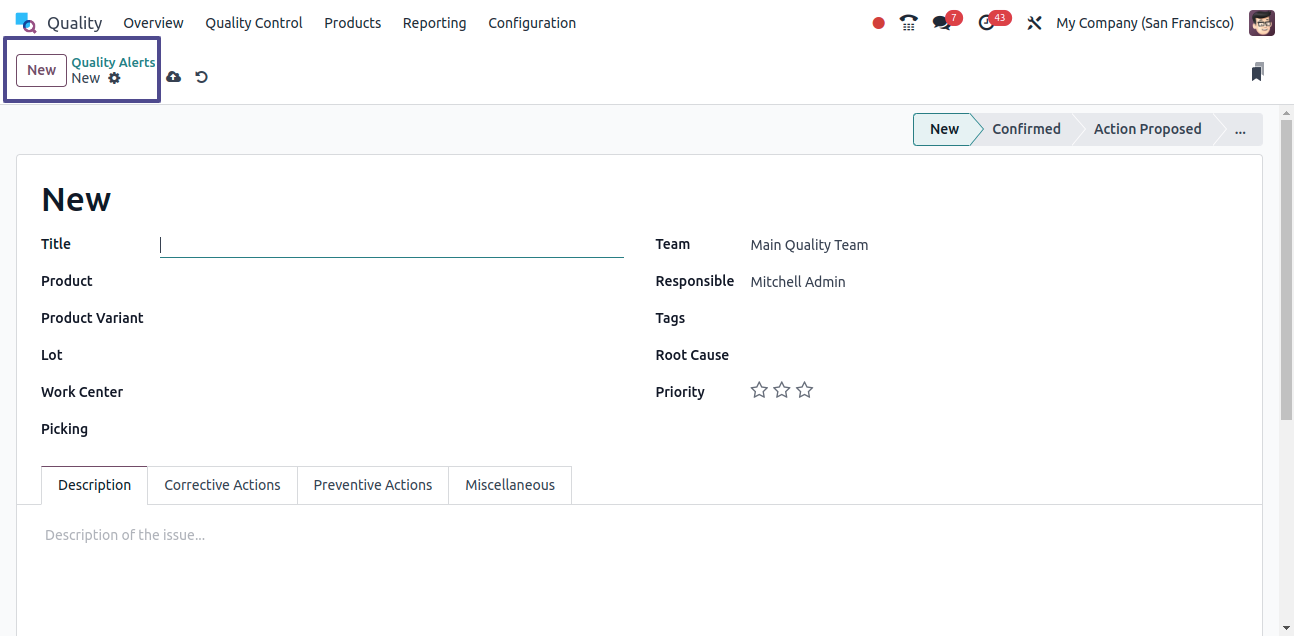
Select the product name and variation, then add the title in the New Quality Alerts panel. Lot Option can be used to generate a serial number. When you want to add a lot, a new window appears, as seen in the screenshot below.
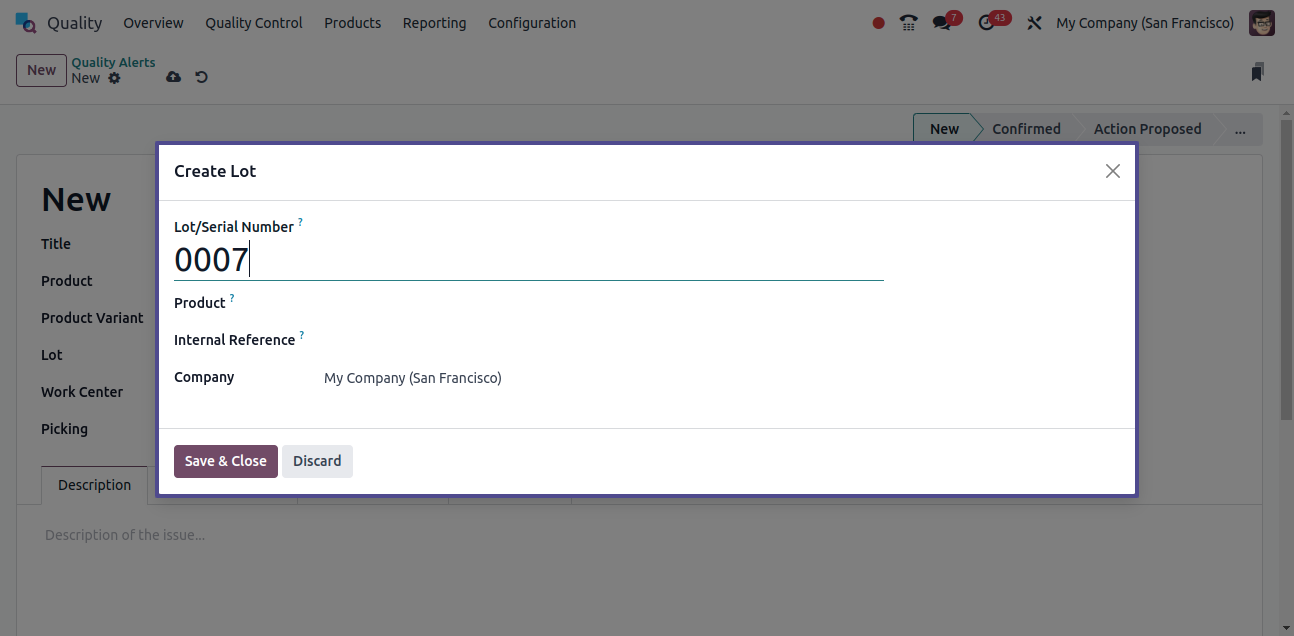
Enter the Product Name, Internal Reference, Serial Number, and Company in the new window. After that, save the changes. The Lot is shown in the New Quality Alerts pane.
Additional options are Work Center, Picking, Team, Root Cause, Responsible Person, and Tags. A component's quality, operations, or failure are the root cause. Finally, we may talk about the nature of the problem and potential solutions.
The Miscellaneous option lists the Assigned Date, Company, and Vendor name. You can select New, Solved, Confirmed, or Action Proposed from the Alert stage.
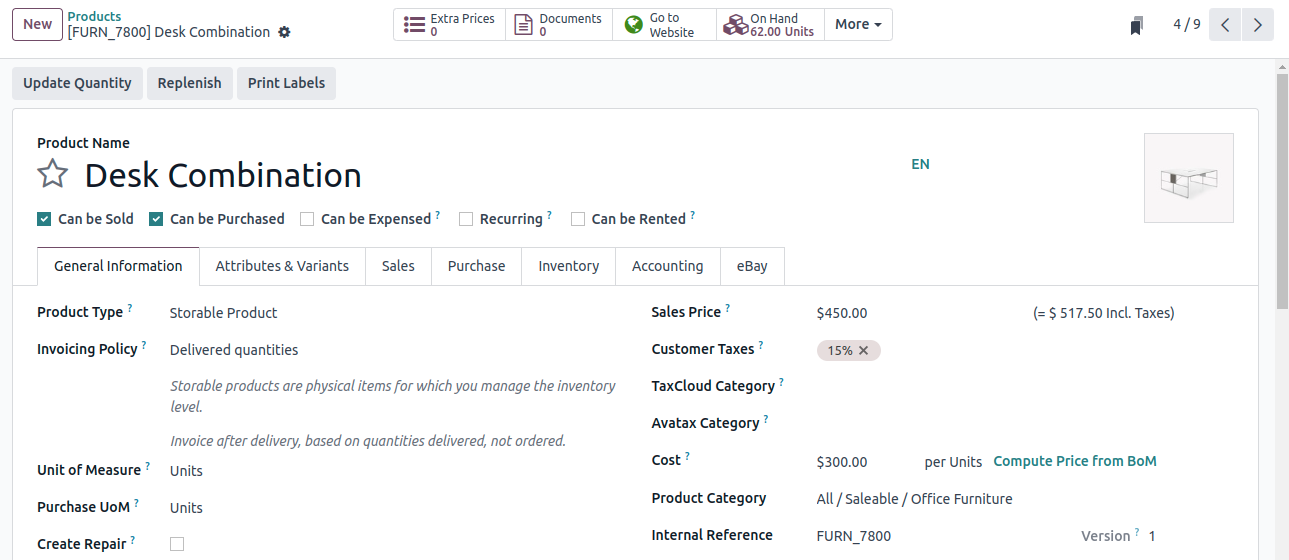
By clicking on the external link, you can find out more about a product's detailed view. By clicking on the product's external link, you can see information about the product, such as its type, unit of measurement, base unit count, sales price, category, customer taxes, and name. We can make the required changes and save the changes by using the Save icon.
After entering all the data in the New Quality Alerts window, click the Save button to create a new alert. Your current and new warnings are shown in the Quality warnings window.
The Odoo 17 Quality module helps in the construction of Alerts, Quality Checks, and Control Points.
Using the Quality module makes product quality easier to achieve, boosts sales, and enhances customer happiness. This Odoo Services feature speeds up the inspection procedure and guarantees product quality all the way through production.
