Employees sometimes incur business expenses, like travel costs for work trips. These expenses are reimbursed by the company since they benefit the company.
No more stress, because Odoo’s expense module simplifies managing employee spending:
Odoo tracks expenses and approvals.
Odoo integrates with accounting and payroll for seamless processing.
Let’s explore Odoo Expense Management
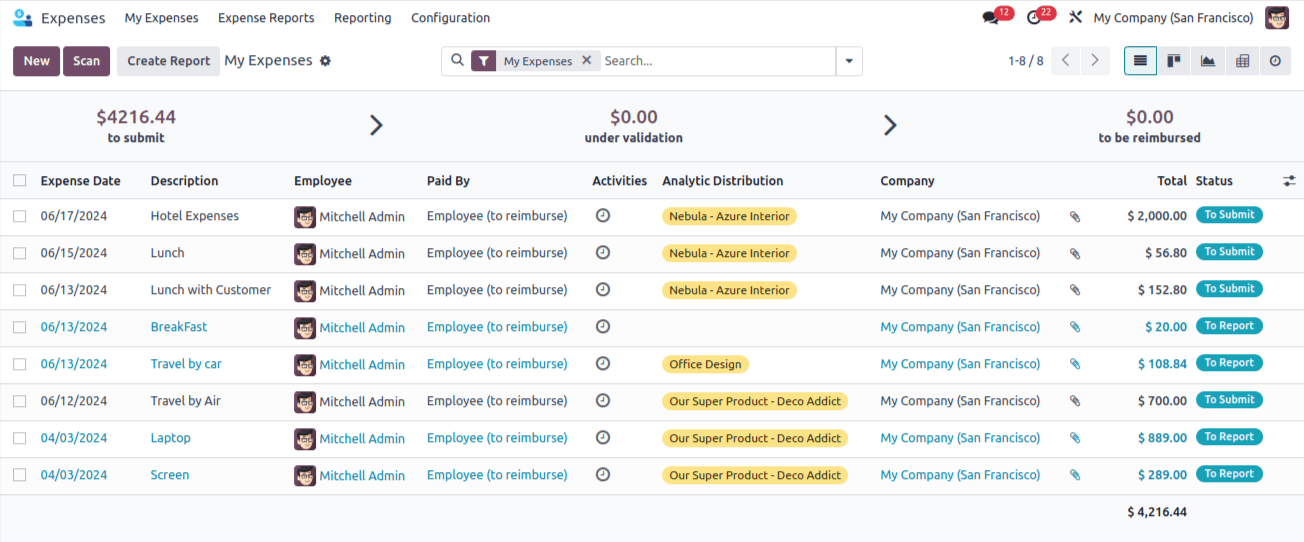
You can track all employee expenses in one place.
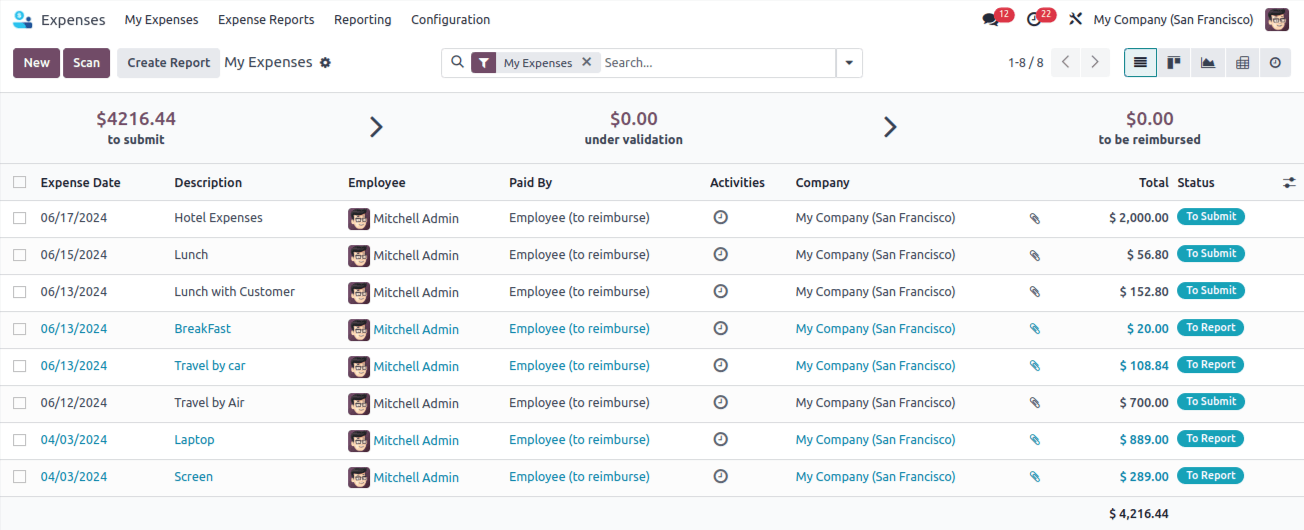
It allows you to create new expenses: Click ‘New’ or scan receipts.
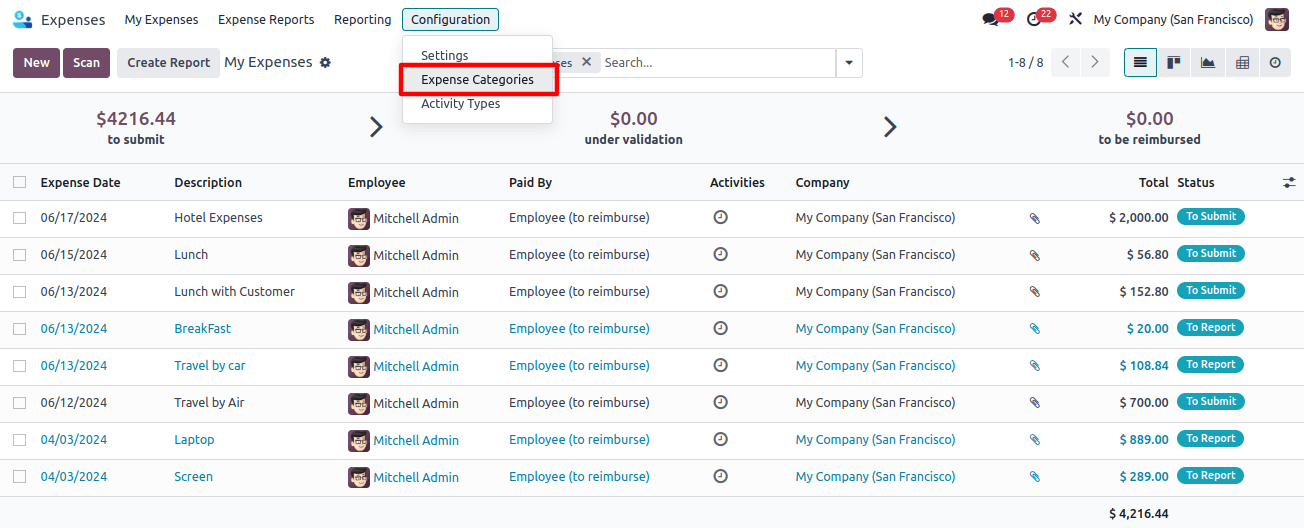
It allows you to use Filter and group expenses and find specific entries easily.
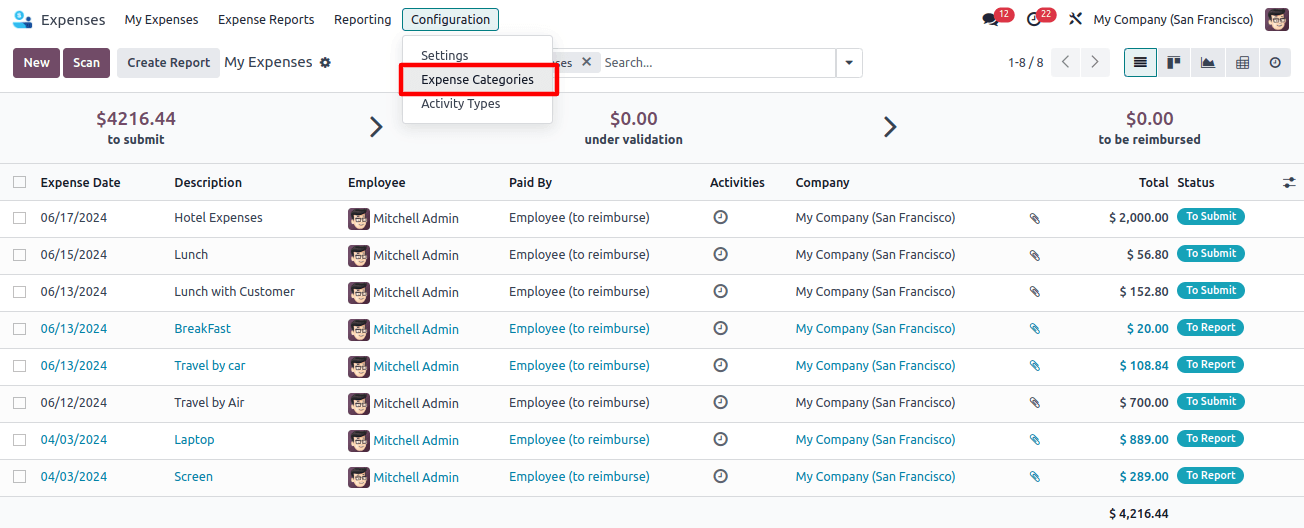
Expense Categories
You can choose from existing categories, or create new ones.
Define expense accounts, taxes, and reimbursement options for each category.

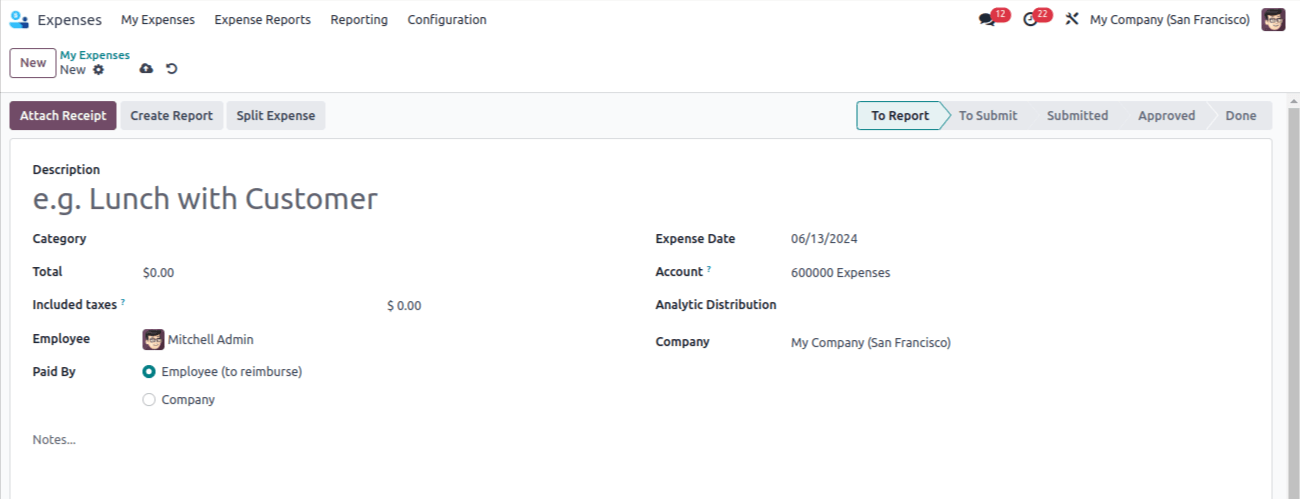
- Go to "My Expenses" and click "New".
- Enter a description, choose a category, and select the employee.
- Optionally, add a date, and account, and attach a receipt.
- Choose who pays: employee or company.
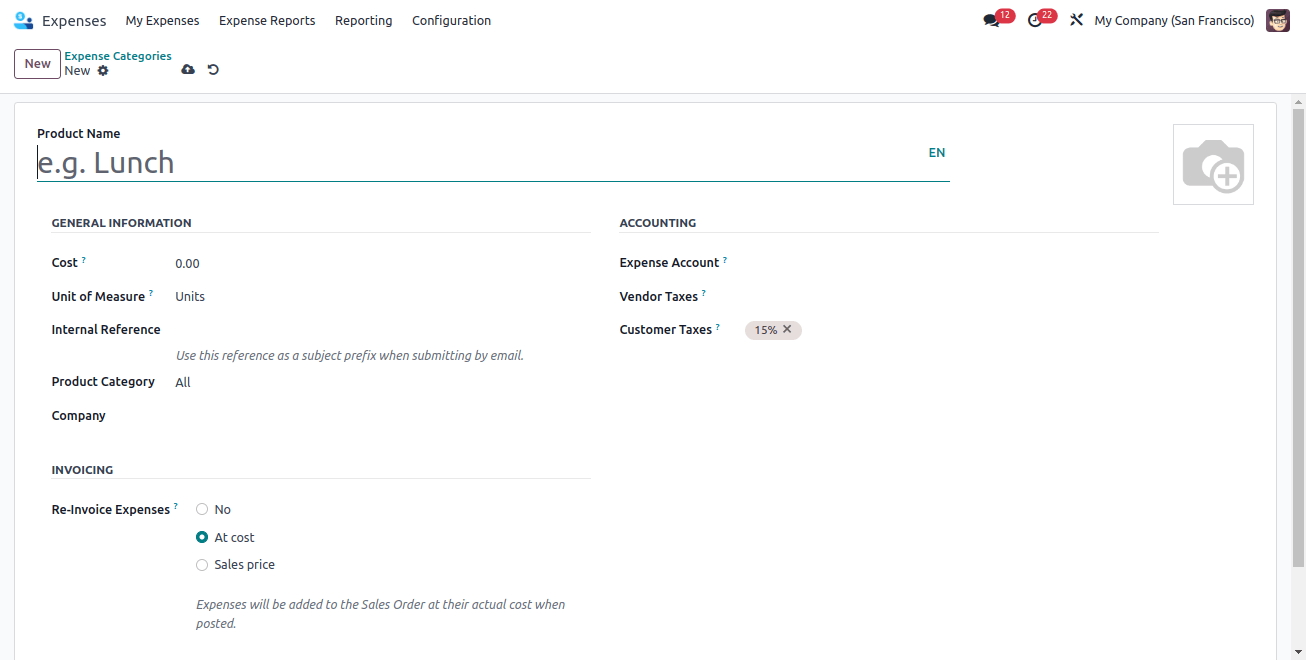
Product Configuration
Here you can link relevant account data to products.
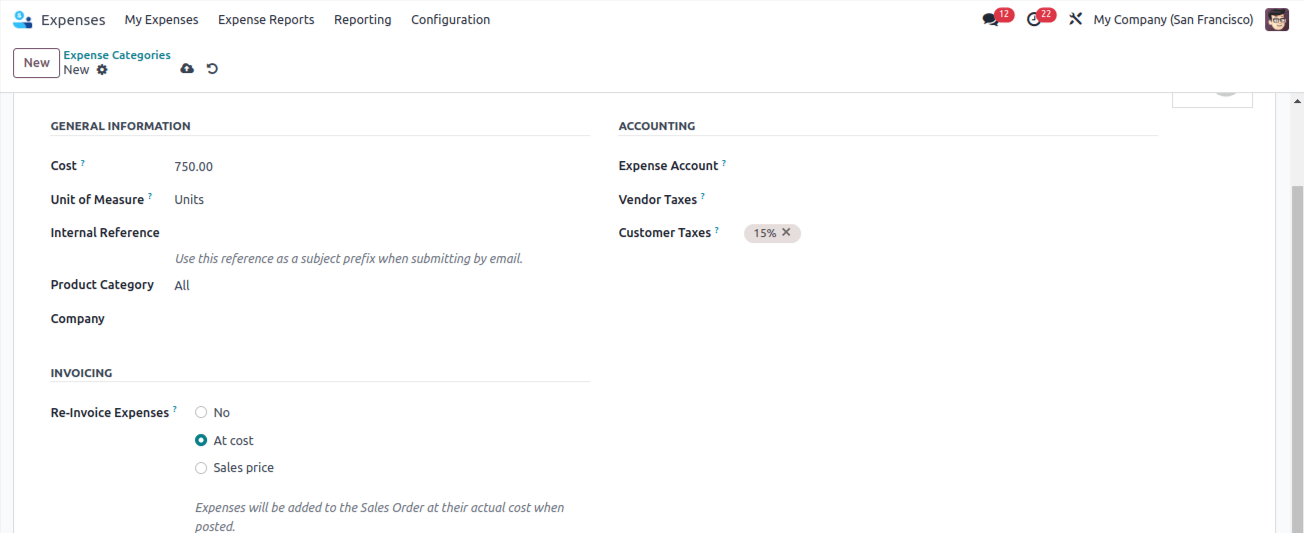
It lets you set reimbursement options ‘No’, ‘At Cost’, or ‘Sales price’.
That's how Odoo 17 simplifies expense tracking and streamlined accounting!
Internal Notes
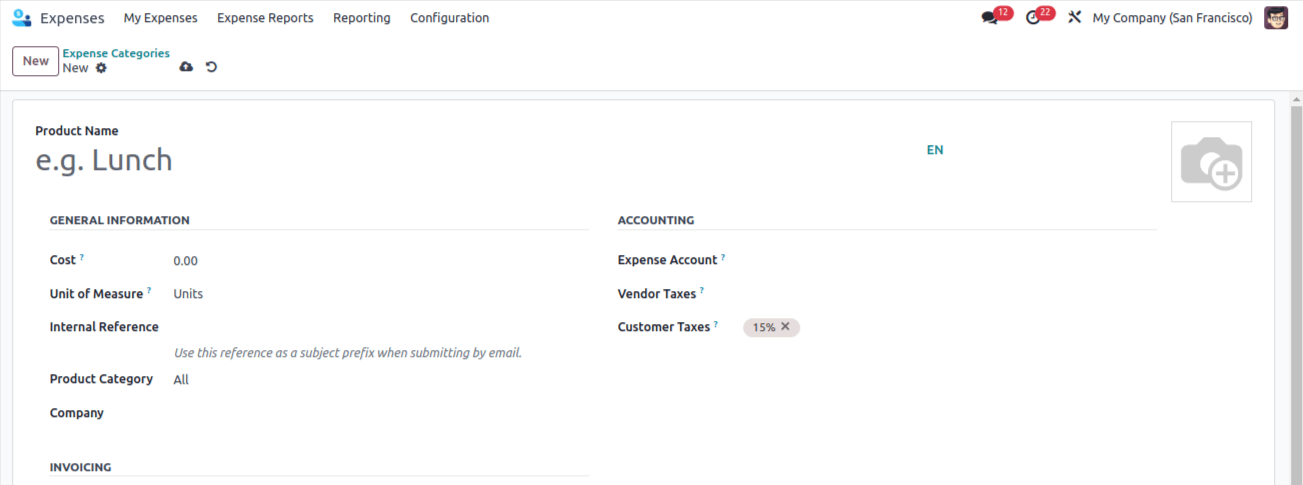
Create a category (e.g., "Field Visit") and set it to:
- Reinvoice expenses at cost (charge the client $750).
- Assign the appropriate expense account.
Save the category for future use.
Creating New Entries:
- Go to "My Expenses" and click "New".
This is where you'll record individual employee expenses.
Adding Details
- Describe the expense clearly.
- Choose the relevant category.
- Select the employee incurring the cost.
- Optionally, add the expense date and relevant account.
- Attach a receipt.
Who Pays?
- Choose who covers the expense: the employee or company.
This clarifies who is responsible for reimbursing the cost.
Let's examine each one in turn
Case 1: Company Covers Costs
The company pays for certain expenses (e.g., travel for client meetings, and communication costs).
These transactions are recorded in a specific expense journal.
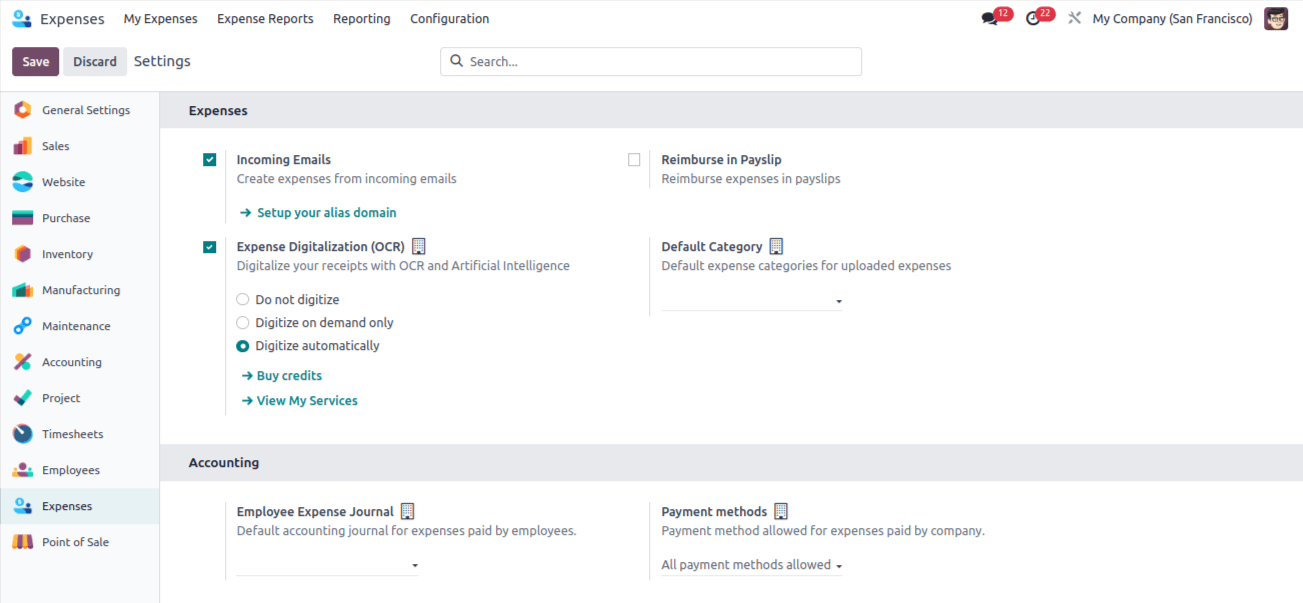
Set the expense journal in Configuration > Preferences > Business Expense Log > Conserve
Company-Paid Example:
This expense is for Mitchell Admin (employee) related to communication with clients (category: "Communication").
Paid By: Company (since the company covers the cost)
Total: Shown on the screen
Customer to Re-Invoice: Select a sales order number if the company wants to bill the client for this expense.

Upload receipts using "Attach Receipt".
Generate expense reports
Go to "My Expenses".
Click "My Expense Report".
Submitting for Approval
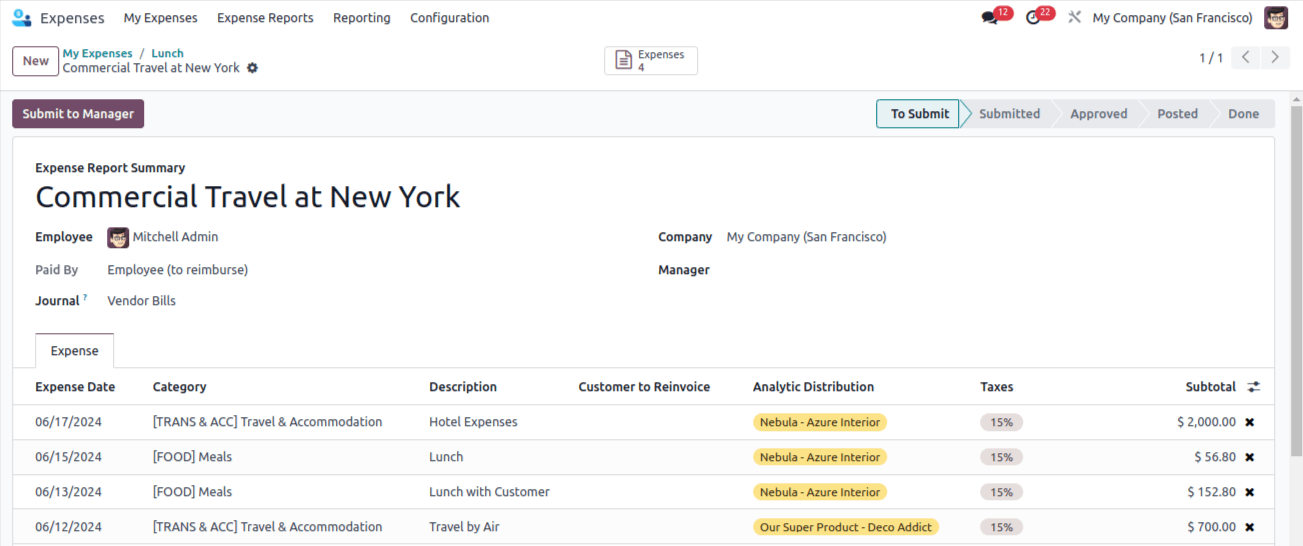
Submit expense reports to your manager for review using "Submit To Manager".
The manager sees an "Approve/Refuse" button to accept or reject the report.
Employee
- Record expenses (description, category, employee, etc.).
- Attach receipt (optional).
- Choose who pays (employee or company).
- Submit for approval.
Manager
- Review and approve/reject expenses.
Upon approval
- Expenses are recorded in the company journal.
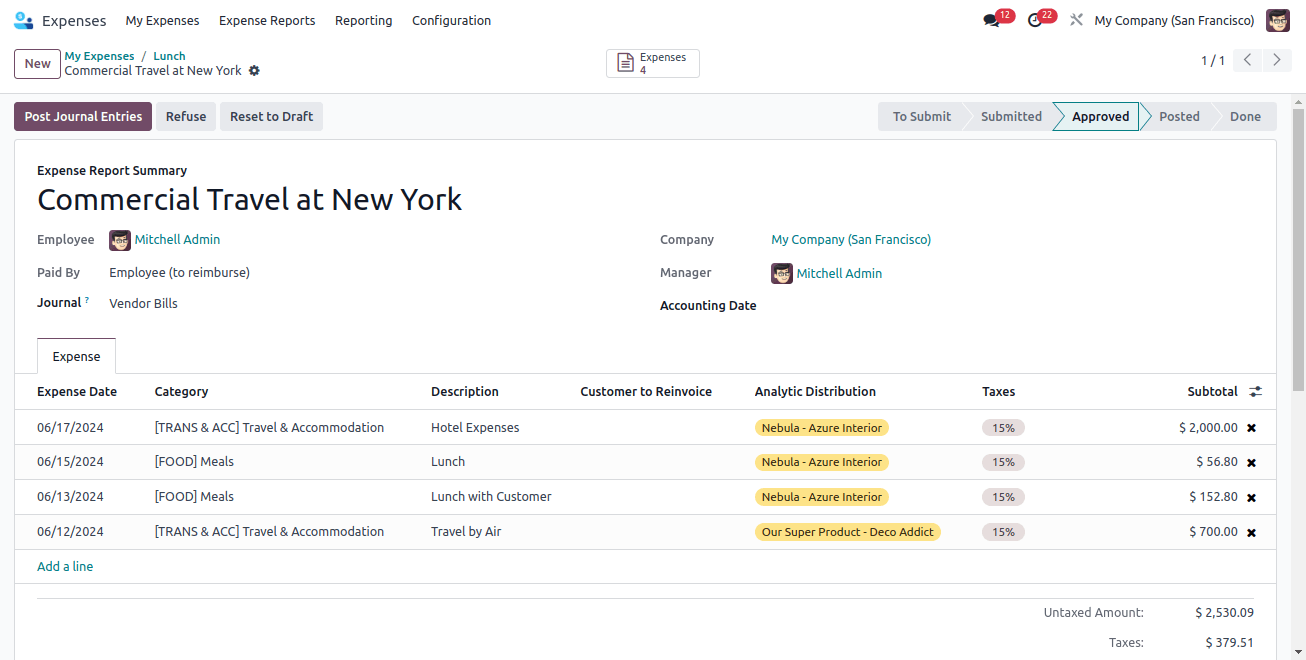
Managers and staff can find it easier to approve and track expenses with Odoo Expenses. This is a clarification;
Employee
- Record expenses (category, description, amount, etc.)
- Attach receipts (optional)
- Specify who pays (employee or company)
- Submit for manager approval
Manager
- Review and approve/reject expenses
Upon Approval
- Expense is recorded in the company's expense journal (defined in configuration settings)
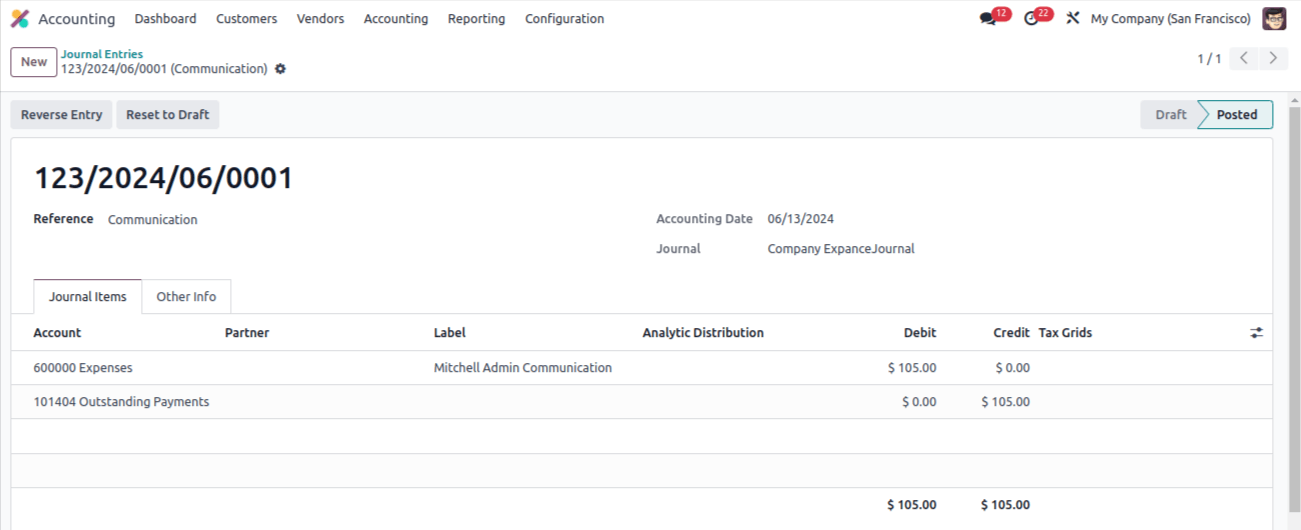
The Odoo journal entry you described reflects a typical expense recording:
Debit: Expense Account (increased expense)
Credit: Outstanding Payment Account (decreased liability)
By opening the journal entry, you can see the exact accounts affected by this specific expense.
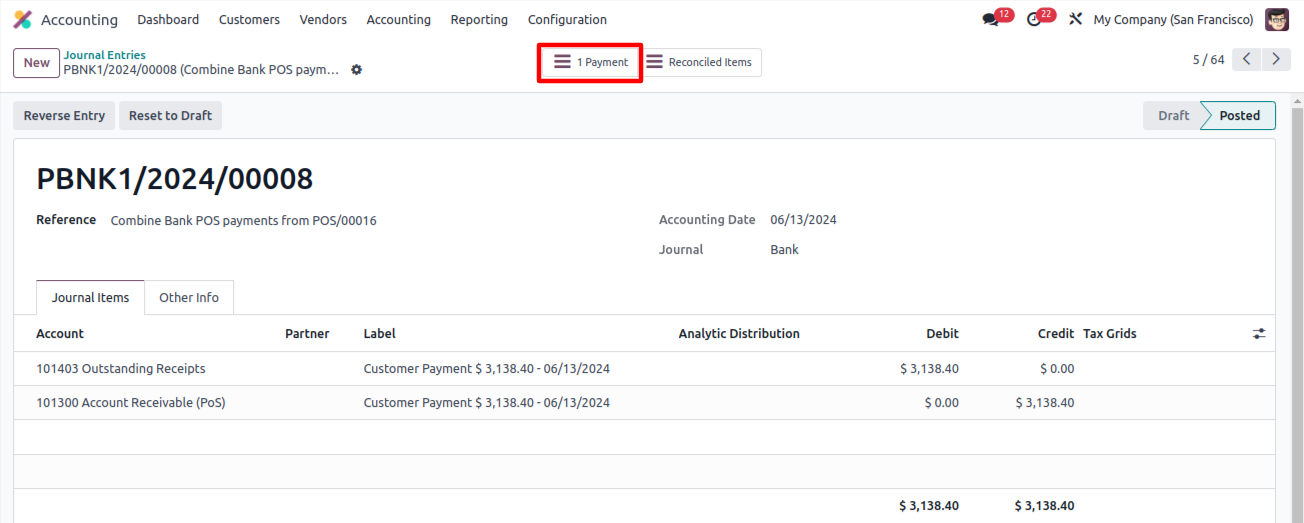
Recording Payment
A "Payment" tab might be available (depending on configuration).
Use this tab to record payment for the expense (if applicable).
Case 2: Employee Pays & Reimbursement
The employee pays for business expenses and needs reimbursement.
Reimbursement options
- Direct Payment: The company reimburses the employee directly.
- Pay Stub Integration: Reimbursement is added to the employee's next paycheck.
Setting Up Employee Reimbursement Journal
- Go to Configuration > Settings.
- Define a new journal for employee expense reimbursements.
- Save the journal configuration.
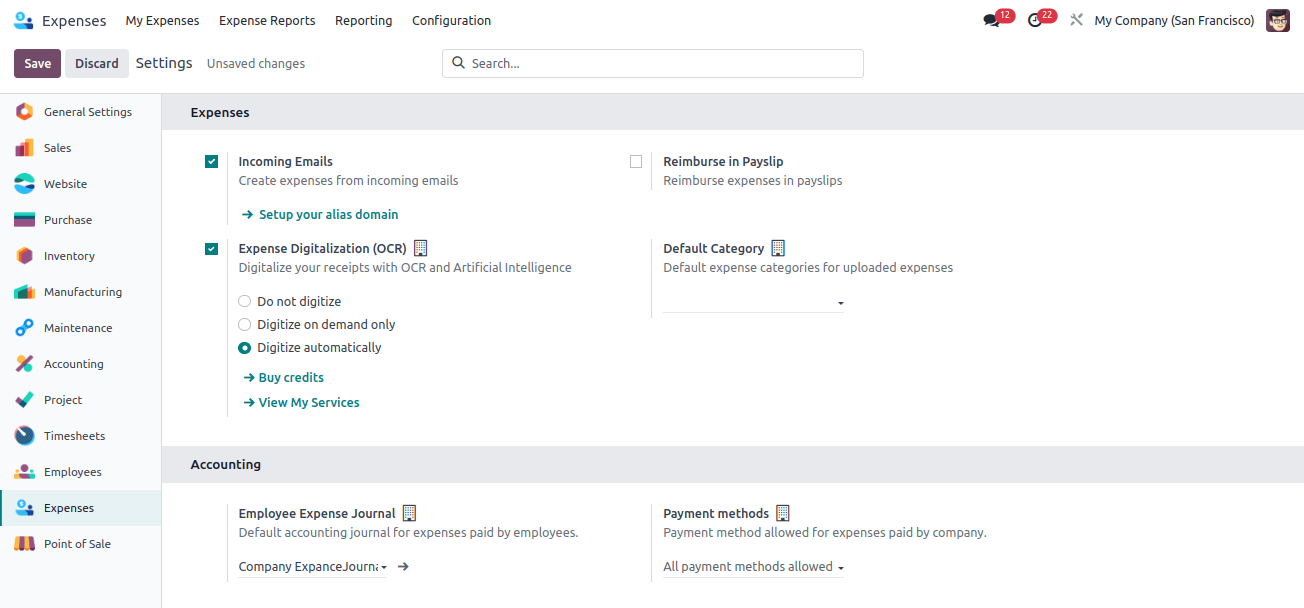
Mitchell incurred a $750 field visit expense (pre-paid by him)
- Create a new expense for Mitchell.
- Select the "Field Visit" category.
- Description: "Field Visit" (clearly explains the expense).
- Amount: $750 (automatically populated based on category).
- Attach receipt (optional).
- Click "Create Report".
This report will be submitted for approval and reimbursement if Mitchell pays upfront.
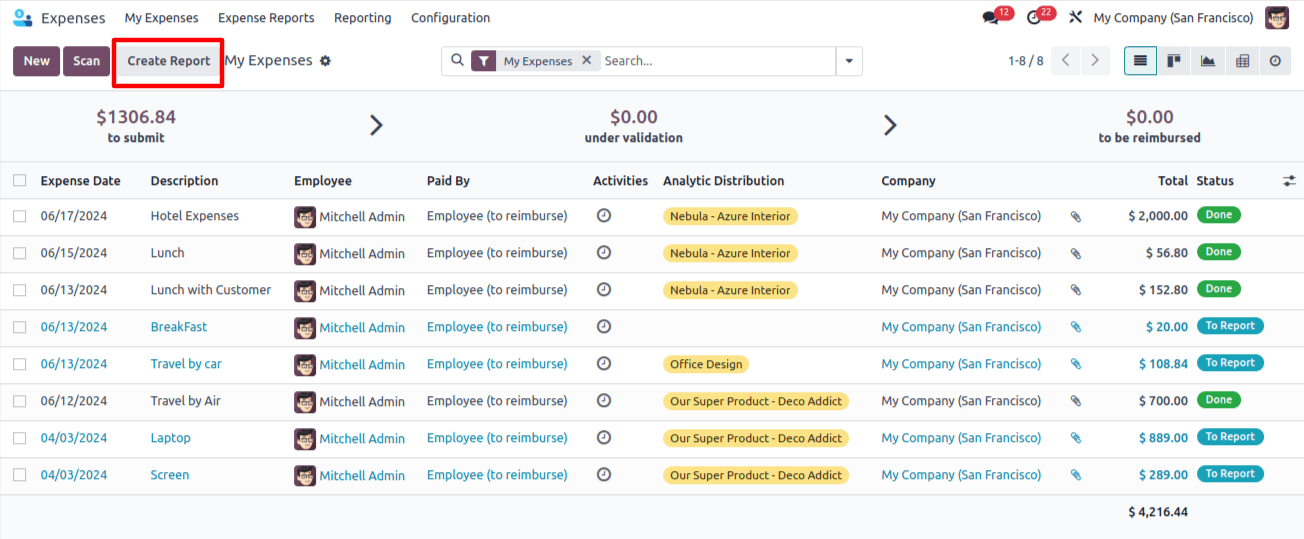
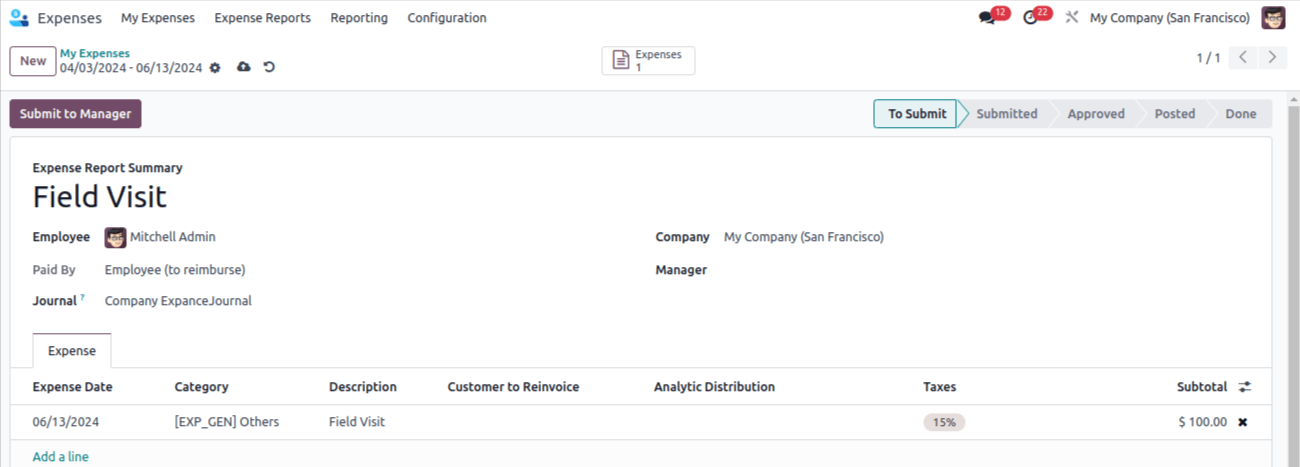
The report is created and then sent to management. After verification, the management will approve the report.
The user can post journal entries for an approved expense report.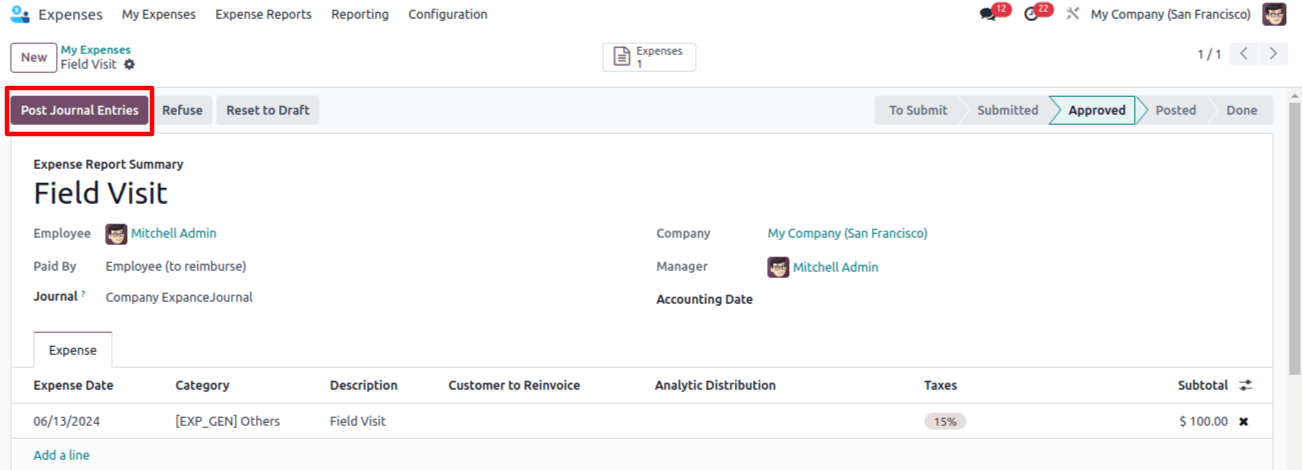
In this case, the report skipped the Done phase and moved directly to the Posted stage. It is designed to be reimbursed to the employees as they are the ones who pay the amount. Click the Register Payment icon as a result.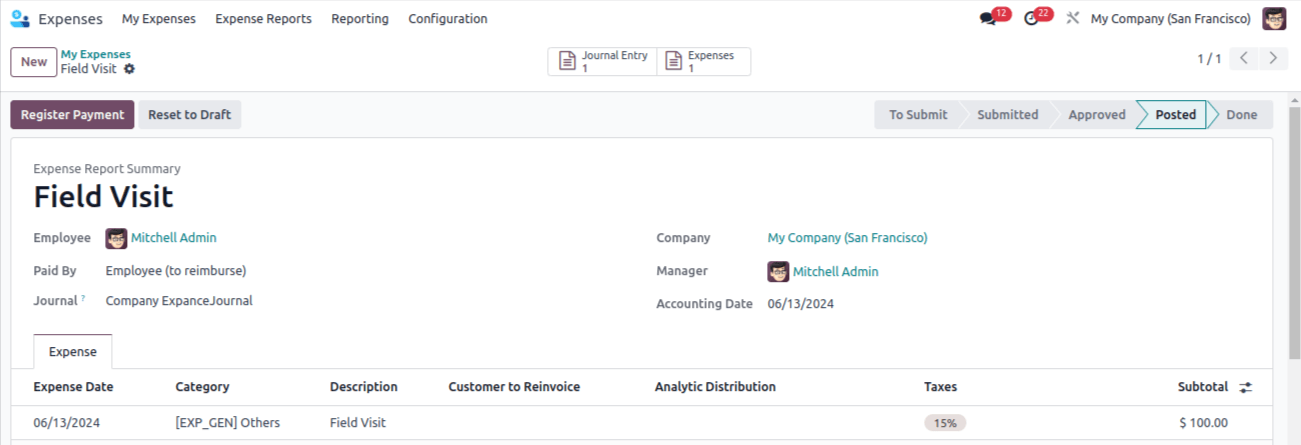
There, you can include a diary along with the payment method, amount, and dates. The expense description is included in the note. Click "Create Payment" to proceed.
Following that, the cost is moved to the Done phase, when a payment for the ribbon is made. The journal mentioned in Configuration, Settings is the same one.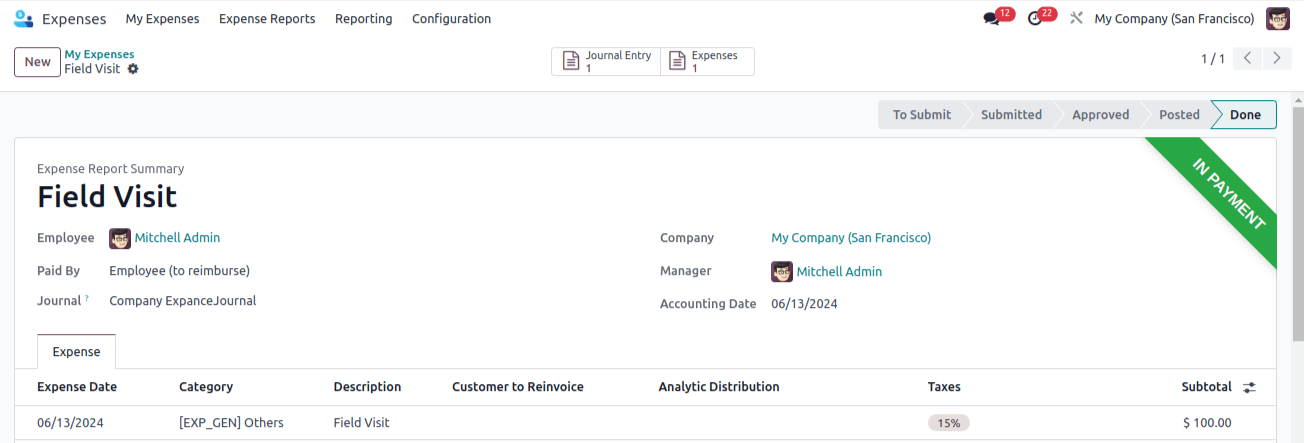
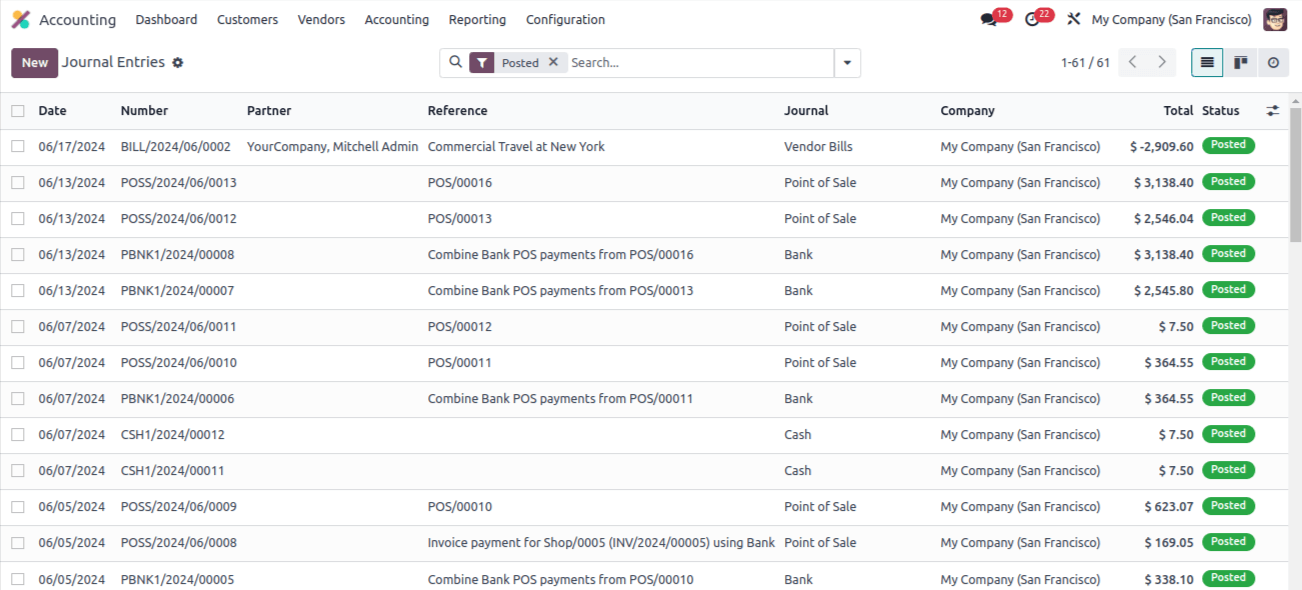
Let's examine the journal entry from the Accounting module once more. In this case, the sum is shown as a negative number. Because the company pays the employees for it. Now let's get going.
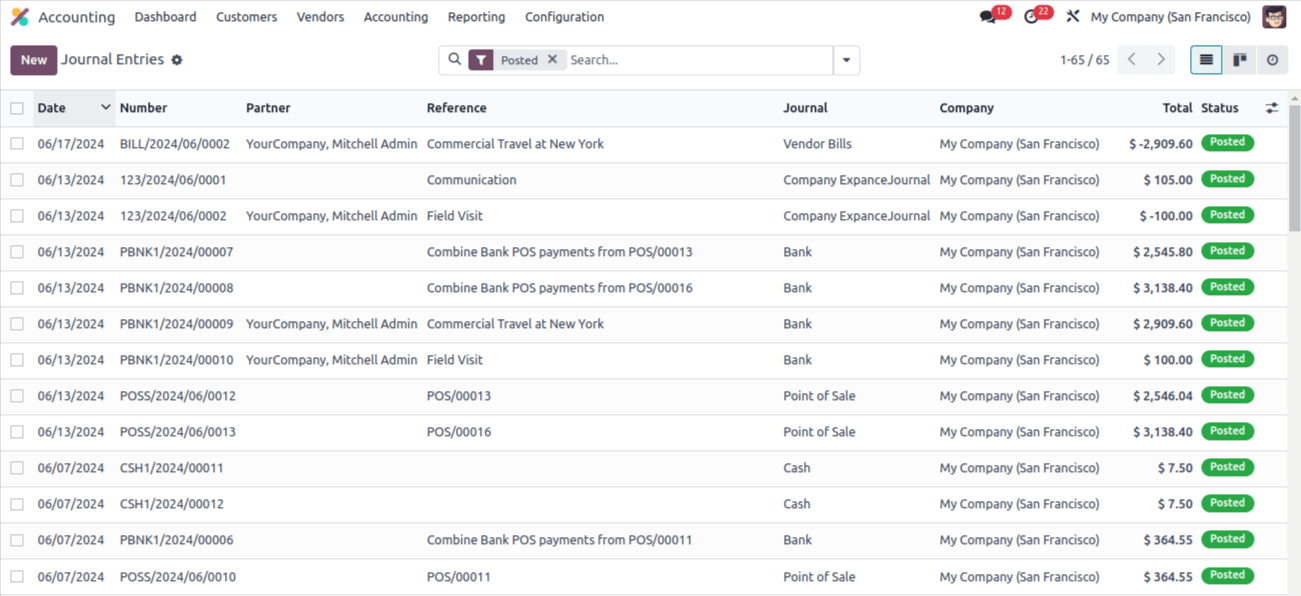
The employee must pay for this. In this instance, as the Journal entry tab shows, there are effects on the Expense Account and Account Payable.
As mentioned before, the employee might also get paid back for the out-of-pocket expenses on their next payslip. Effective expense management is made simpler with the help of the Odoo Expense module.
Odoo Development simplifies expense management for both employees and your company in Odoo 17.It is now simpler to authorize staff expenses and maintain correct spending records thanks to this functionality.

