Another benefit is it helps track tips for your employees fairly. This is important for good record-keeping and keeping your team happy!
- Save time at checkout: Add new customers and their info right at the register, no need to switch screens.
- Get all the details: Add things like phone numbers, email addresses, and more for your customers.
- See what you need: Choose to show only the main customer or all the people connected to them.
- Full control: You can also manage all your customer information in a separate area.
This guide is here to help you keep track of your customers easily! We'll show you the best way to enter and organize all their information in one place.
Customer Configuration
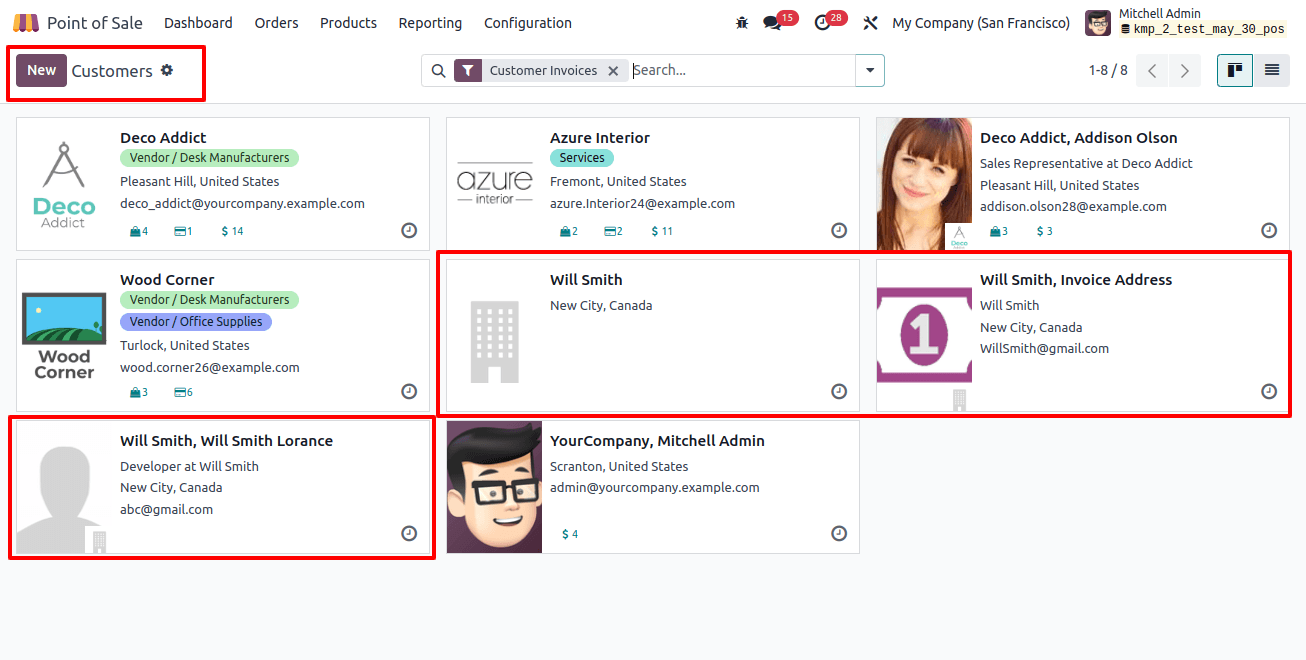
To add new customers or see your existing ones, go to "Orders" and then "Customers" on your POS system. This will show you a list of all your customers, including their name, address, email, phone number, and anything else you've added. (This might look like a bunch of cards, like in the picture below.)
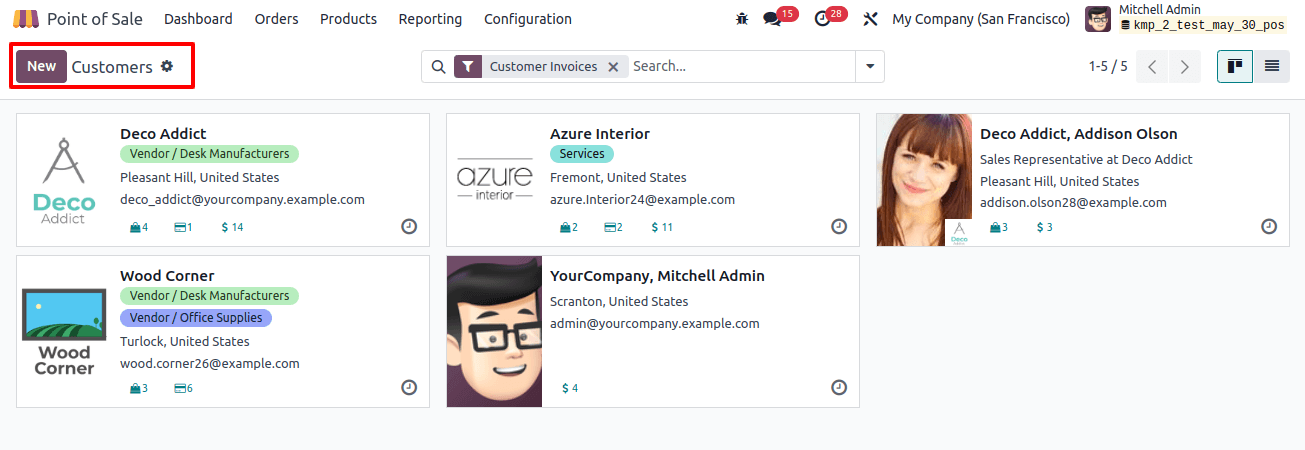
You can also see your customers differently. Click the list icon (it looks like lines) in the top right corner. This will change the view from cards to a list.
Adding a New Customer Data
To add a new customer, click "New." This will open their profile where you can enter all their information. It's like a filing cabinet with different sections for things like contact details, sales history, and any notes you want to keep track of.
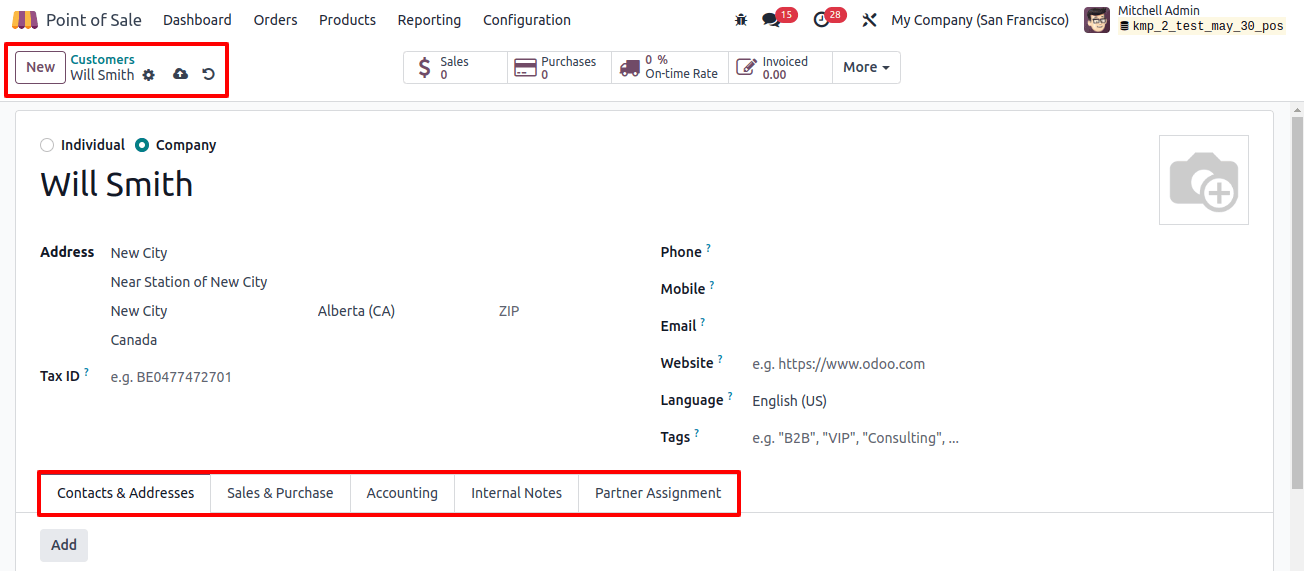
Let's add some details about the customer, our new customer.
First, choose if she's an individual or represents a company. Then, you can add things like customer name, phone number, email, and website. Existing customer addresses will pop up to save you time!
We'll cover the other sections (like notes and sales history) later.
Contacts & Addresses
Some customers might have different addresses, like a home and an office. You can add these extra addresses for customers here.
Click the "Add" button next to "Contacts & Addresses." This will open a pop-up window where you can enter the address details.
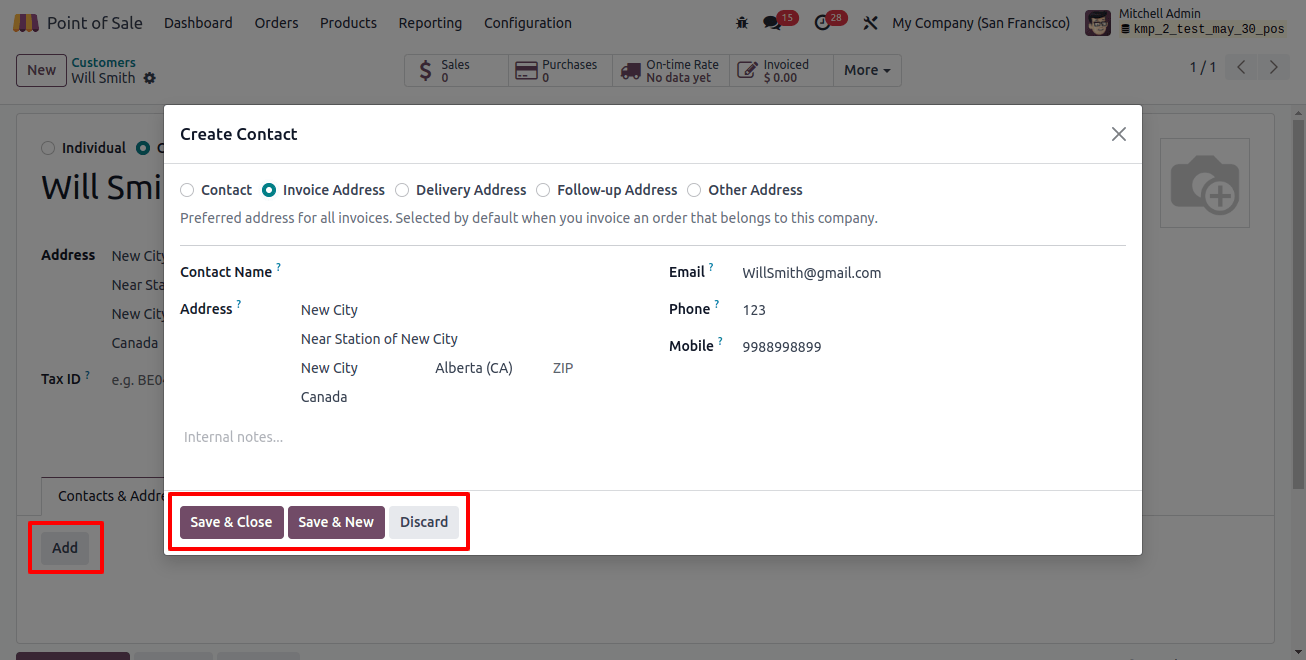
You can easily add different addresses for Jennifer, like her home address, billing address, or any other place you need to send things.
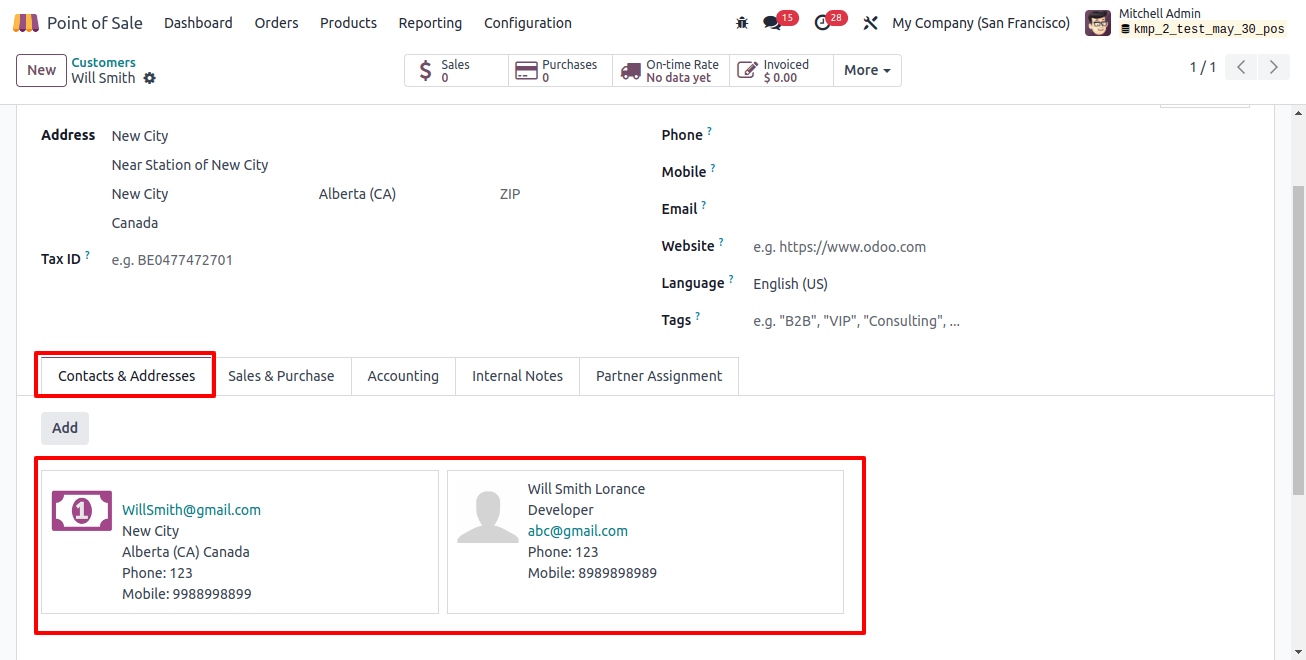
Just choose the type of address (like "Home" or "Work") from the list, and fill in the details. When you're done, click "Save & Close" to keep the information or "Save & New" to add another address quickly. You'll see all the saved addresses listed here.
Sales & Purchase Tab
Here we can see payment details, delivery method, POS information, and fiscal details inside the SALES, PURCHASE, POS, FISCAL INFORMATION, and MISCELLANEOUS sections as shown in the following image.


The "Sales" section lets you add things related to selling to customers. This might include things like the salesperson who usually helps her, how she normally pays, and how you typically deliver things to her.
In the PURCHASE area, you can set up how you buy things from this customer. This includes who will buy from them (Buyer), how you'll pay (Payment Terms & Methods) if you want reminders for receipts, any special pricing deals you have with them, and what currency they use.
In the checkout area (point of sale), you can choose a barcode to easily find this customer.
In the TAX INFO section, you can specify the customer's tax details.
In the LAST DETAILS section, you can add the customer's company ID, ID number (if applicable), a reference code (if you use one), their website address, and any other information you need.
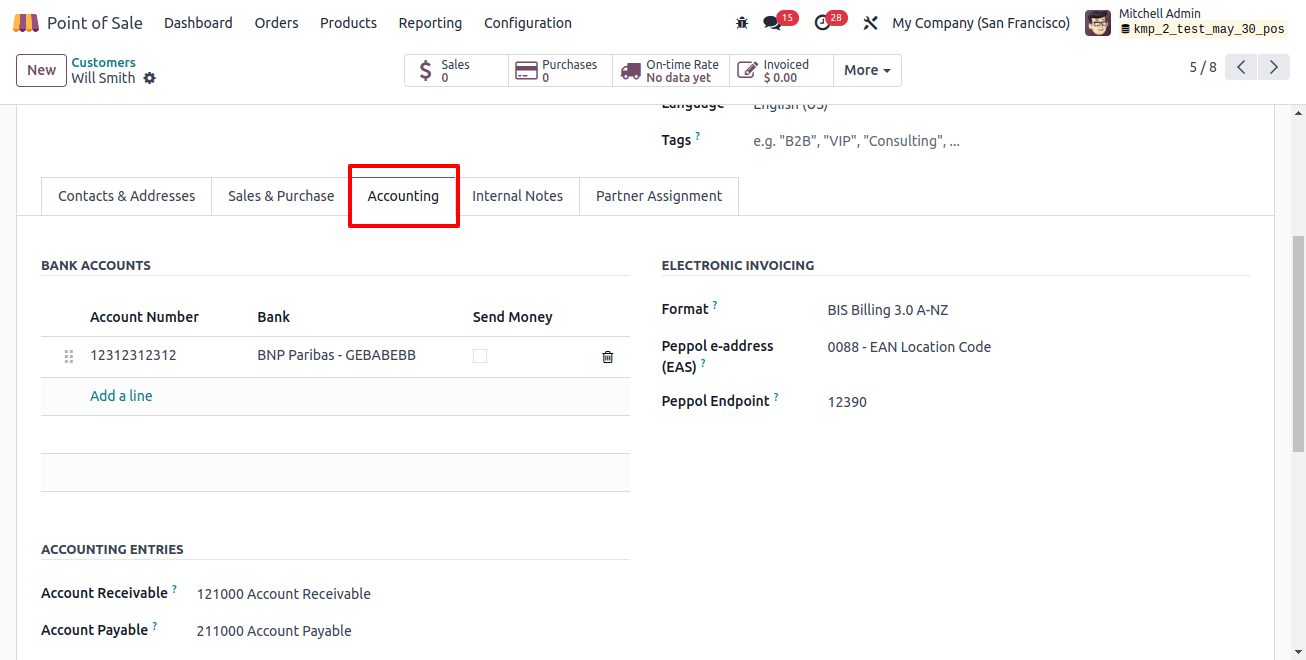
Accounting Tab
Set up how you pay for things:
- Enter your bank details for payments and deliveries.
- Or, choose an existing company account to use.
- Keep your records accurate by updating this information whenever needed.
Step-by-Step Guide: Analyzing Product Margins & Costs in Odoo 17 POS Click Here
Clicking the "Add account" button in the "Bank accounts" area will open a window where you can enter details about your bank accounts, like:
- Bank name
- Account number
- Account holder name
- Company name (optional)
- Currency
- Routing number (if applicable in your country)
See the example below for reference.
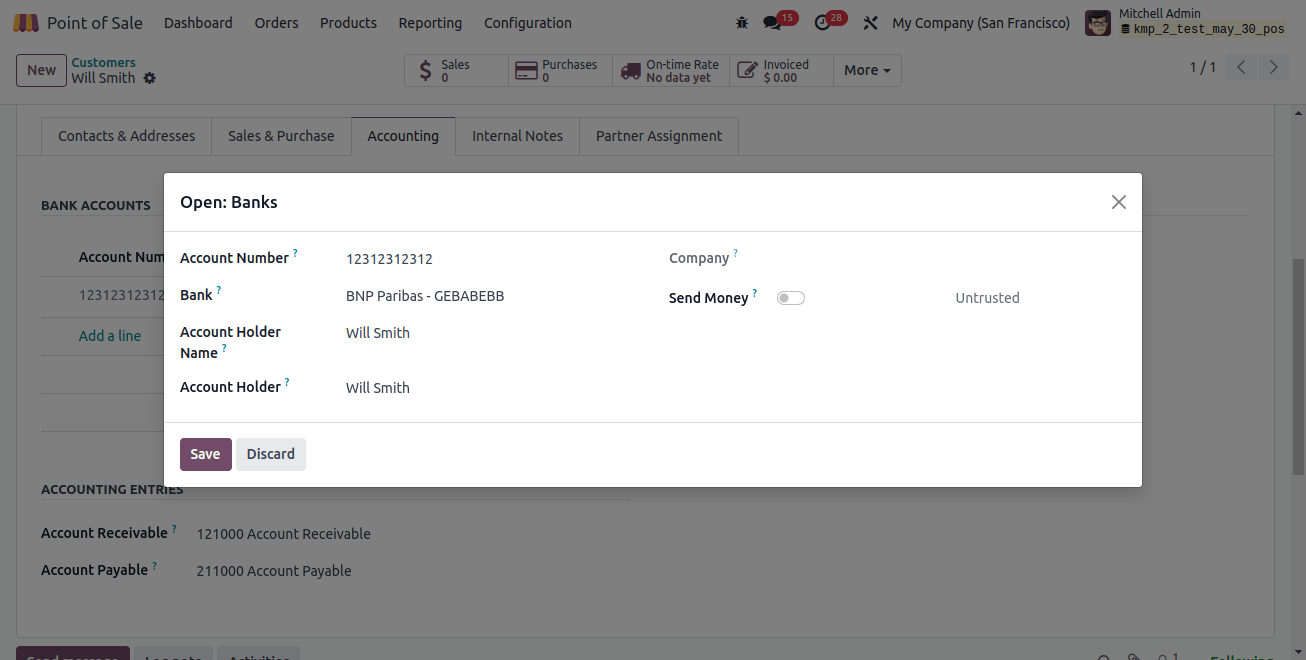
- After you've entered all your bank info, click "Save & Close" to save it.
- Next, under the "Accounts" tab, fill in the details about your accounts, like "Accounts Payable" and "Accounts Receivable."
- If you use electronic invoicing, you can also add those details here, like the format, Peppol e-address, and endpoint (these are optional).
- Finally, you can enter your Legal Identity Number (LEI) in the "Miscellaneous" area and save everything using the save button.
Internal Notes
In the "Notes" section, you can add any important information about sales, delivery, or your customer.
Partner Assignment Tab
Odoo's "Partner Assignment" feature is useful for companies that work with different partners in various ways. It lets you link specific partners to customers.
This helps your team work together better and communicate more effectively by keeping track of who's working with each customer.

The "Partner Assignment" tab lets you add details that help your team work together with partners, like activation status, reviews, and location (as shown in the picture above).
Membership Tab
Odoo lets you manage your customer memberships under the "Membership" tab.
Here, you can control their subscription plans, including membership levels, renewal dates, any special benefits they get, and whether their subscription is active.
This helps you keep track of everything, offer members the right services, and manage memberships efficiently.
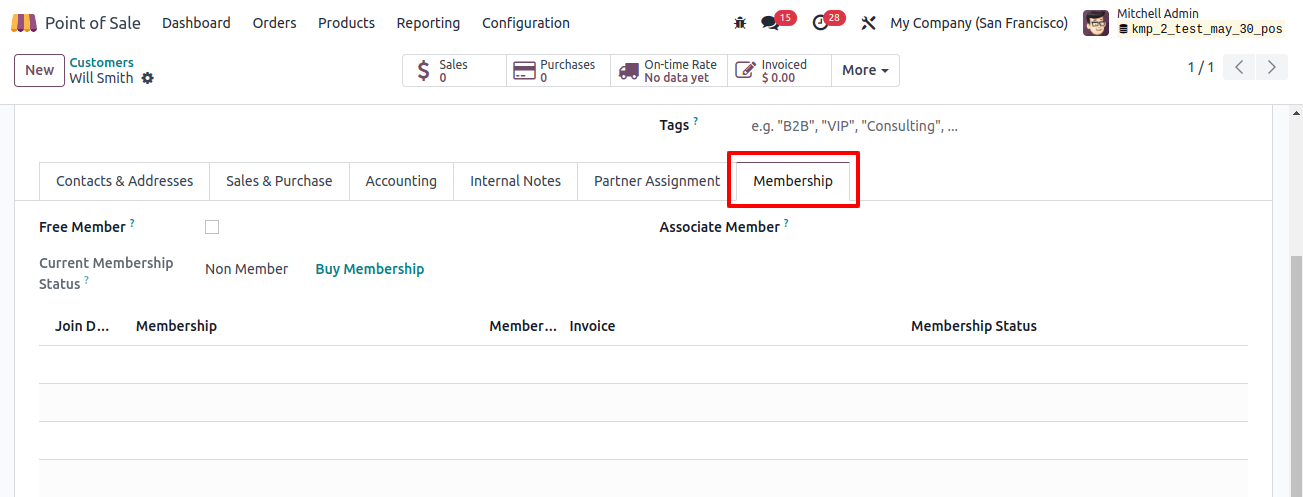
In Odoo, you can give a customer a free membership by checking the "Free Member" option. If the membership allows them to include someone else (like a dependent), you can enter their name in the "Associate Member" field.
Last, click "Buy Membership" to make the customer a member. Enter the start date, and any membership fee, and choose an invoice option.
In this example, we are making them a Free Member. Don't forget to save the customer information after filling in all the details.
You'll then be able to see the new customer on the Customer dashboard, like in the picture below.
Let's see how to find this customer when making a sale at the checkout (point of sale).
Invoicing the Customer in a Sales Session
To create a new sale, open the Point of Sale dashboard. Click "New Session" to start selling, and choose your shop or restaurant. Then, you can try invoicing the customer we just created.
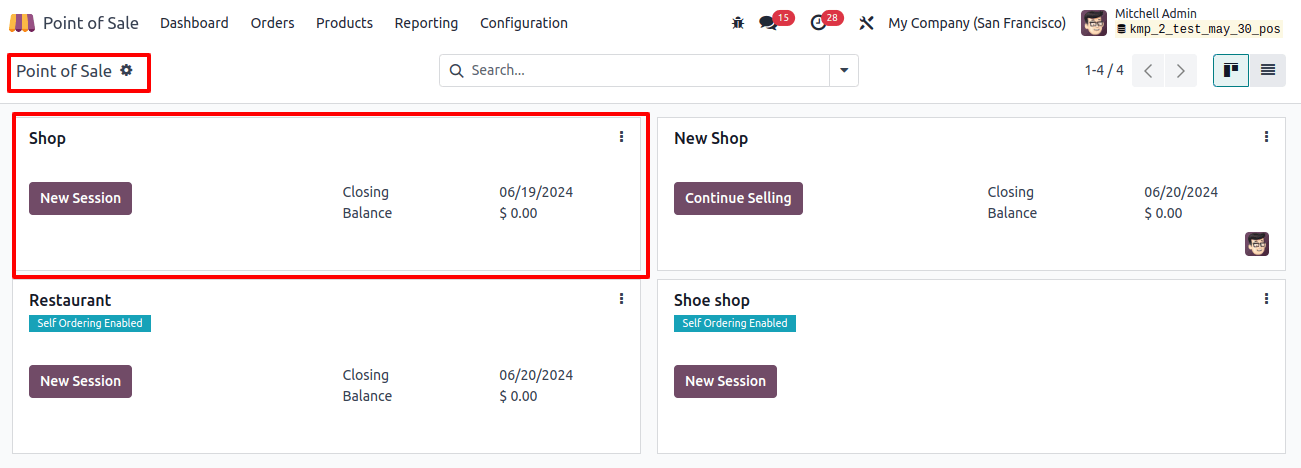
Once you've opened your shop in the Point of Sale, pick the products you want to sell from the "Orders" section (see picture below).
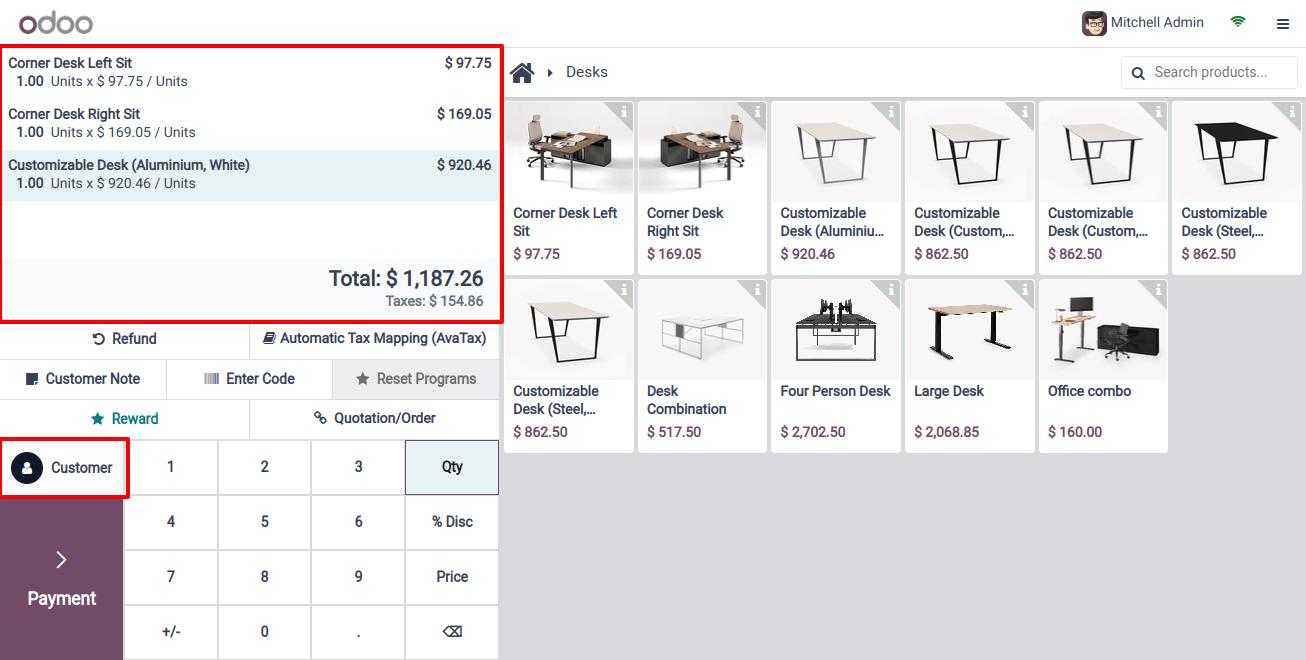
After picking the products, click the "Customer" button on the left side of the screen (like in the picture below).
This will show a list of your customers, including their name, address, contact information, and account balance.
you can choose the customer you want to sell to by clicking on their row.
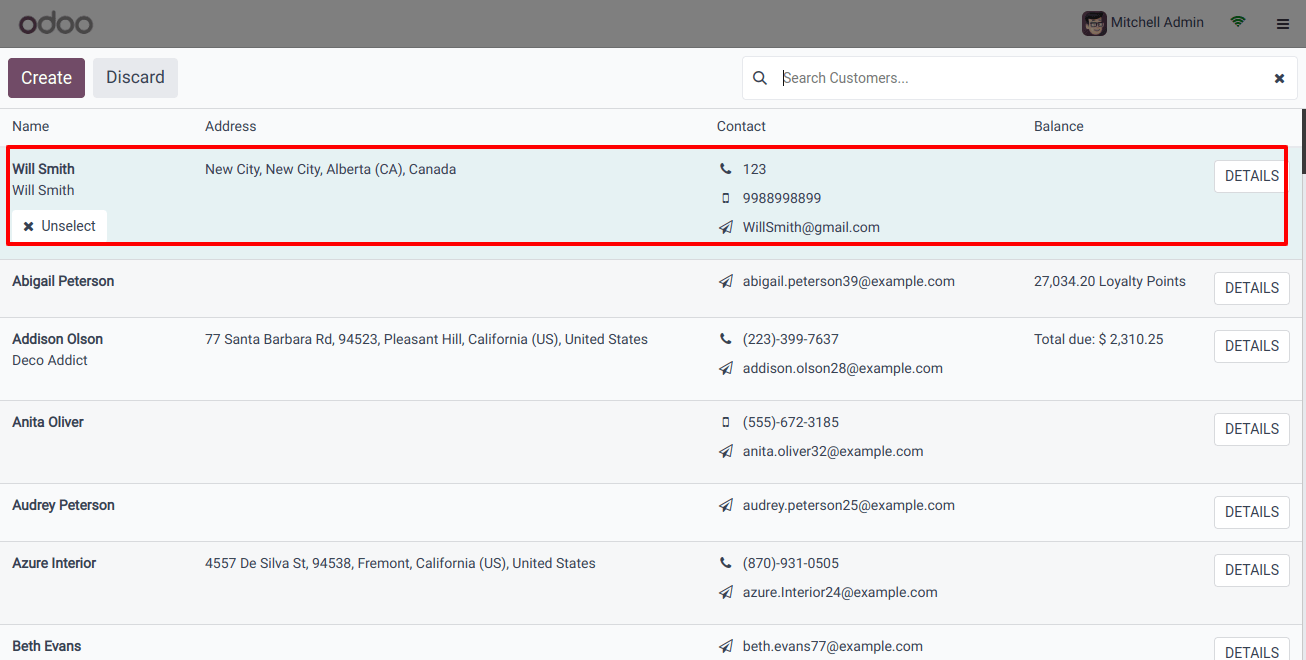
Once you've chosen a customer, you can click "Unselect" if you need to pick someone else. The "DETAILS" button lets you see all their information in more detail.

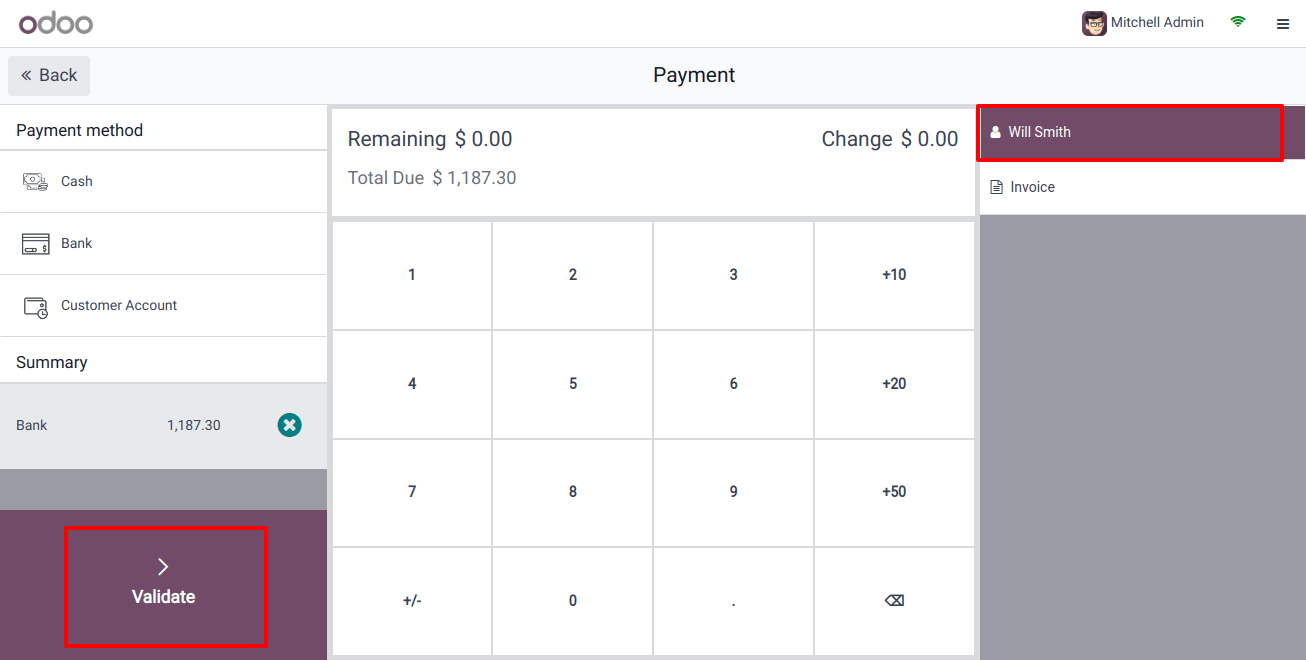
After picking a customer, you'll see them added to the sale. Now you can take their payment by clicking the "Payment" button. Once you've entered the payment details, click "Validate" to confirm the payment.
Odoo lets you:
Set up meetings: Schedule meetings with your customers directly within the platform. You can add details like the meeting topic, start and end times, reminders, and even video call links.
Manage deliveries: Keep track of everything you need for smooth deliveries. Use the "More" menu to view vendor bills, documents, and partner ledgers.
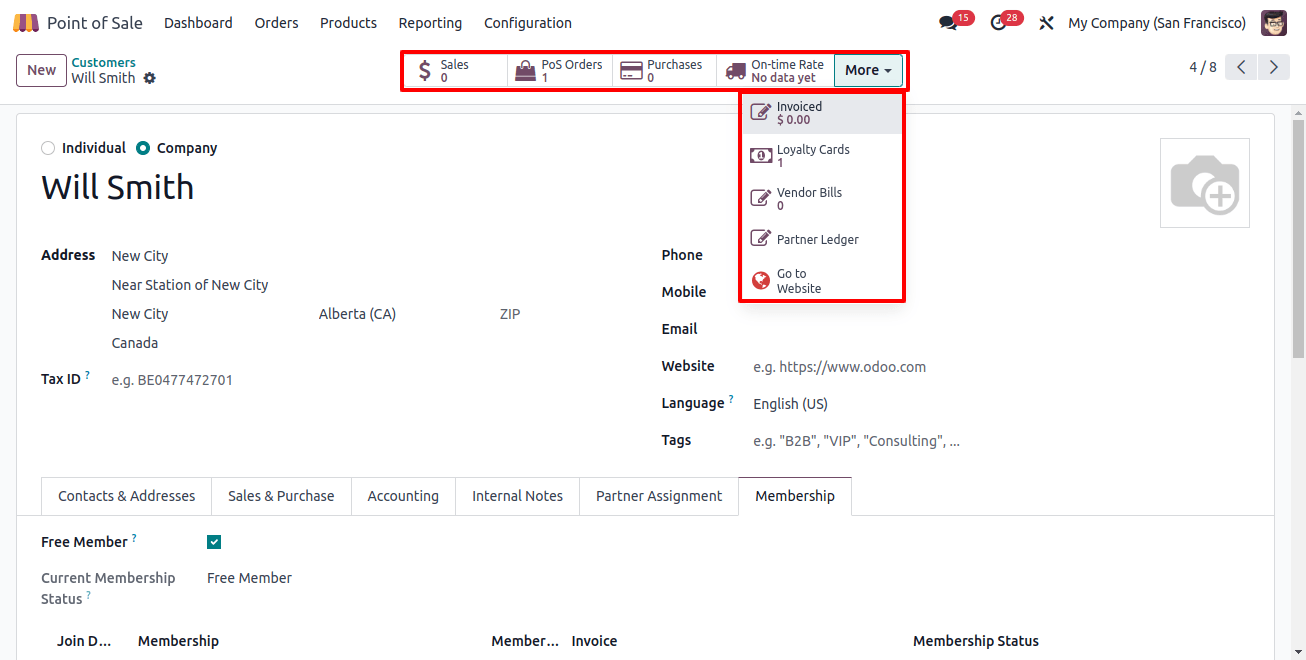
Double-check everything before saving! From the customer's page in Odoo, you can see all their sales, deliveries, and any meetings you've scheduled.
Once you're comfortable with these steps, you'll be a pro at managing customer information in Odoo.
This will help your company run smoother and give you the confidence to manage your customers like a champ!

