Accounting journals are important records for transactions organized by date, such as client invoices, credit notes, purchase invoices, and bank transactions.
Each journal has its own presentation and field order, and the default sequence determines automatic numbering for accounting entries.
Default credit and debit accounts enable the software to generate counterpart entries automatically; nevertheless, some journals require debit and credit accounts.
To avoid manual counterpart formation, a related bank account should be included in the default debit and credit accounts.
Declaring a journal as centralized allows for global counterpart entries for that journal and time, which can be used to set a centralized credit and debit line for each entry. This can be useful when posting the first entries in a scenario diary.
Steps To Create Custom Journals in Odoo 17 Accounting
Configuring Journal Entries
To create and maintain journals in Odoo 17 Accounting, select the ‘journal’ option from the ‘configuration’ menu dropdown list. When you pick journals from the Accounting field, a screen with preloaded journals in Odoo will appear with their respective.
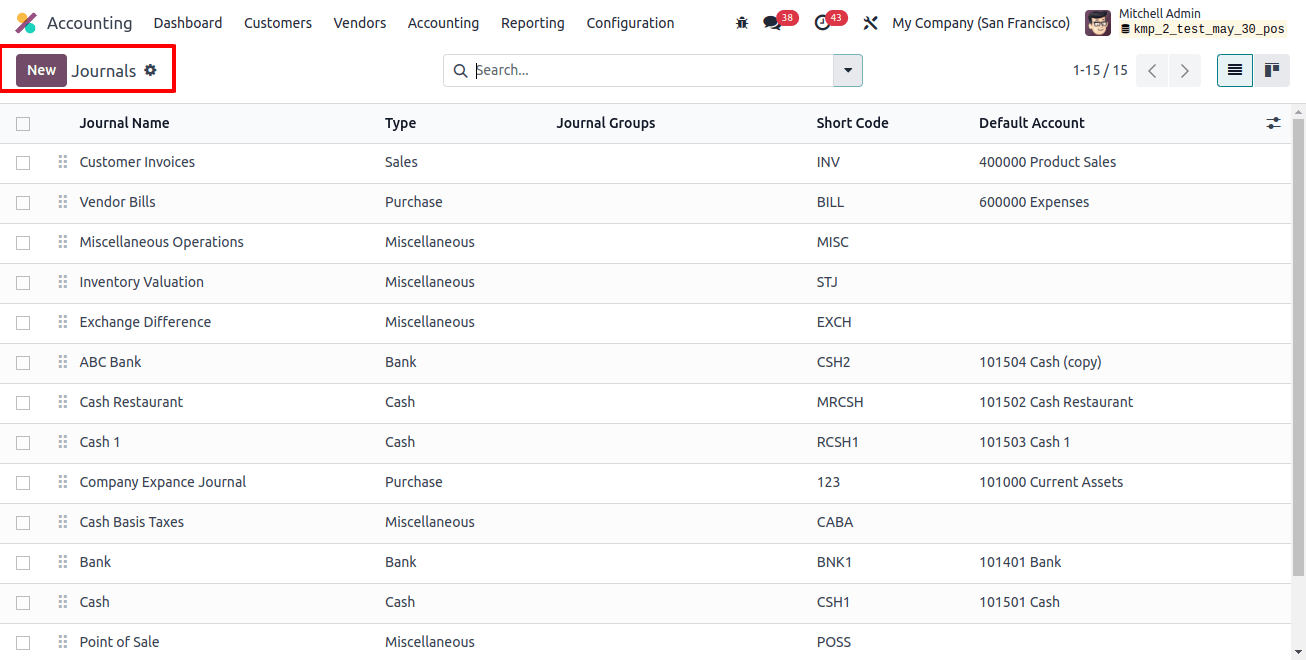
You can add and create a new journal in Odoo using the Journal configuration form page. The journal’s name should reflect the items it will maintain.
Journal administration is simplified by allowing you to choose the preferred journal type from a list of alternatives in the ‘Type’ field. This list contains sales, purchases, cash, bank, and others.
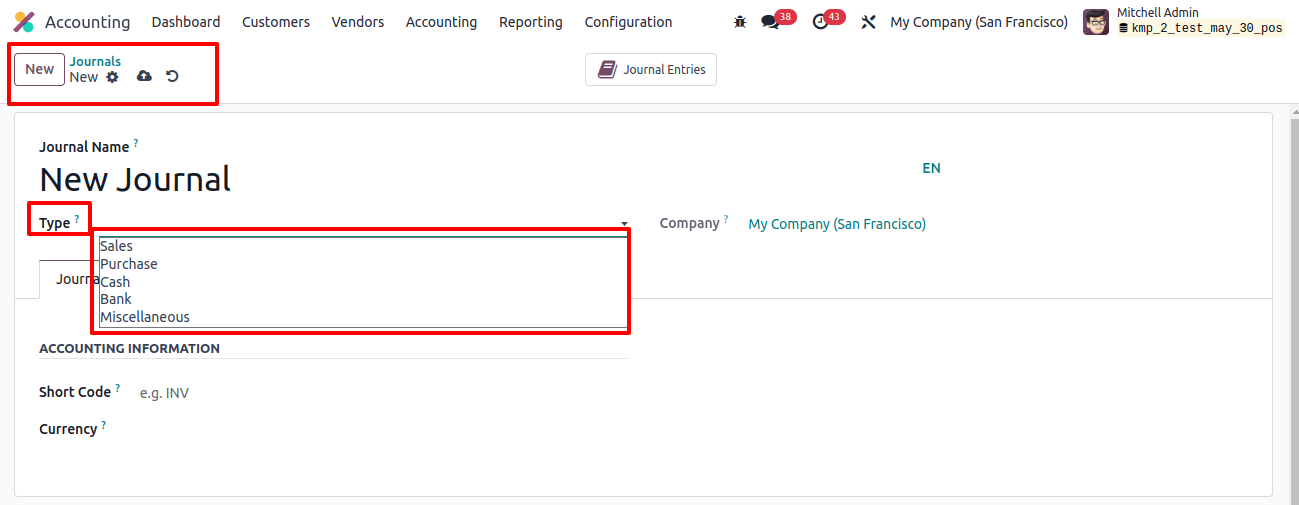
The sales journal manages client invoices, the purchase journal posts vendor bills, the cash journal records daily transactions and payments, the bank journal uploads bank statements, and miscellaneous journals manage additional entries.
These journals are required for the accurate tracking and updating of transactions in various financial systems.
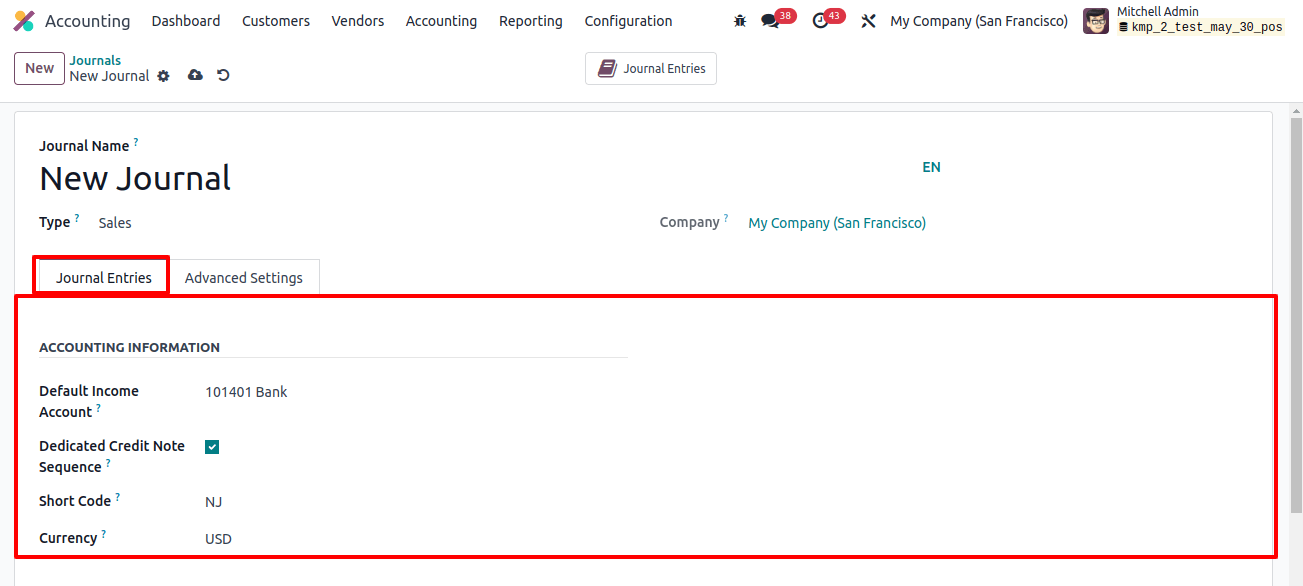
Choosing the chosen journal type will modify the configurations. The journal entries and advanced settings tab sections will also alter depending on the selected type. For example, if you select the sales journal type, the setup will be displayed.
Journal Entries
Select the ‘Default Income Account’ and click the empty field next to it to enter accounting information for a certain journal type.
If you do not wish to share credit notes and invoices from this journal, enable the ‘Dedicated credit note sequence’ option. Also, you can select a ‘Short-code’ for the Journal and a currency from the ‘Currency’ section, as shown in the image below.
Advanced Settings
Once the changes are complete, go to the Advanced Settings tab. You can configure control access, generate invoices via email, use electronic data interchange, communicate payment information, and track client payment options.
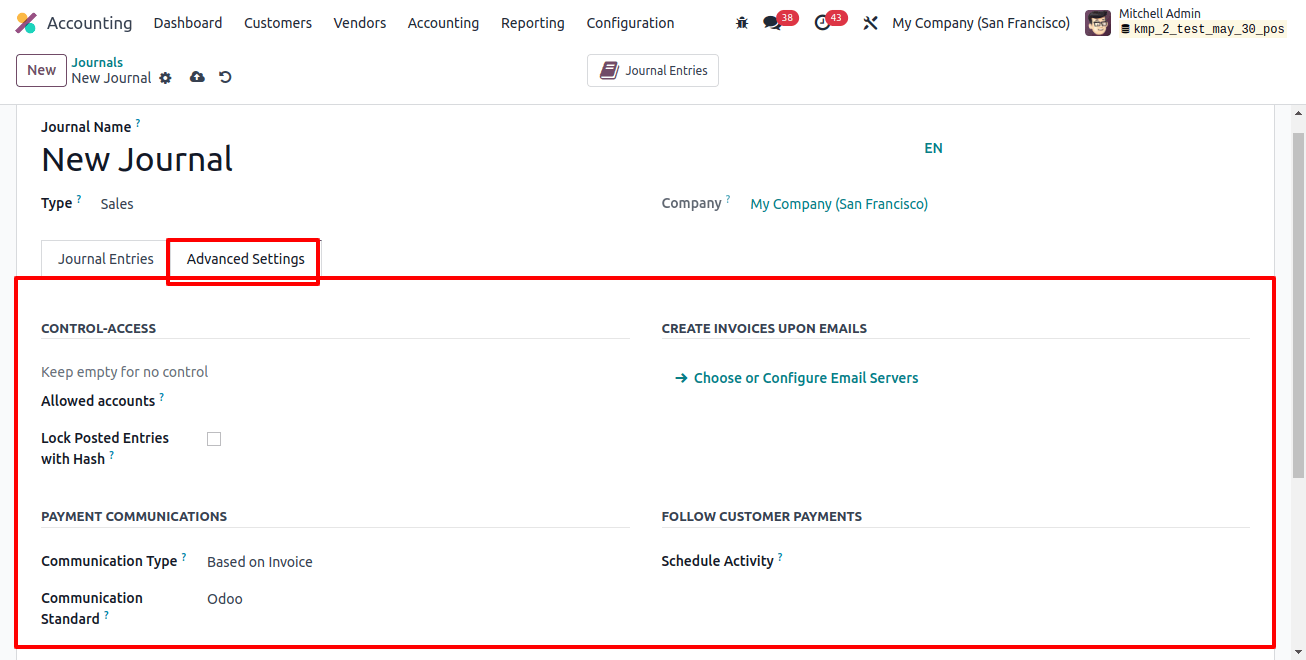
This setting allows users to schedule follow-ups for customers and send them automatically if they miss the payment deadline. To manage cash flow, users can create an activity user and an activity summary.
You can choose the communications type in the payment communication section. Based on the county, the alternatives are ‘based on invoice’ or ‘configure the email server.’ Configuring invoice creation based on email helps to preserve cash flow in the business.
After amending the relevant form fields, click the save icon to save your updated journal data in the Odoo accounting database. Then, we can test the process of making an invoice with the above-mentioned journal and its features.
Creating an Invoice
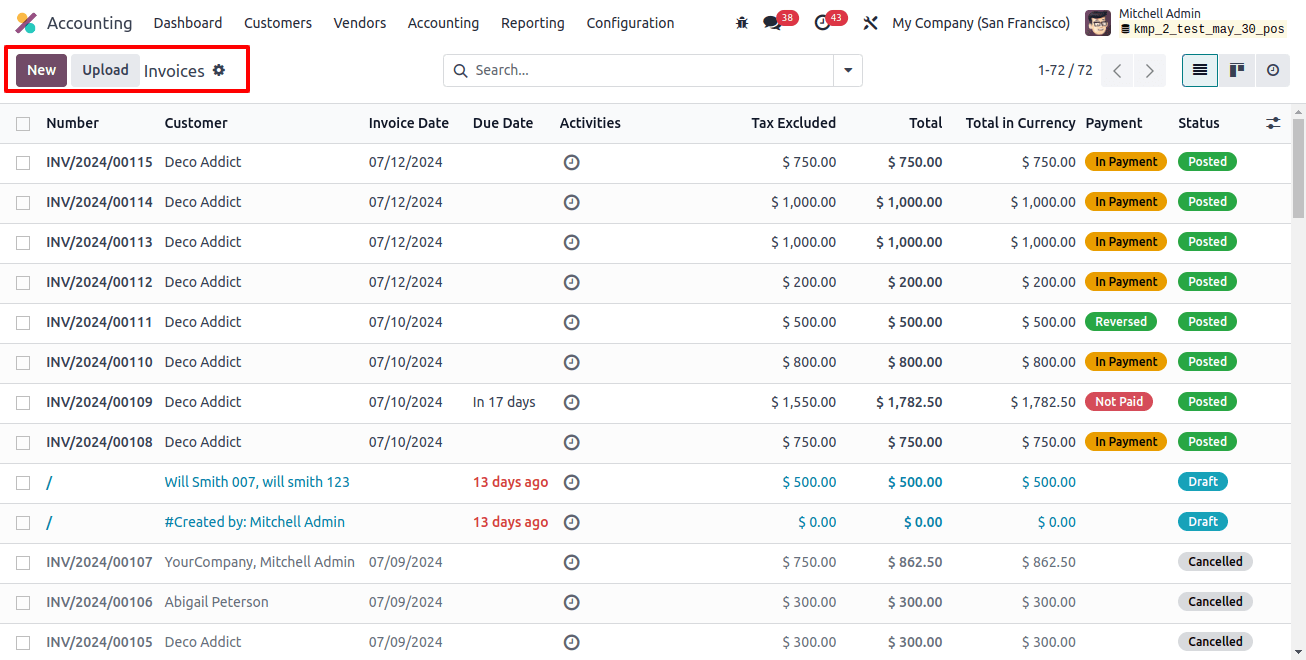
To generate an invoice, go to the accounting module dashboard and select the ‘invoices’ window under the ‘customer’ menu. A list of invoices will appear, and you can open a new configuration form by selecting the relevant button.
Fill in the right fields in the invoice generation window, including customer name, delivery address, invoice date, payment reference, due date, and journal. To get an overview, use the external link to view journals.
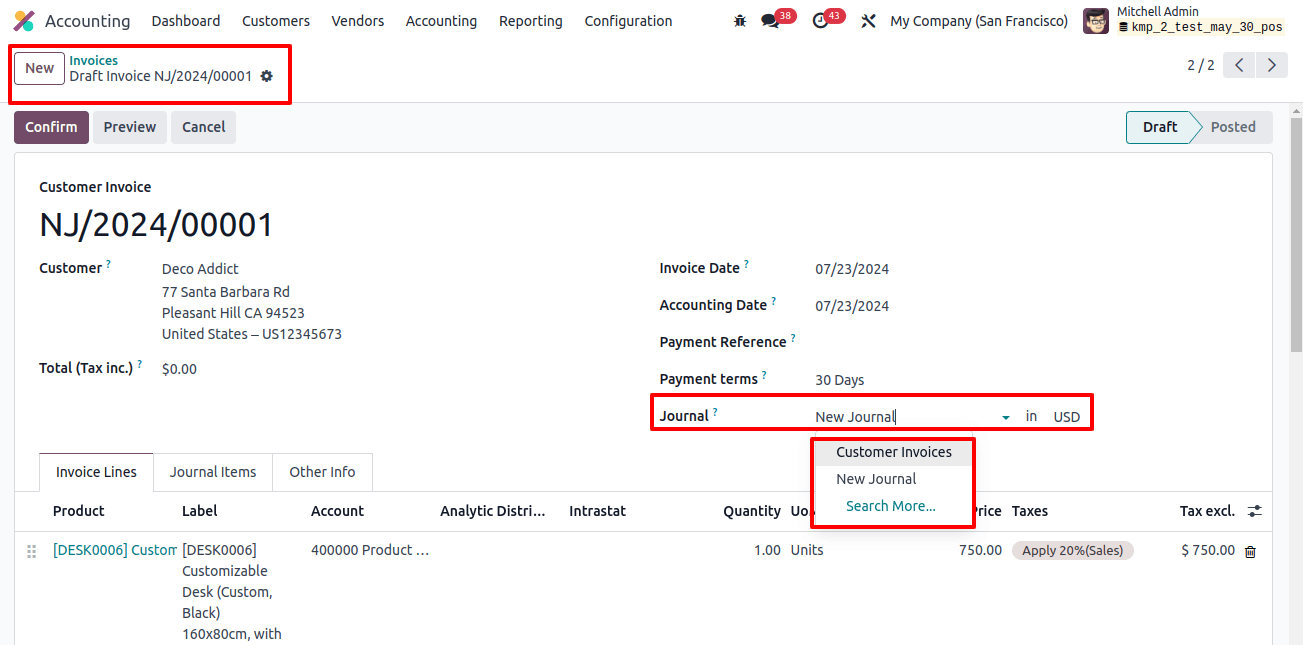
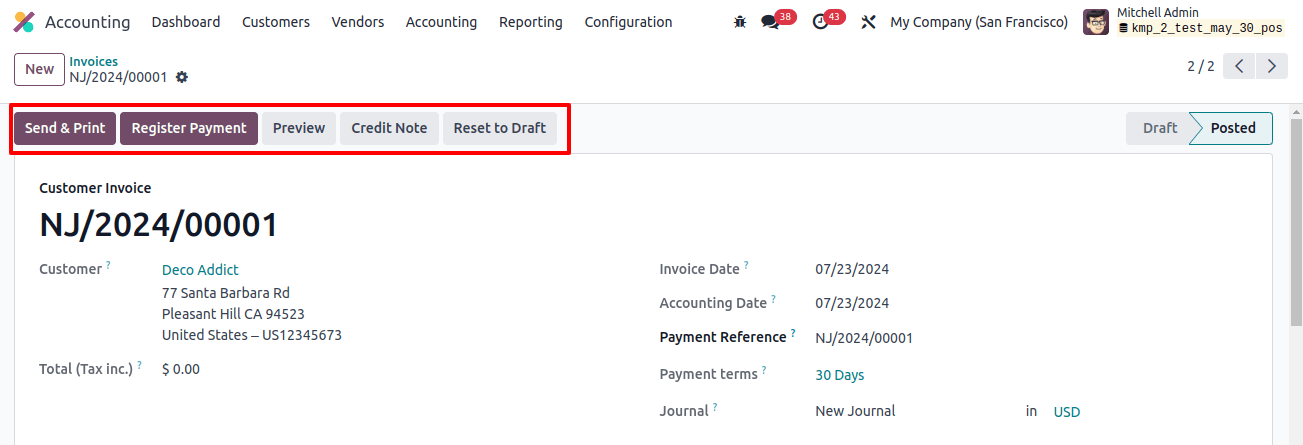
Then, add your products to the ‘invoice lines page, and the journal details may be found under the ‘journal items tab, as well as additional details in the ‘additional information’ tab. After filling out the right fields, save the data and click the ‘confirm’ button to finalize the invoice.
Registering the Payments
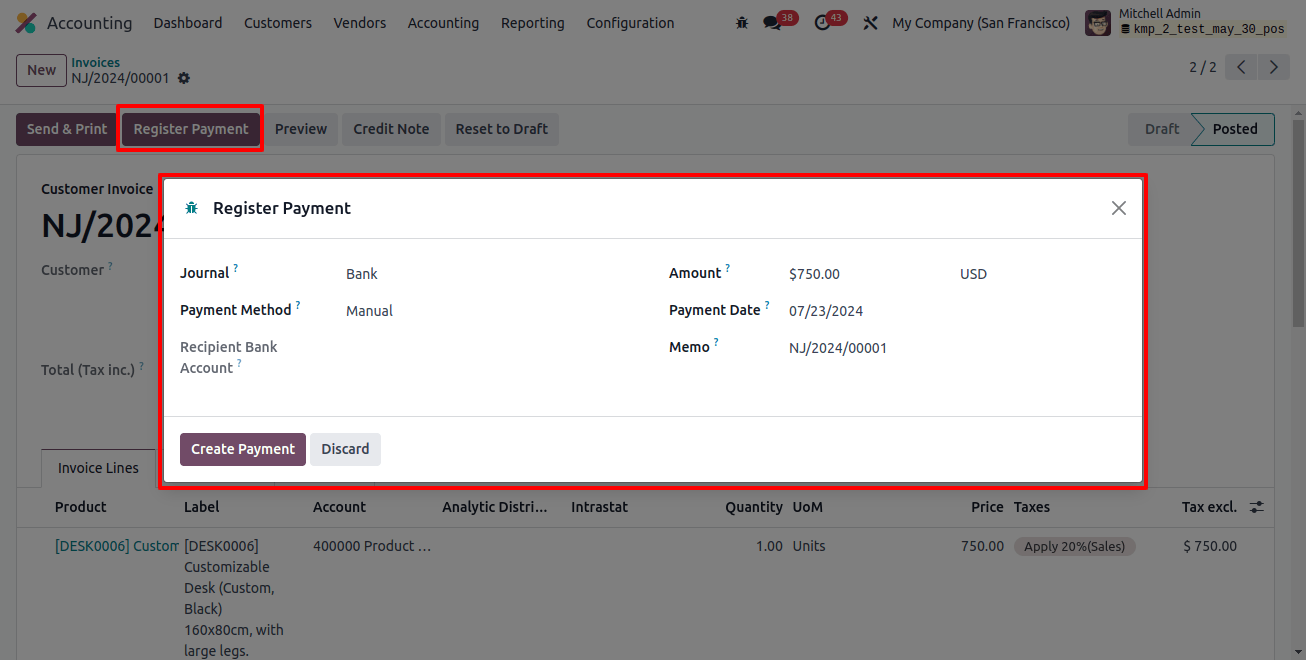
After verifying the payment, we will see a ‘Register Payment’ button, which can be used to pay invoice bills.
When you click the ‘Register payments’ button, you will be taken to another payment registration page where you can examine or change the journal, payment method, payment date, memo, and other settings as shown below.
After clicking the payment information, click the ‘Create payment’ button to complete the payment. The window will display an ‘In Payment’ ribbon to indicate the payment status of the specific invoice.
Sales Journal Review
You may view your diary entries in the ‘diary entities’ window. To view the sales journal details created above, click on the ‘Accounting’ menu and select ‘Journal entries.’
Then, group the dashboard data by ‘sales’ in the group by’ area and filter the journal section. The invoice-related entry will be listed in the journal, as shown in the image below.

If you have selected an additional journal, the entry will be noted under those titles. You can perform invoicing operations with the remaining journal types, exactly as you would with the sales type.
Journal Reports
The journal Reports platform allows you to see or generate accounting reports for the journals specified in your accounting module. This can be viewed in the ‘journal reports’ window under the ‘reporting’ option.
You will find a report of the linked journal entries under each journal, together with information on the name, invoice date, account, label, debit, credit, taxes, and so on, as shown below.
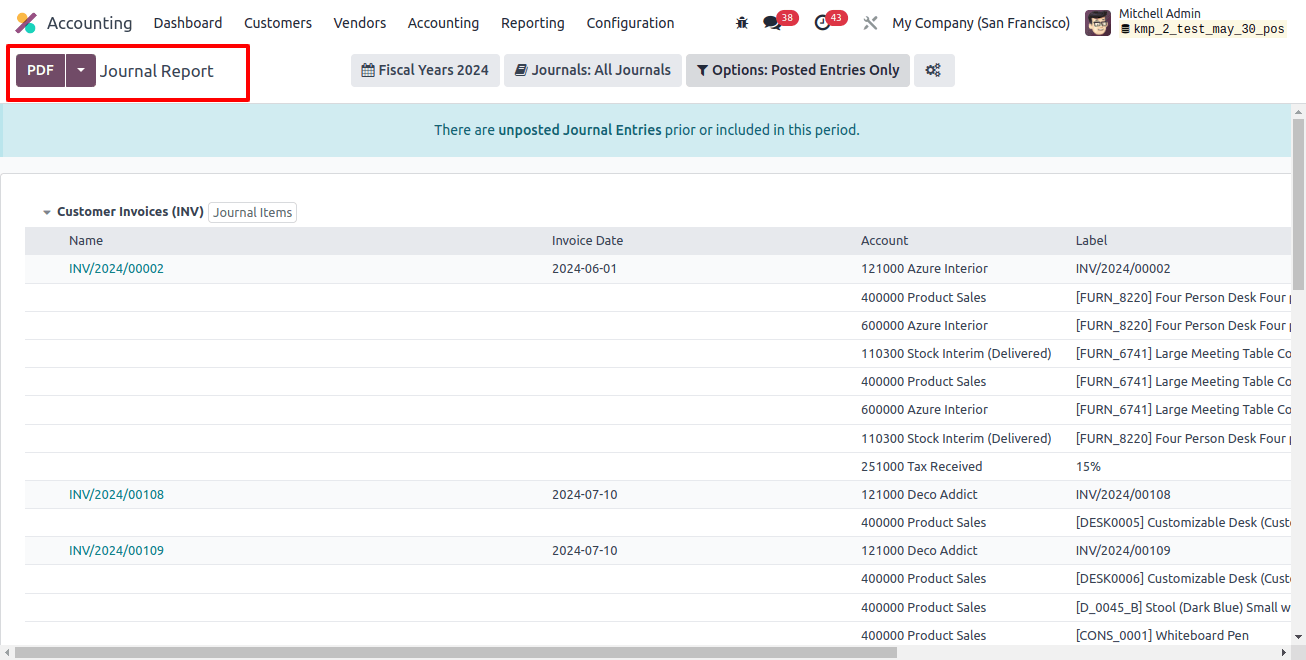
You can sort the journal reports by the current month, quarter, and financial year, as well as the previous month, quarter, and fiscal year. Also, you can filter and sort the reports.
This feature of the Odoo 17 accounting module’s journals section provides a full overview of entries, allowing for easier management and reducing journal clutter, ultimately improving accounting productivity.


