Refund management is an important part of any business that manages consumer transactions. Efficiently managing refunds not only promotes client satisfaction but also helps your business’s financial status.
Odoo 17 Accounting, a powerful ERP solution, includes a strong set of capabilities for streamlining the refund process. In this blog, we will go over step-by-step instructions for properly managing refunds with Odoo 17 Accounting.
Odoo Accounting is important in helping businesses refine and optimize their refund management processes.
Its seamless integration, automated processing, transparent tracking, customer-focused communication, compliance, security features, and improved user experience all help to build a strong and effective refund management system.
Odoo Accounting shows up as a useful friend as companies navigate the intricacies of financial operations, providing a simplified and customer-focused method of handling refunds.
Refund Options in Odoo 17
Odoo’s refund process offers two unique approaches. The basic technique is to go to the Accounting menu and look for a sub-menu labeled ‘Refunds.’
This feature simplifies the monitoring of all refund transactions inside your business by setting up a centralized center for effective oversight.
Alternatively, the second technique allows you to generate refunds directly from the purchase module. After completing a transaction and creating the related vendor bill, an extra option is available:
‘Add Credit Note.’ This option is a useful feature inside Odoo 17 that allows for the seamless creation of refunds, increasing flexibility in managing financial transactions.
Whether you use the specific Refunds sub-menu in the Accounting menu or the ‘Add Credit Note’ option in the purchase module, Odoo provides flexible alternatives for efficient and targeted refund processing.
1. Refunds from the Accounting Module:
To manage refunds in Odoo, log in and go to the accounting module. Once in the accounting module, locate and select the ‘vendor’ menu.

Within the vendor menu, there is a ‘refunds’ sub-menu. This option allows you to access the refund feature.

You can view all refunds generated as a result of various purchase actions here.
The preview of the refund list includes important information such as the refund number, vendor, bill date, due date, reference, activities, tax inclusion, total amount, payment status, and refund status.
This organized display provides a rapid and efficient overview of your return transaction, allowing for more streamlined processing.
If you wish to create a refund directly from the Accounting module, simply use the ‘New’ button on this platform.
This user-friendly option streamlines the process, allowing you to easily generate a new refund entry.
Also, the ‘upload’ button is a significant feature, allowing you to rapidly upload many refunds to your Odoo database in one go, increasing productivity and data management.
To create a new refund in Odoo 17, simply click the ‘New’ option.
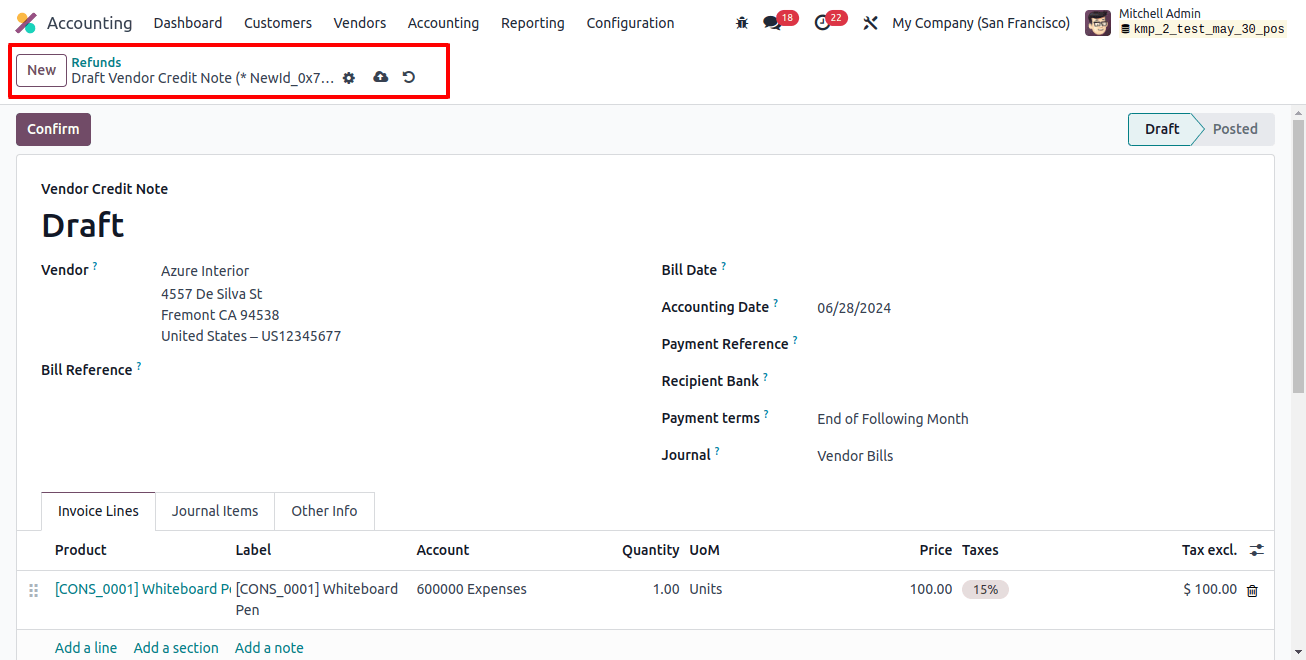
This will open a new window where you can provide information about the refund. Determine the merchant from whom you wish to process a refund.
Choose the proper seller from the list. You can enter the bill reference in the provided space. This could be the bill for a purchase that requires a refund.
Fill out the relevant refund information. This could comprise the billing date, accounting date, payment reference, recipient bank, payment terms, and journal.
The product details can be changed under the invoice lines field. When you enter the bill reference for the refund, the invoice number and journal item tabs will automatically appear.
Double-check the refund information to verify accuracy. Once happy, click the confirm button to submit your refund request.
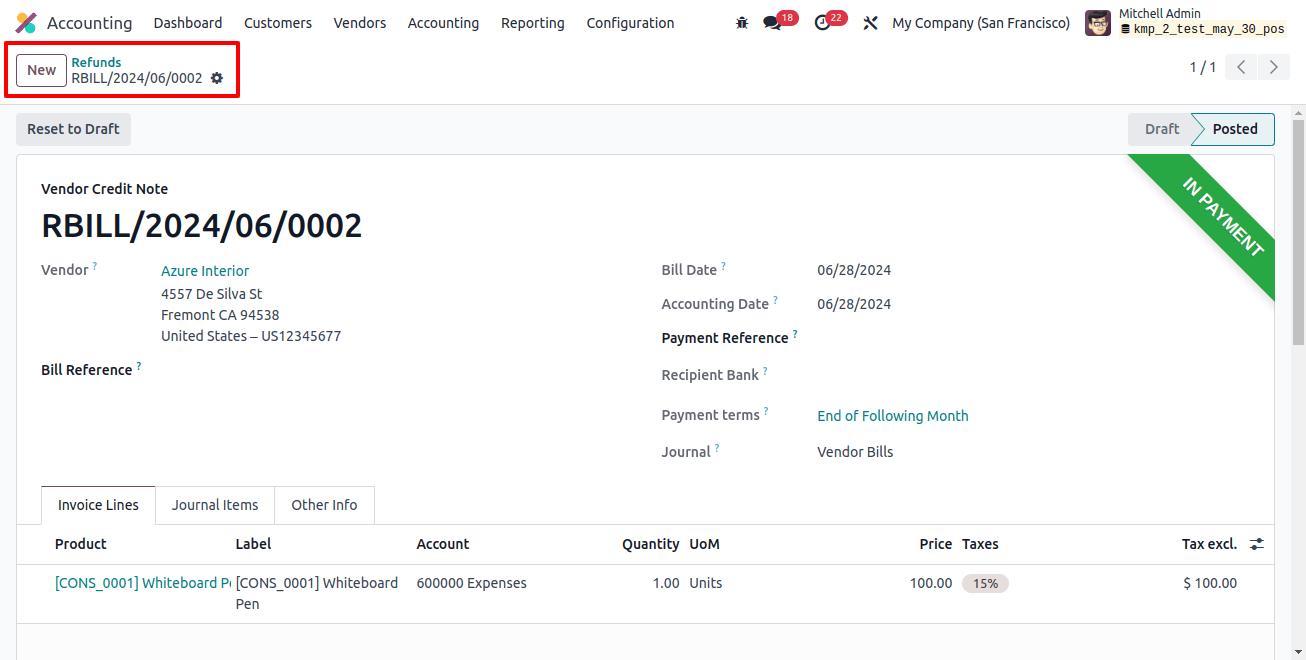
Odoo will instantly update the accounting records with the refund transaction.
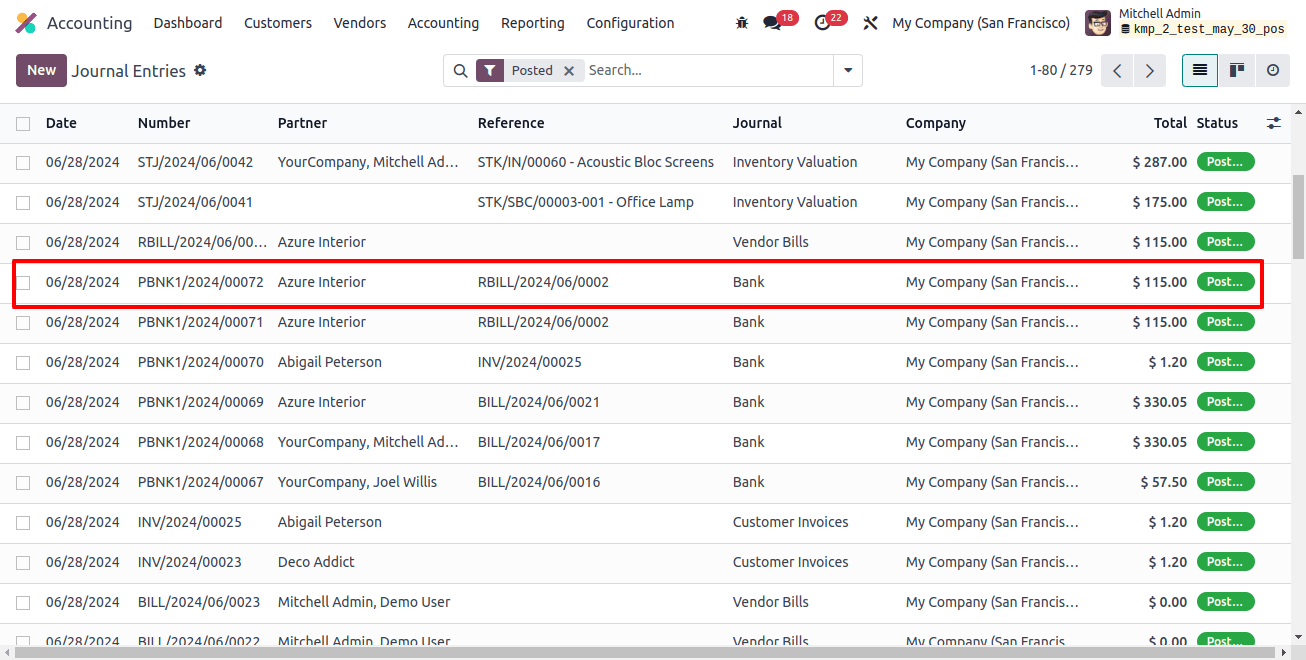
Verify the amended accounting transactions to ensure the refund was properly processed and recorded. Under the ‘Journal Entries’ menu, you may find the journal entry related to the bill reversal caused by the refund.
2. Refunds in Odoo from a Purchase Order:
Now, we’ll look at how to generate refunds from a purchase order in Odoo 17. To produce refunds using Odoo’s Purchase module, use the ‘credit note’ option in the vendor bill. Log into your Odoo account and go to the purchase module.
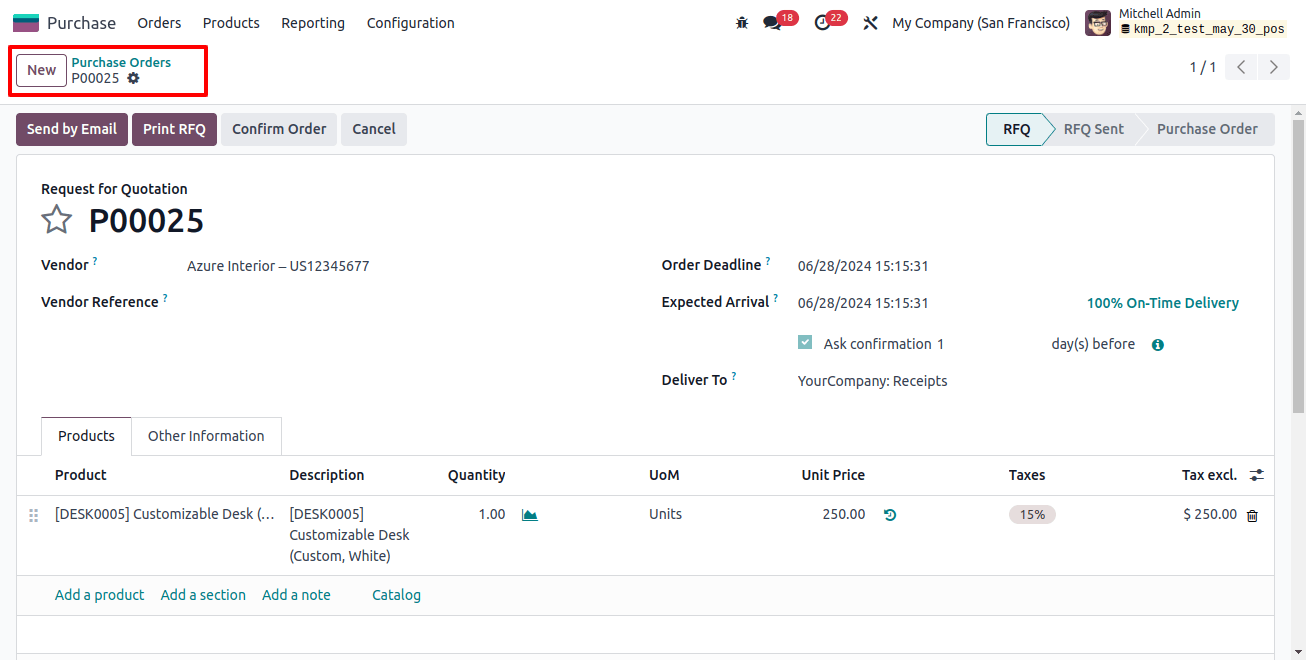
Begin by setting a purchase order for the goods or services you wish to request a refund.
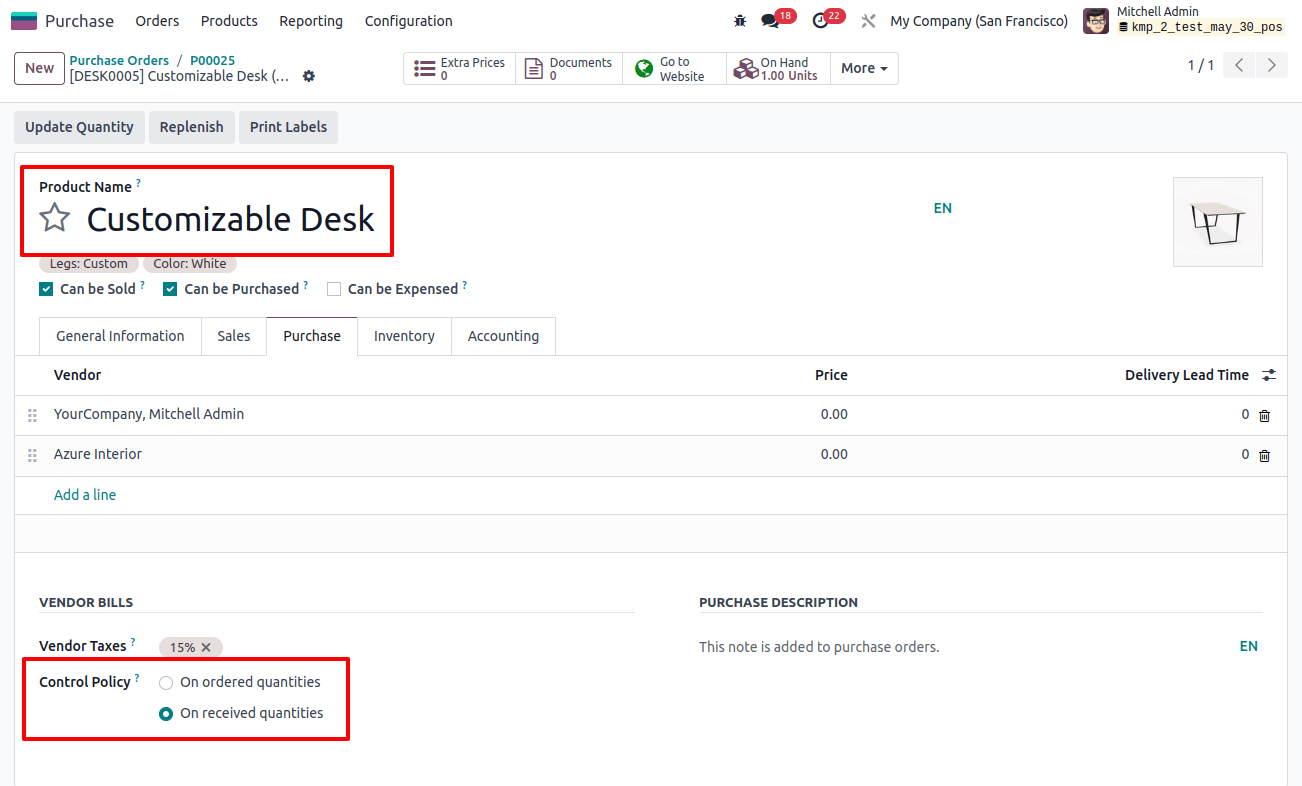
The control policy for the goods you wish to refund must be ‘On Received Quantities.’
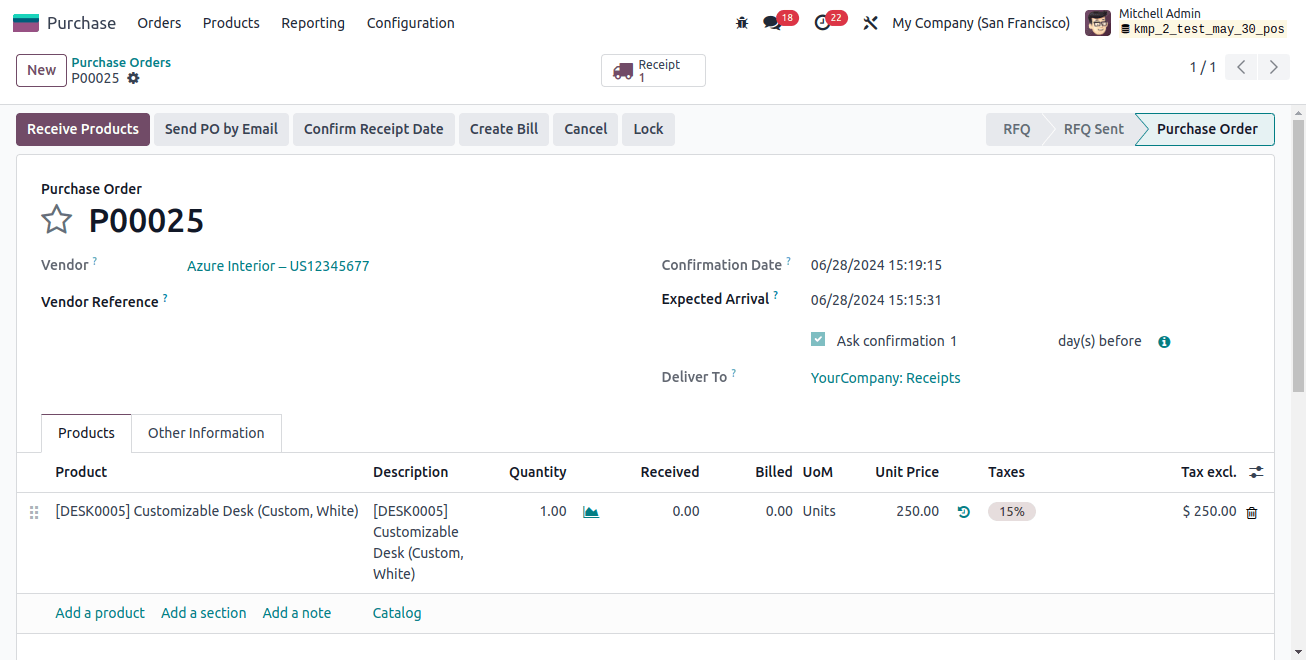
Once the products or services have arrived, validate the receipt in the purchase module.
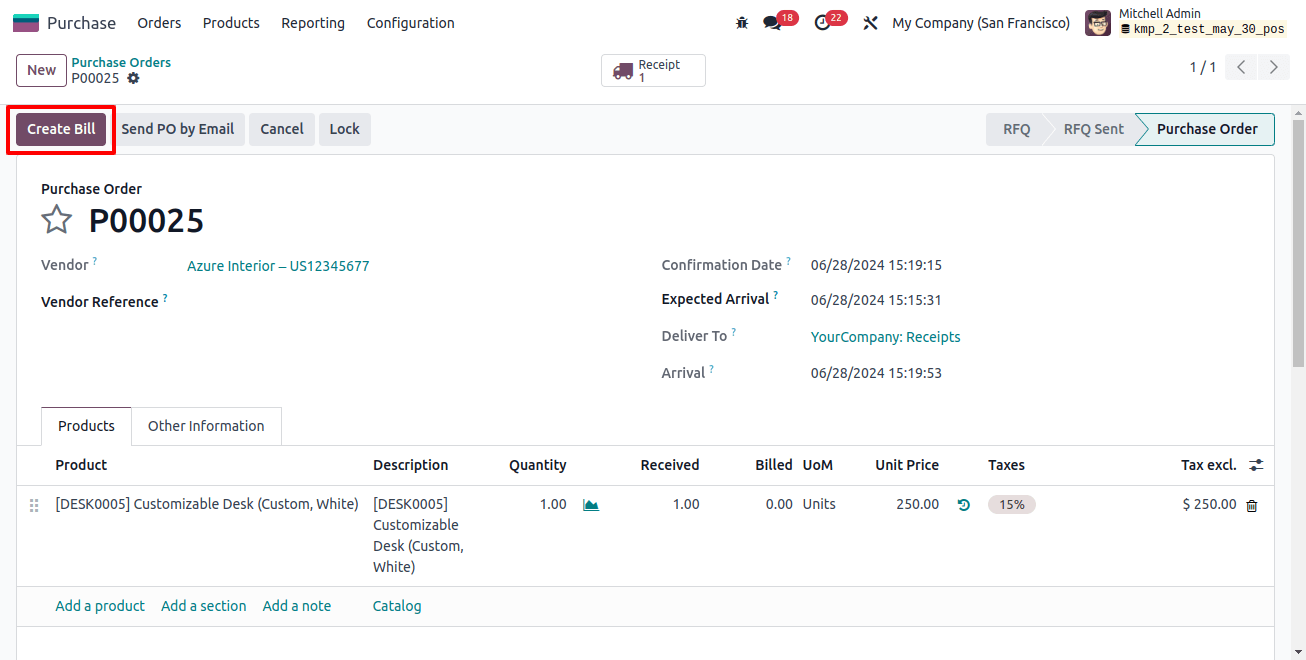
Create a vendor bill based on the products or services you have. This can be accomplished by choosing the right purchase order and clicking the Create Bill button.
When you finish the purchase and payment process, you can generate a refund in Odoo if you want to return things due to fault, damages, or dissatisfaction.
If there are billing issues, such as wrong pricing on an invoice, you can issue a refund to repay the mistake. Adjustments can be made with credit notes or refund bills.
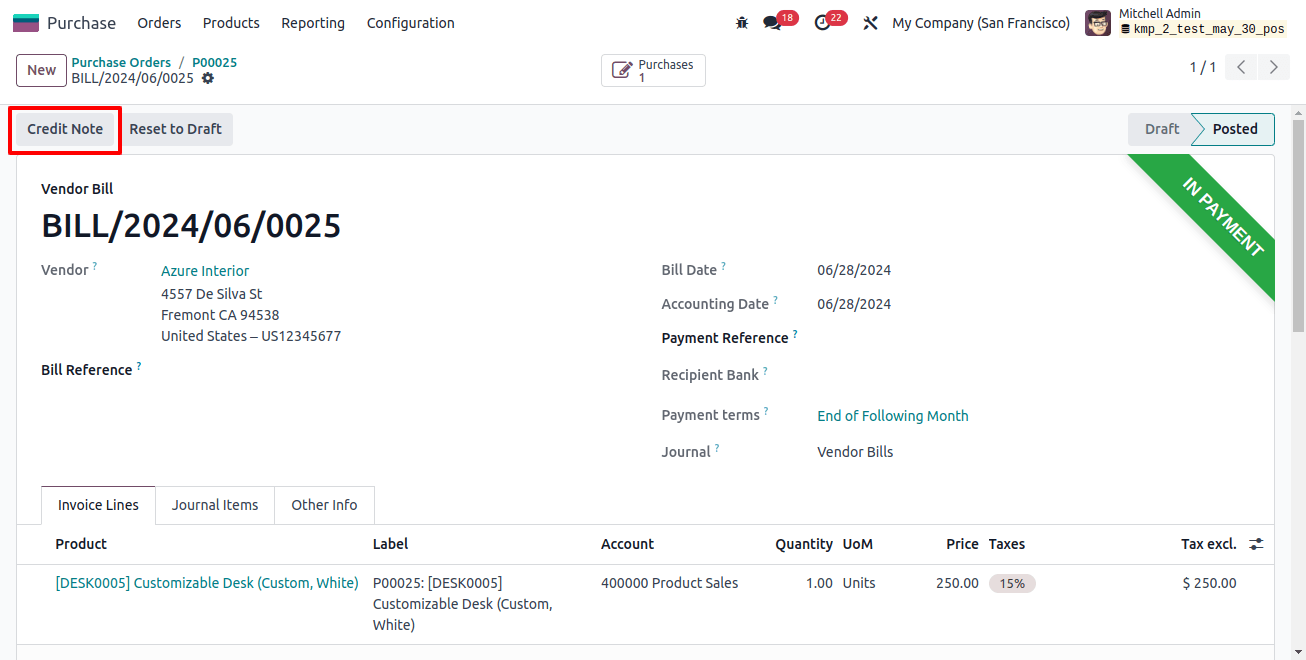
Within the vendor bill, look for the ‘credit note’ option. This is the important step for beginning a refund. Click on this option. This will open a new pop-up window as seen in the image below.
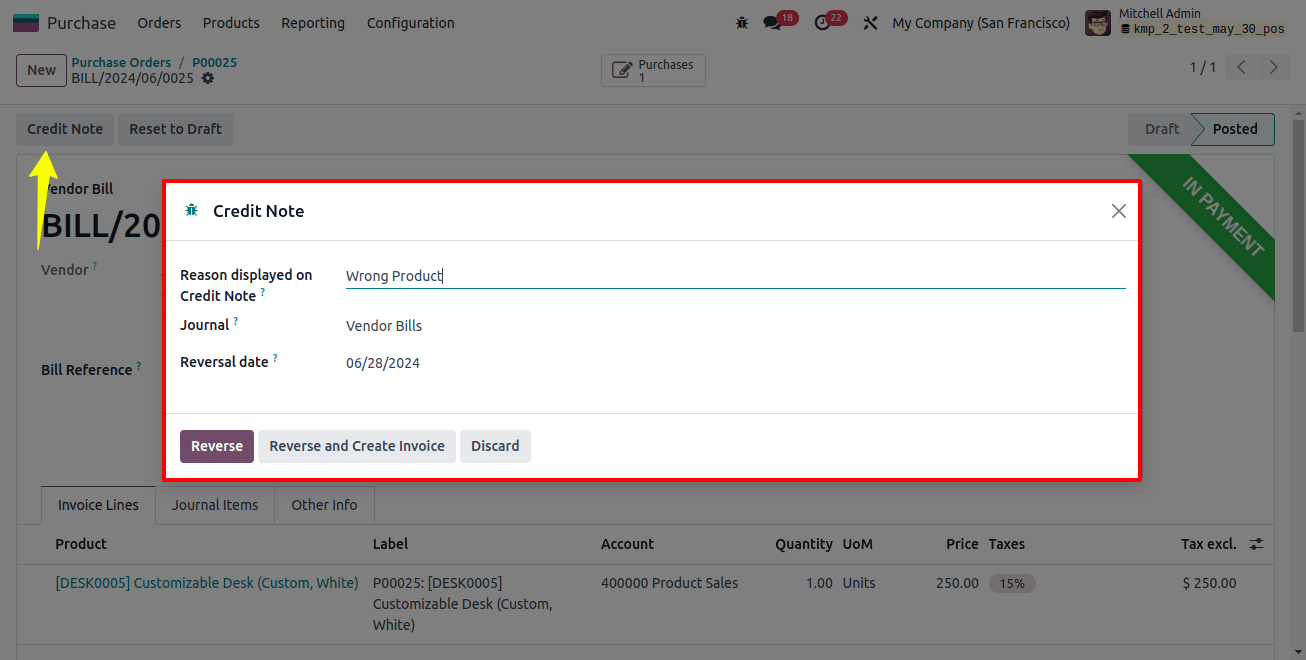
Provide the credit note with all the necessary details, such as the purpose, the journal, and the date of reversal. Click the Reverse button now.
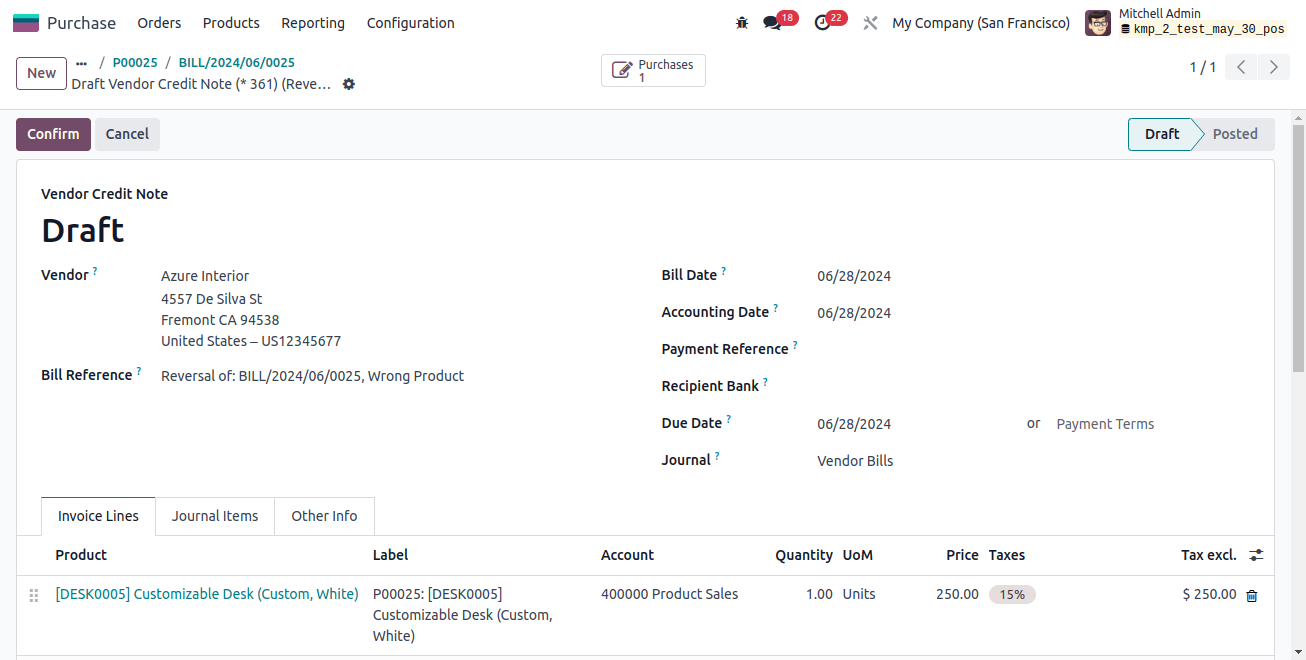
As seen above, this will result in a vendor credit note. Verify the transaction and the credit note. The reverse bill linked to the initial vendor bill will be produced by this activity.
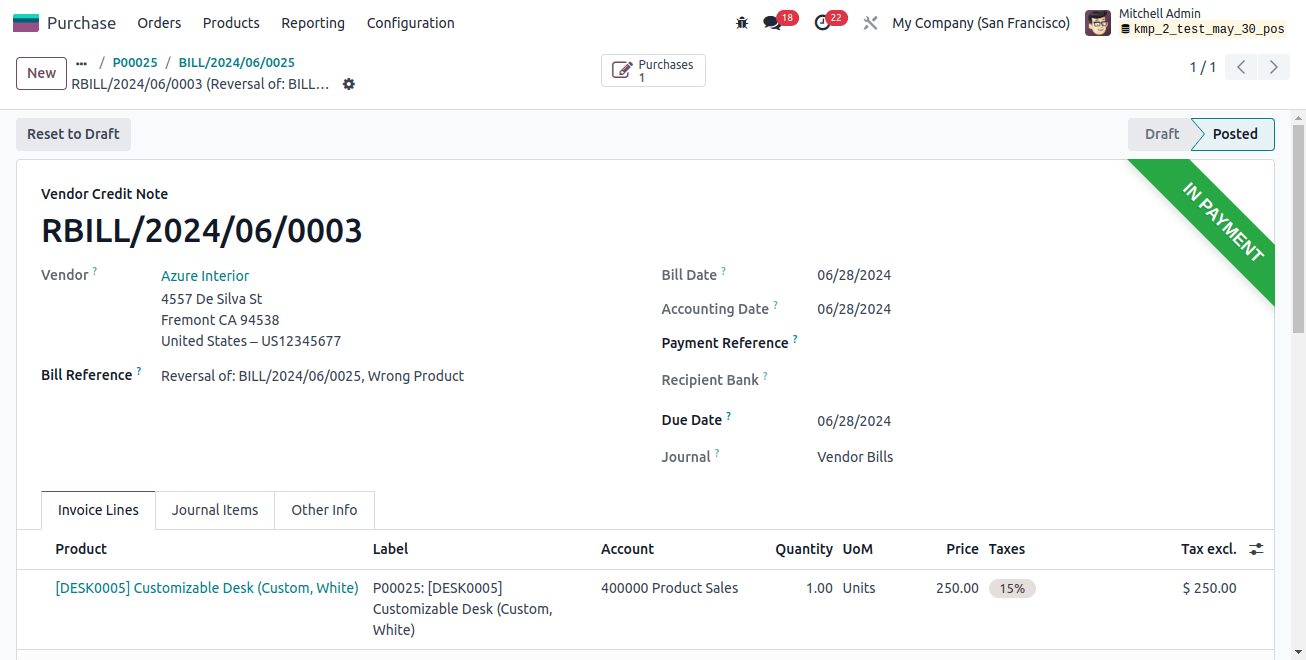
Verify that the corresponding refund has been managed and the credit note has been generated successfully. Analyze the most recent data in the accounting documentation.
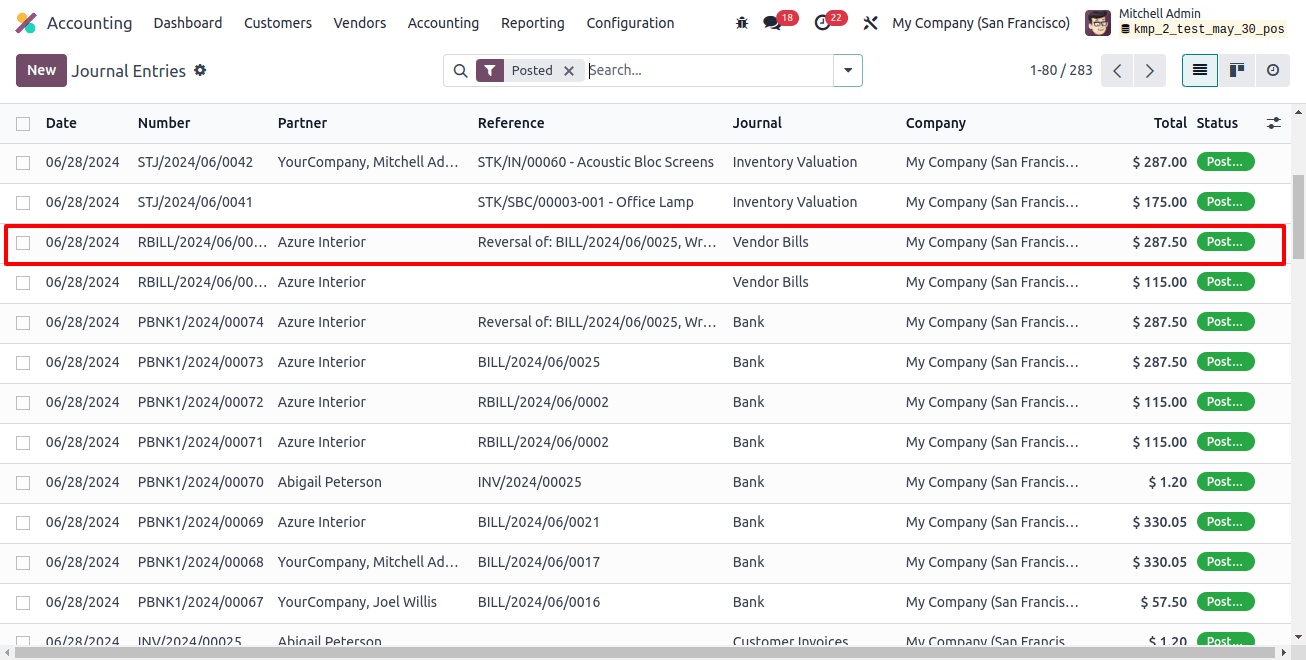
You may effectively create refunds for individual transactions in Odoo by using the ‘credit note’ feature in the vendor bill of the purchase module. Here’s how to accomplish this.

You may view all the refunds created in Odoo across various platforms by selecting the payment menu in the Accounting module.
Effective refund management is important for preserving excellent customer relationships and financial performance. Businesses using Odoo 17 Accounting may streamline the refund process, automate the process, and improve overall productivity.
By following the above steps shown in this blog, your business may fully exploit Odoo 17 Accounting’s capabilities for friction less and customer-centric refund management.

